This Rainbow Fish art project gives students a hands-on project for the beloved book by Marcus Pfister. In the story, the main character starts with loads of shimmering, beautiful scales. He is rude when another fish asks for just one of the shiny scales. Soon the Rainbow Fish discovers that it doesn’t matter how handsome he is if he has no friends and an unkind heart. Advice from a wise octopus sets him back on the path to being truly happy.
This Rainbow Fish art project is a fun, two-stage process art project with stunning results. It goes great with a unit on ocean life, fish, or even kindness. The project is easy to prepare and provides practice with glue sticks and paints – always good lessons to review!
Materials Needed for the Rainbow Fish Art
- tissue paper, cut into squares
- aluminum foil, cut into squares
- glue sticks
- fish template printed on sturdy paper
- scissors
- white cardstock
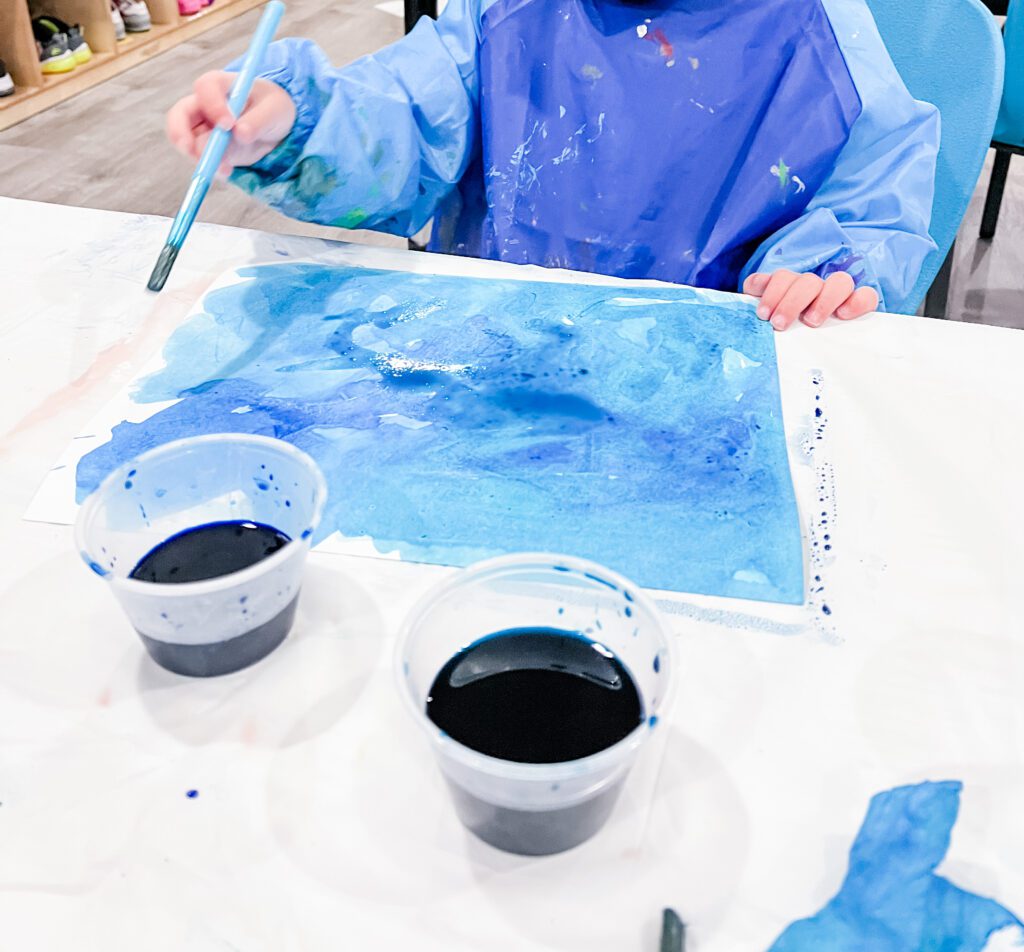
- blue watercolor paints
- paint brushes
This is a two-stage process art project – so be sure to leave plenty of time to complete it or prepare to use it over a couple of days.
The Rainbow Fish shared his scales left and right. And the more he gave away, the more delighted he became.
Marcus Pfister in The Rainbow Fish
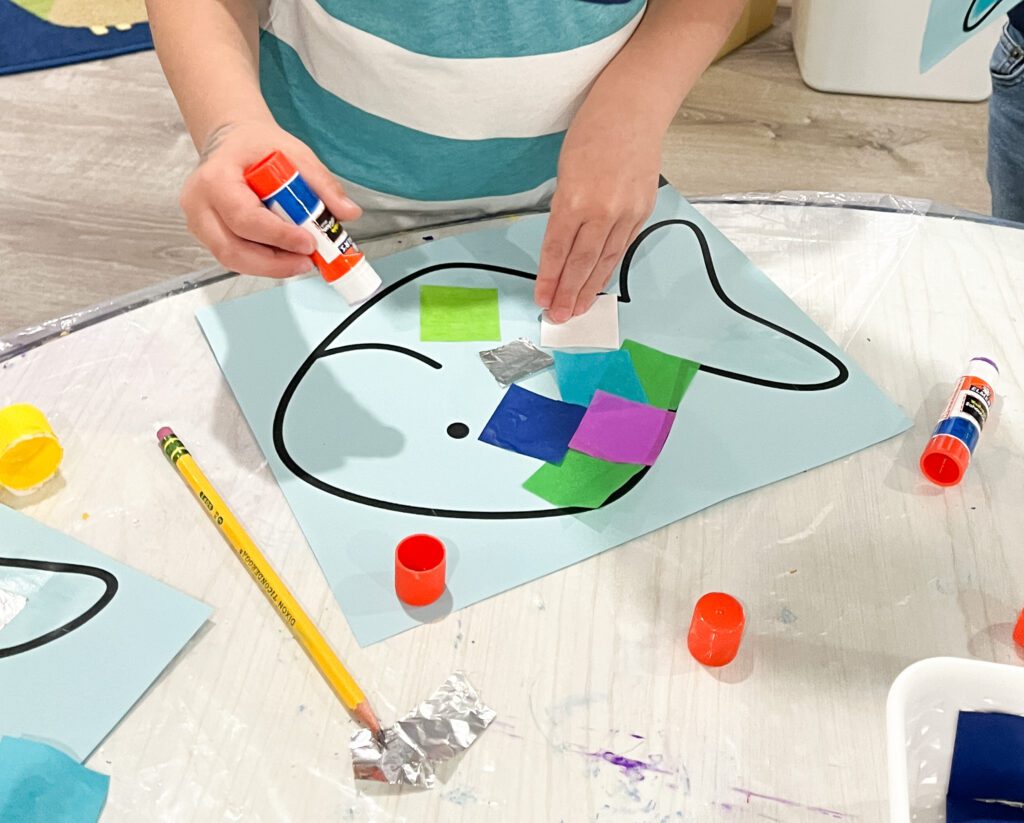
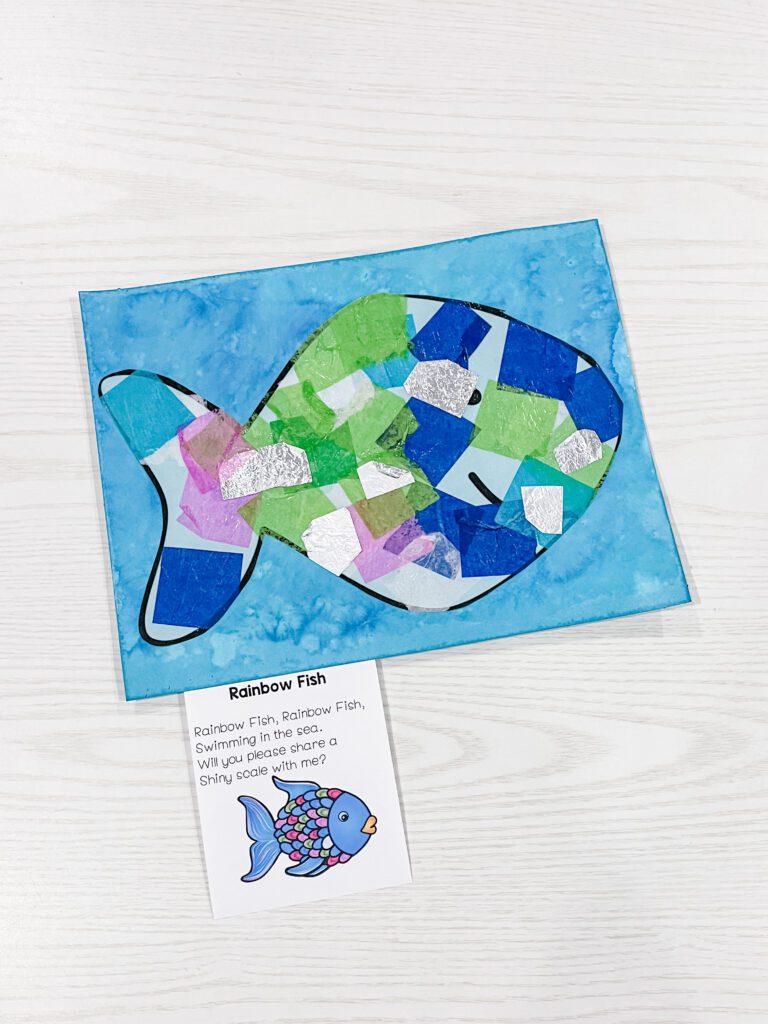
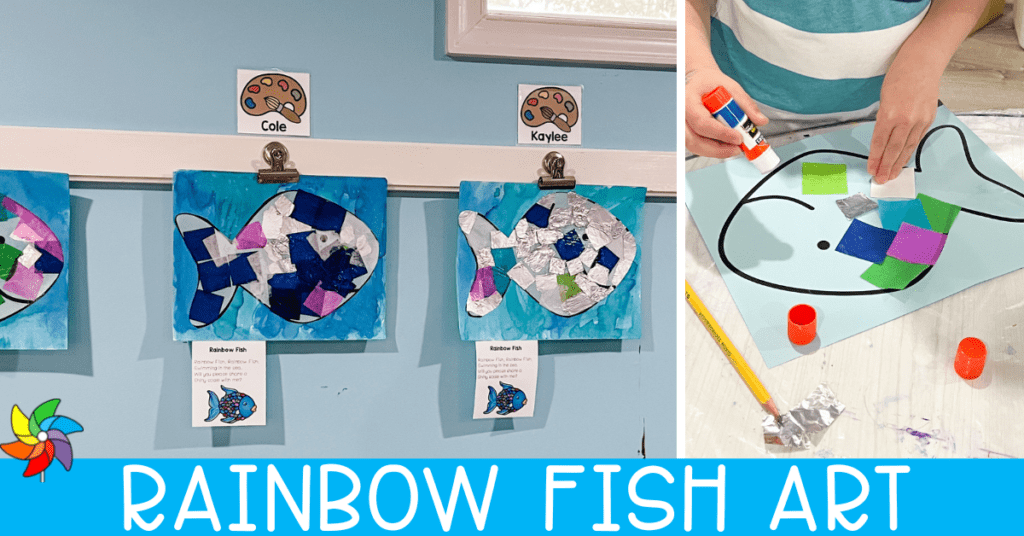
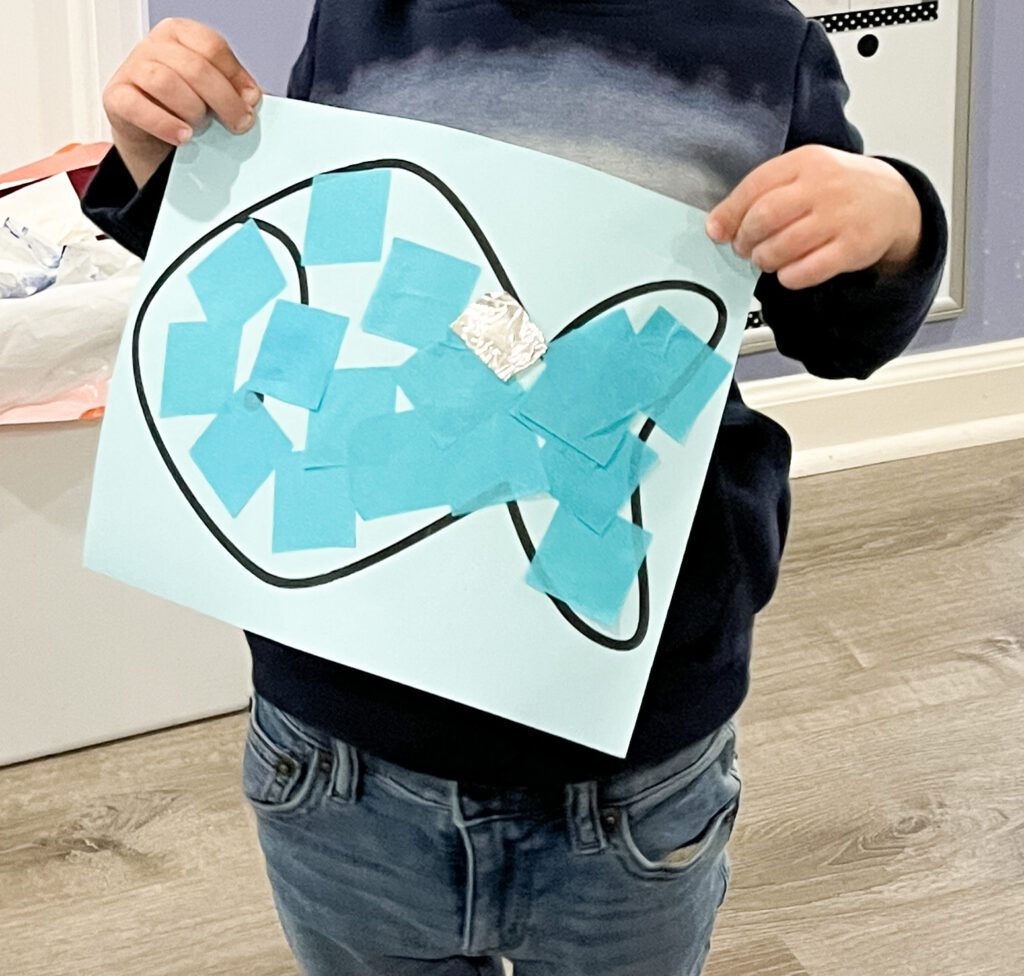
Step One – Fishy Friends
Set up the art table with the fish outlines, tissue paper, aluminum squares, and glue sticks. Model for students how to use a glue stick (“Just a dab is enough!”) to glue the tissue paper and aluminum squares onto their fish. Invite the students to decorate the fish however they please, using as many shiny “scales” as they’d like. When the students complete the gluing, cut out the fish shape, trimming off any excess around the edges. Depending on the student’s age, they might require teacher assistance with the cutting!
Step Two: Watery Wonder
Every fish needs an aquatic abode! Give each student a piece of white cardstock. Set up liquid watercolors (pictured: turquoise and blue Colorations brand) with brushes and smocks at the table. Students paint swirls of blue to make a beautiful home for the fish. When dry, glue the fish cut out to the cardstock.
Final Touches for the Rainbow Fish Art
Add a final finishing touch with this adorable printable poem! Simply add it to the bottom of the artwork when displaying. The poem is also fantastic for students to recite, turn into a chip-clip game, and more!