
This Picasso-inspired preschool shape art project is a great way to have young students practice using a gluestick while creating some stunning fridge-worthy art at the same time.
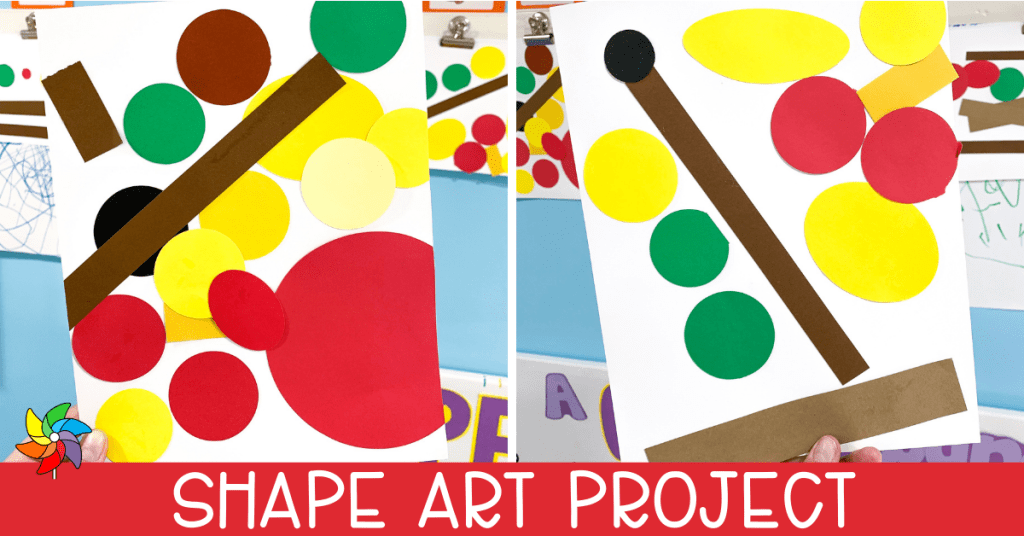
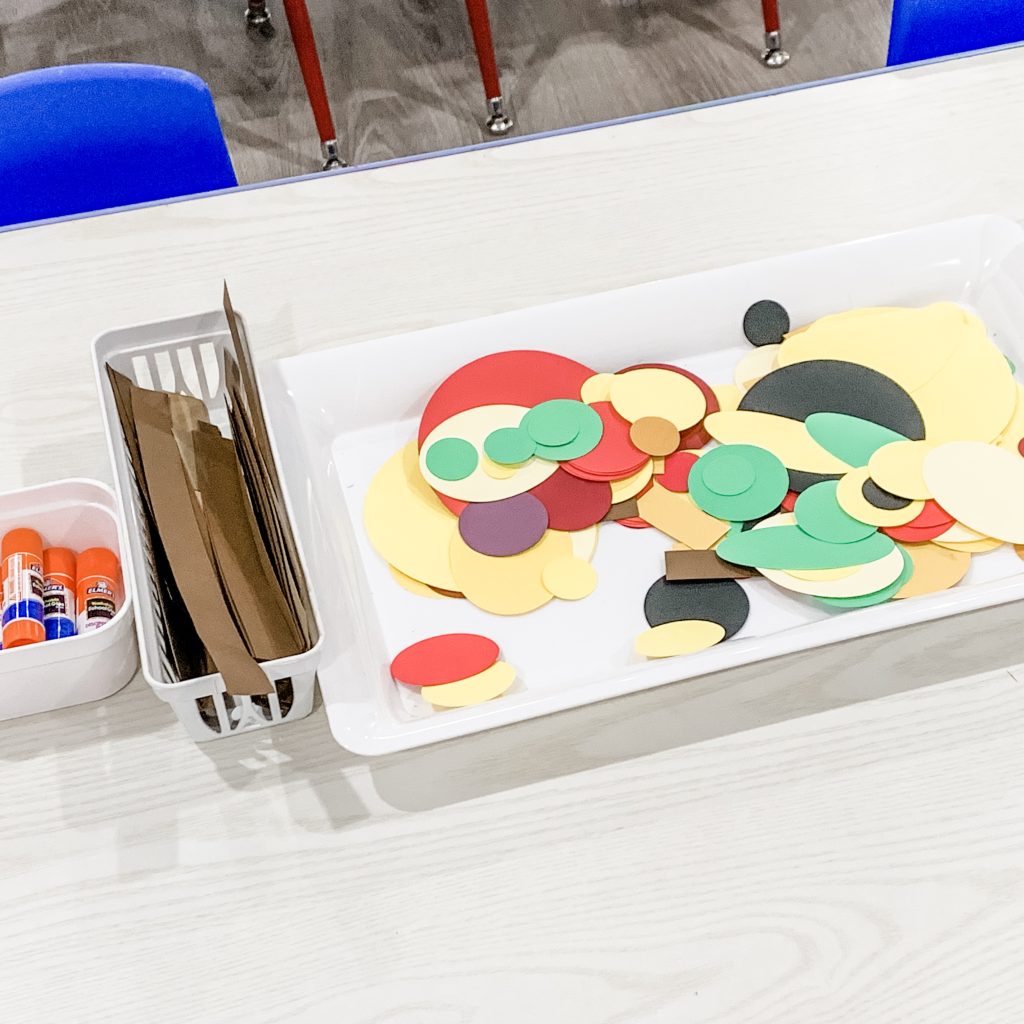
Use this preschool shape art project at the beginning of the year or any time that young children need to practice using a glue stick! To prepare the project, cut out 1″ rectangular strips and various circles from colorful cardstock.
Setting Up the Preschool Shape Art Project
Either allow the students to choose the color of the paper that they want to use, or use colors that are visually appealing. Here are a few choices:
- red, yellow, and green circles with brown paper strips
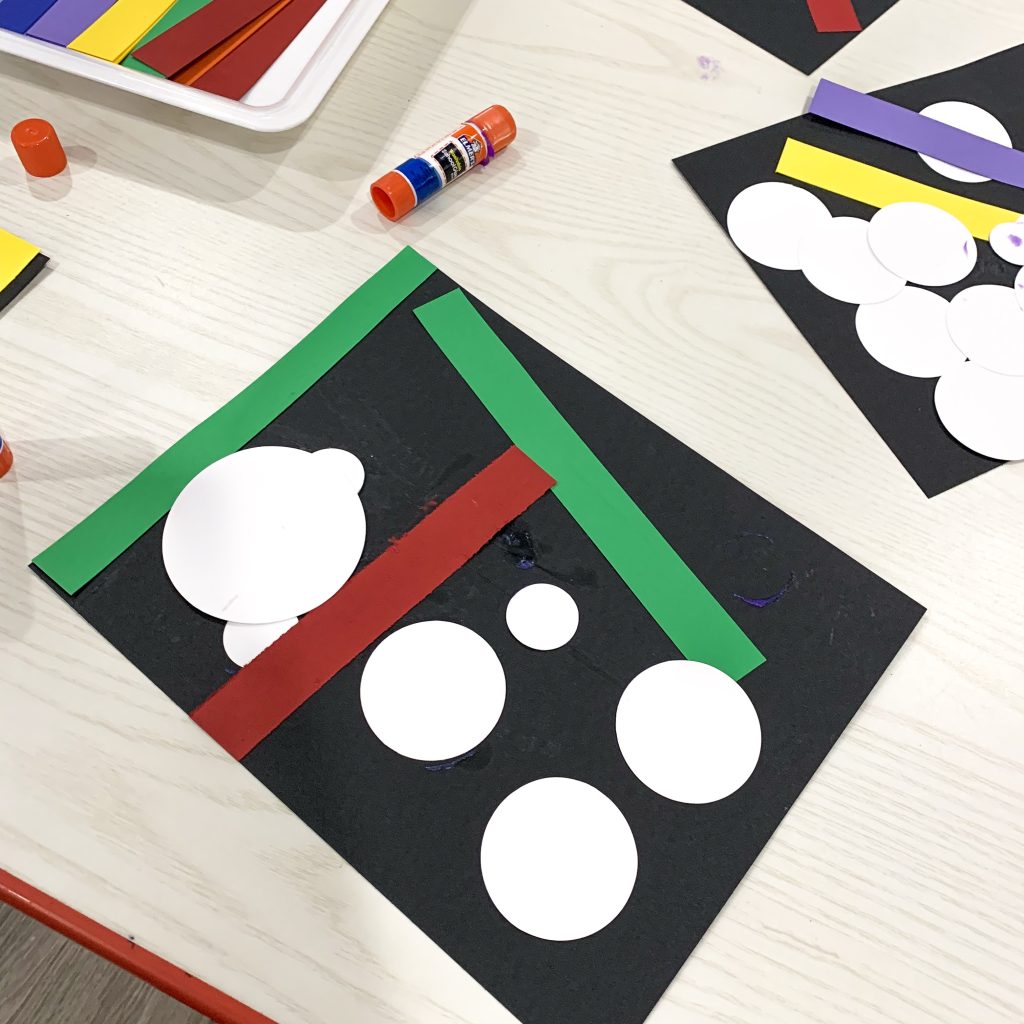
- red, white, green, and yellow circles with white paper strips (on black paper)
- fall colors (red, orange, yellow, brown)
- winter colors (shades of blue, silver, white)
- pastel colors (perfect for spring)
Demonstrate how to put the glue on one side of the shape and then turn it over to stick it down to the paper!
Alternatively, have the students put the glue on the paper and stick the pieces down. Method #1 (glue on the shapes) makes less of a sticky mess, from experience.
Don’t Forget to Talk About Math!
While the students are working, have a math chat about the different colors, shapes, and sizes that they are using. Expand the math vocabulary by using size words like “bigger” and “smaller,” positional words such as “over” and “underneath,” and geometry words like “circle,” “square” and “rectangle.”
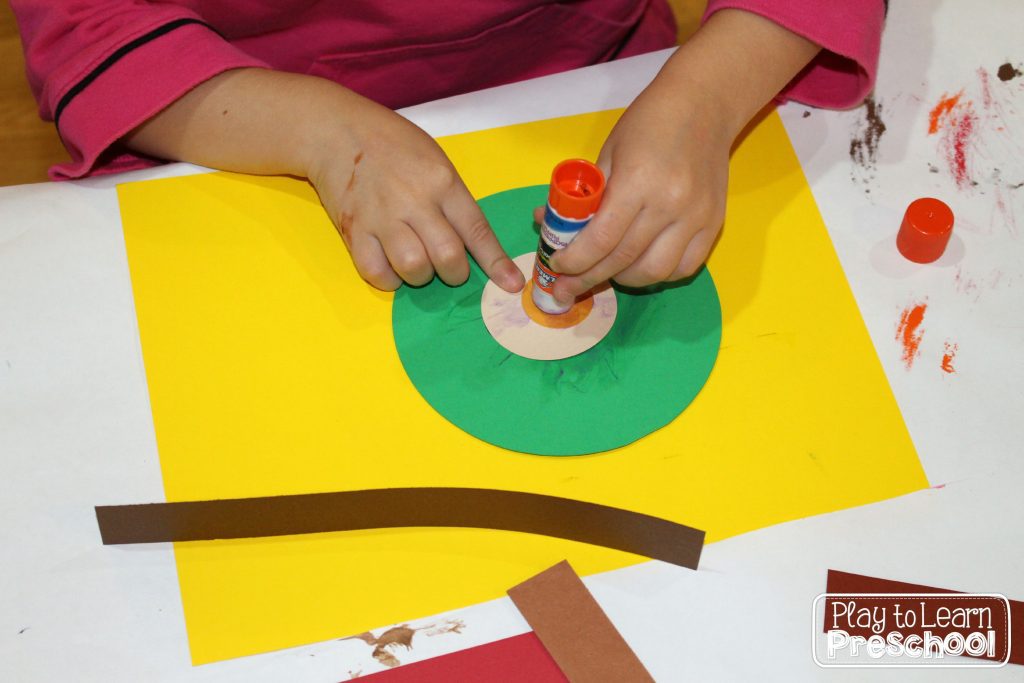
Encourage the students to layer and overlap their shapes. Let them know that the shapes can even hang off the edge of the paper. Students might want to plan their project by placing the shapes first, and then gluing them down.
Always give students the freedom to choose how to create their own project. The learning comes from the process!
– Jamie White, Play to Learn Preschool
Check out this Resource from my Shop!
Name Art Keepsake Books – Editable
$4.75Teach young children to use basic art supplies while they make a keepsake NAME ART BOOK at the same time. This file is simple to use. Just type your class list, then print the custom pages for each student. Quick and easy!
The sky’s the limit with this project and the options are unlimited! It is really amazing to see the different choices that the students make given the same materials. Some students just let the pieces stay where they land, and others are very purposeful in choosing their placement.
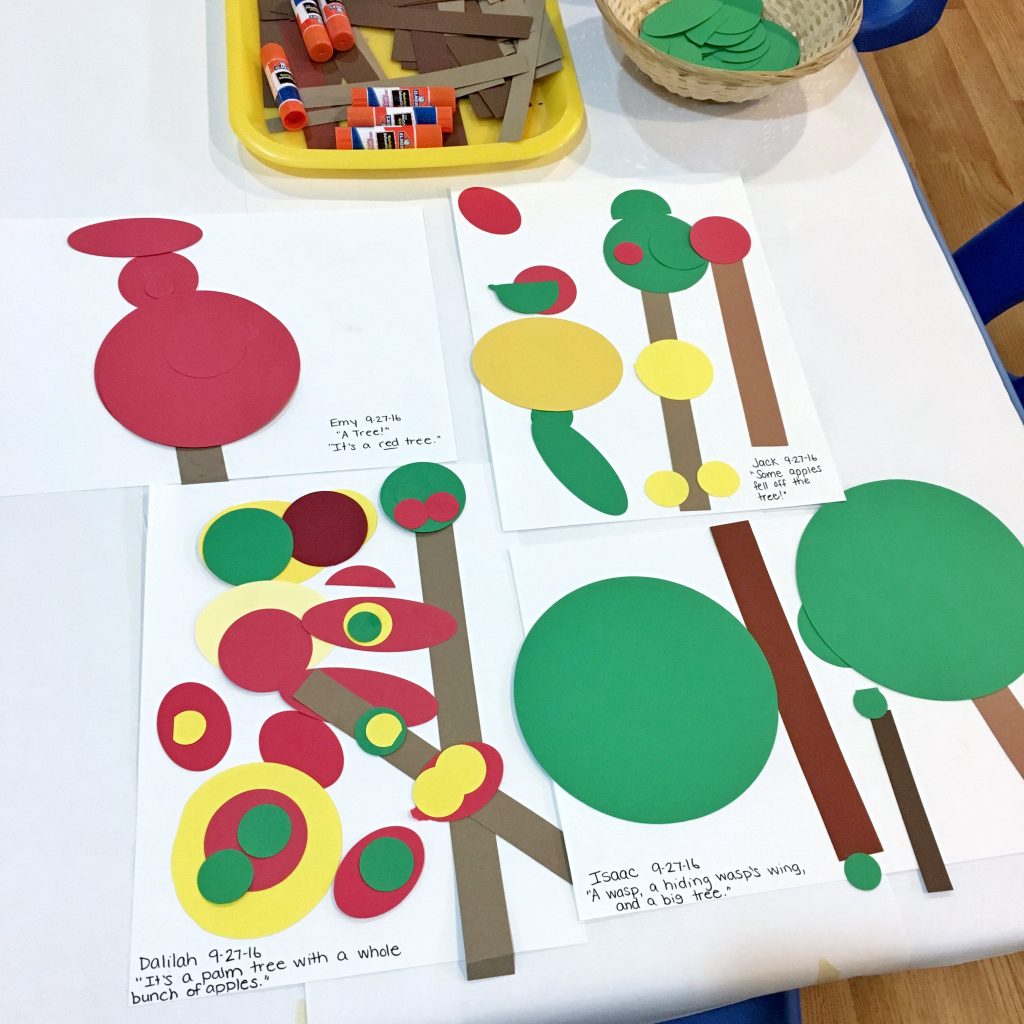
When the artists decide that their projects are finished, ask them if they want to trim any excess paper shapes or if they would like the teacher to trim them. Turn the paper over, and cut off any parts that are hanging off the edge.
Hanging the art projects all together before sending them home makes a stunning display!

Are you looking for more fridge-worthy process art projects for your preschoolers?
Love it! Great and simple idea with a beautiful outcome!
This would be a great activity to adapt for my kids aged 2, 5 and 6 to do together. A lovely idea.
They turned out great, and I love how each one is different!