Yayoi Kusama’s art style is especially appealing to students. Her polka dots, with all of their contrasting colors, come across as playful and fun. In this polka dot letters project, students focus on the first letter in their name. Preschoolers get fine motor practice and exposure to a 3-D art style that they can imitate and enjoy. Of course, parents adore this keepsake art as well. This polka dot letters art project really “hits the spot!”

Exploring Kusama’s Art with Young Minds
Before starting the polka dot letters art project, introduce the students to the art of Yayoi Kusama by looking at photos and books of Kusama’s artwork. Encourage them to think critically and express their observations by asking four key questions:
- What colors do you see?
- What shapes do you see?
- How do you think the artist made this art?
- What else do you notice about it?


Some students will likely notice the fact that polka dots are circles. While looking at the artwork, practice shape recognition. Do students see any other shapes? If the class also studied Kandinsky, how are these circles different? How are they the same?
Explore more great artists with this thematic unit!
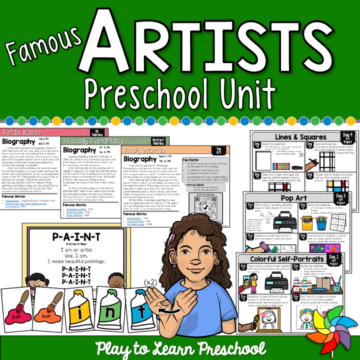
Famous Artists Preschool Unit
$12.00Watch your students’ creativity abound with this comprehensive Famous Artists Unit for preschoolers. The unit includes complete lesson plans for 10 days of circle time, as well as additional literacy and math centers. All of the planning is done for you!
Setting Up the Polka Dot Art Project
Inspired by ideas from Art is Smart Preschool, this project involves creating 3D paper mache letters decorated with polka dots. Here’s how to bring this project to life:
Materials Needed:
- 3D paper mache letters (one for each student)
- Paint in various colors
- Dot stickers in different colors and sizes
- Sturdy index cards
- Glue
- Mod Podge

Preparing the Letters:
- Purchase the first letter of each student’s name from the craft store. These letters are about 7 inches tall.
- Some of the letters may not stand up on their own, so glue them to sturdy cardstock or index cards to create a stable base.
Creating the Polka Dot Letters


This polka dot letter art project is as easy as A-B-C! Here are the steps:
- Painting the Letters:
- Each student chooses a color to paint their letter. Allow students to choose one color from a few choices.
- Adding the Polka Dots:
- Once the paint is dry, students add dot stickers to their letters. Remind them of Kusama’s artwork and talk about it while they practice their fine motor skills by peeling and sticking dots on their letters.
- Finishing Touches:
- After completing the artwork, the teacher coats the letters with Mod Podge or another clear coating. This ensures that the stickers do not peel up and stay in place, as well as giving them a finished look.

Ending the Day with a Polka Dot Dance Party
To wrap up the Kusama-inspired day, read The Nuts: Sing and Dance in Your Polka Dot Pants by Eric Litwin. The catchy and fun audio version of the book adds an extra layer of excitement. The children can dance and sing along, celebrating their artistic journey in true polka dot fashion.

Every child succeeds with this Kusama-inspired Polka Dot Letters project. This activity allows them the freedom of process art, but has the structure of a craft. It also makes a beautiful keepsake for families to treasure for years to come. Use them as a classroom decoration, a fun part of a names unit, or as a focal point of a preschool art show! No matter what “spot” these polka dot letters are in, they are a gorgeous and fun way to brighten up the space.