Extended art projects like these preschool pond murals are essential for developing young minds. Giving students more than one day on a project gives them time to make decisions, plan, and absorb what they learn.
This project also exposes students to using different kinds of art and materials to create a cohesive finished product. Making a preschool pond mural allows students to express themselves creatively while also demonstrating what they have learned about pond life.
This art project goes well with this Circle Time Unit!
Pond Life Preschool Unit for Circle Time
$13.50Explore POND LIFE with this complete unit that includes daily lesson plans, activities, and ideas that you need to teach preschool and Pre-K students about the pond. Everything is written out and planned to make your job easier!
- 10 circle time lessons
- 10 math, literacy, & fine motor centers
- Book Recommendations
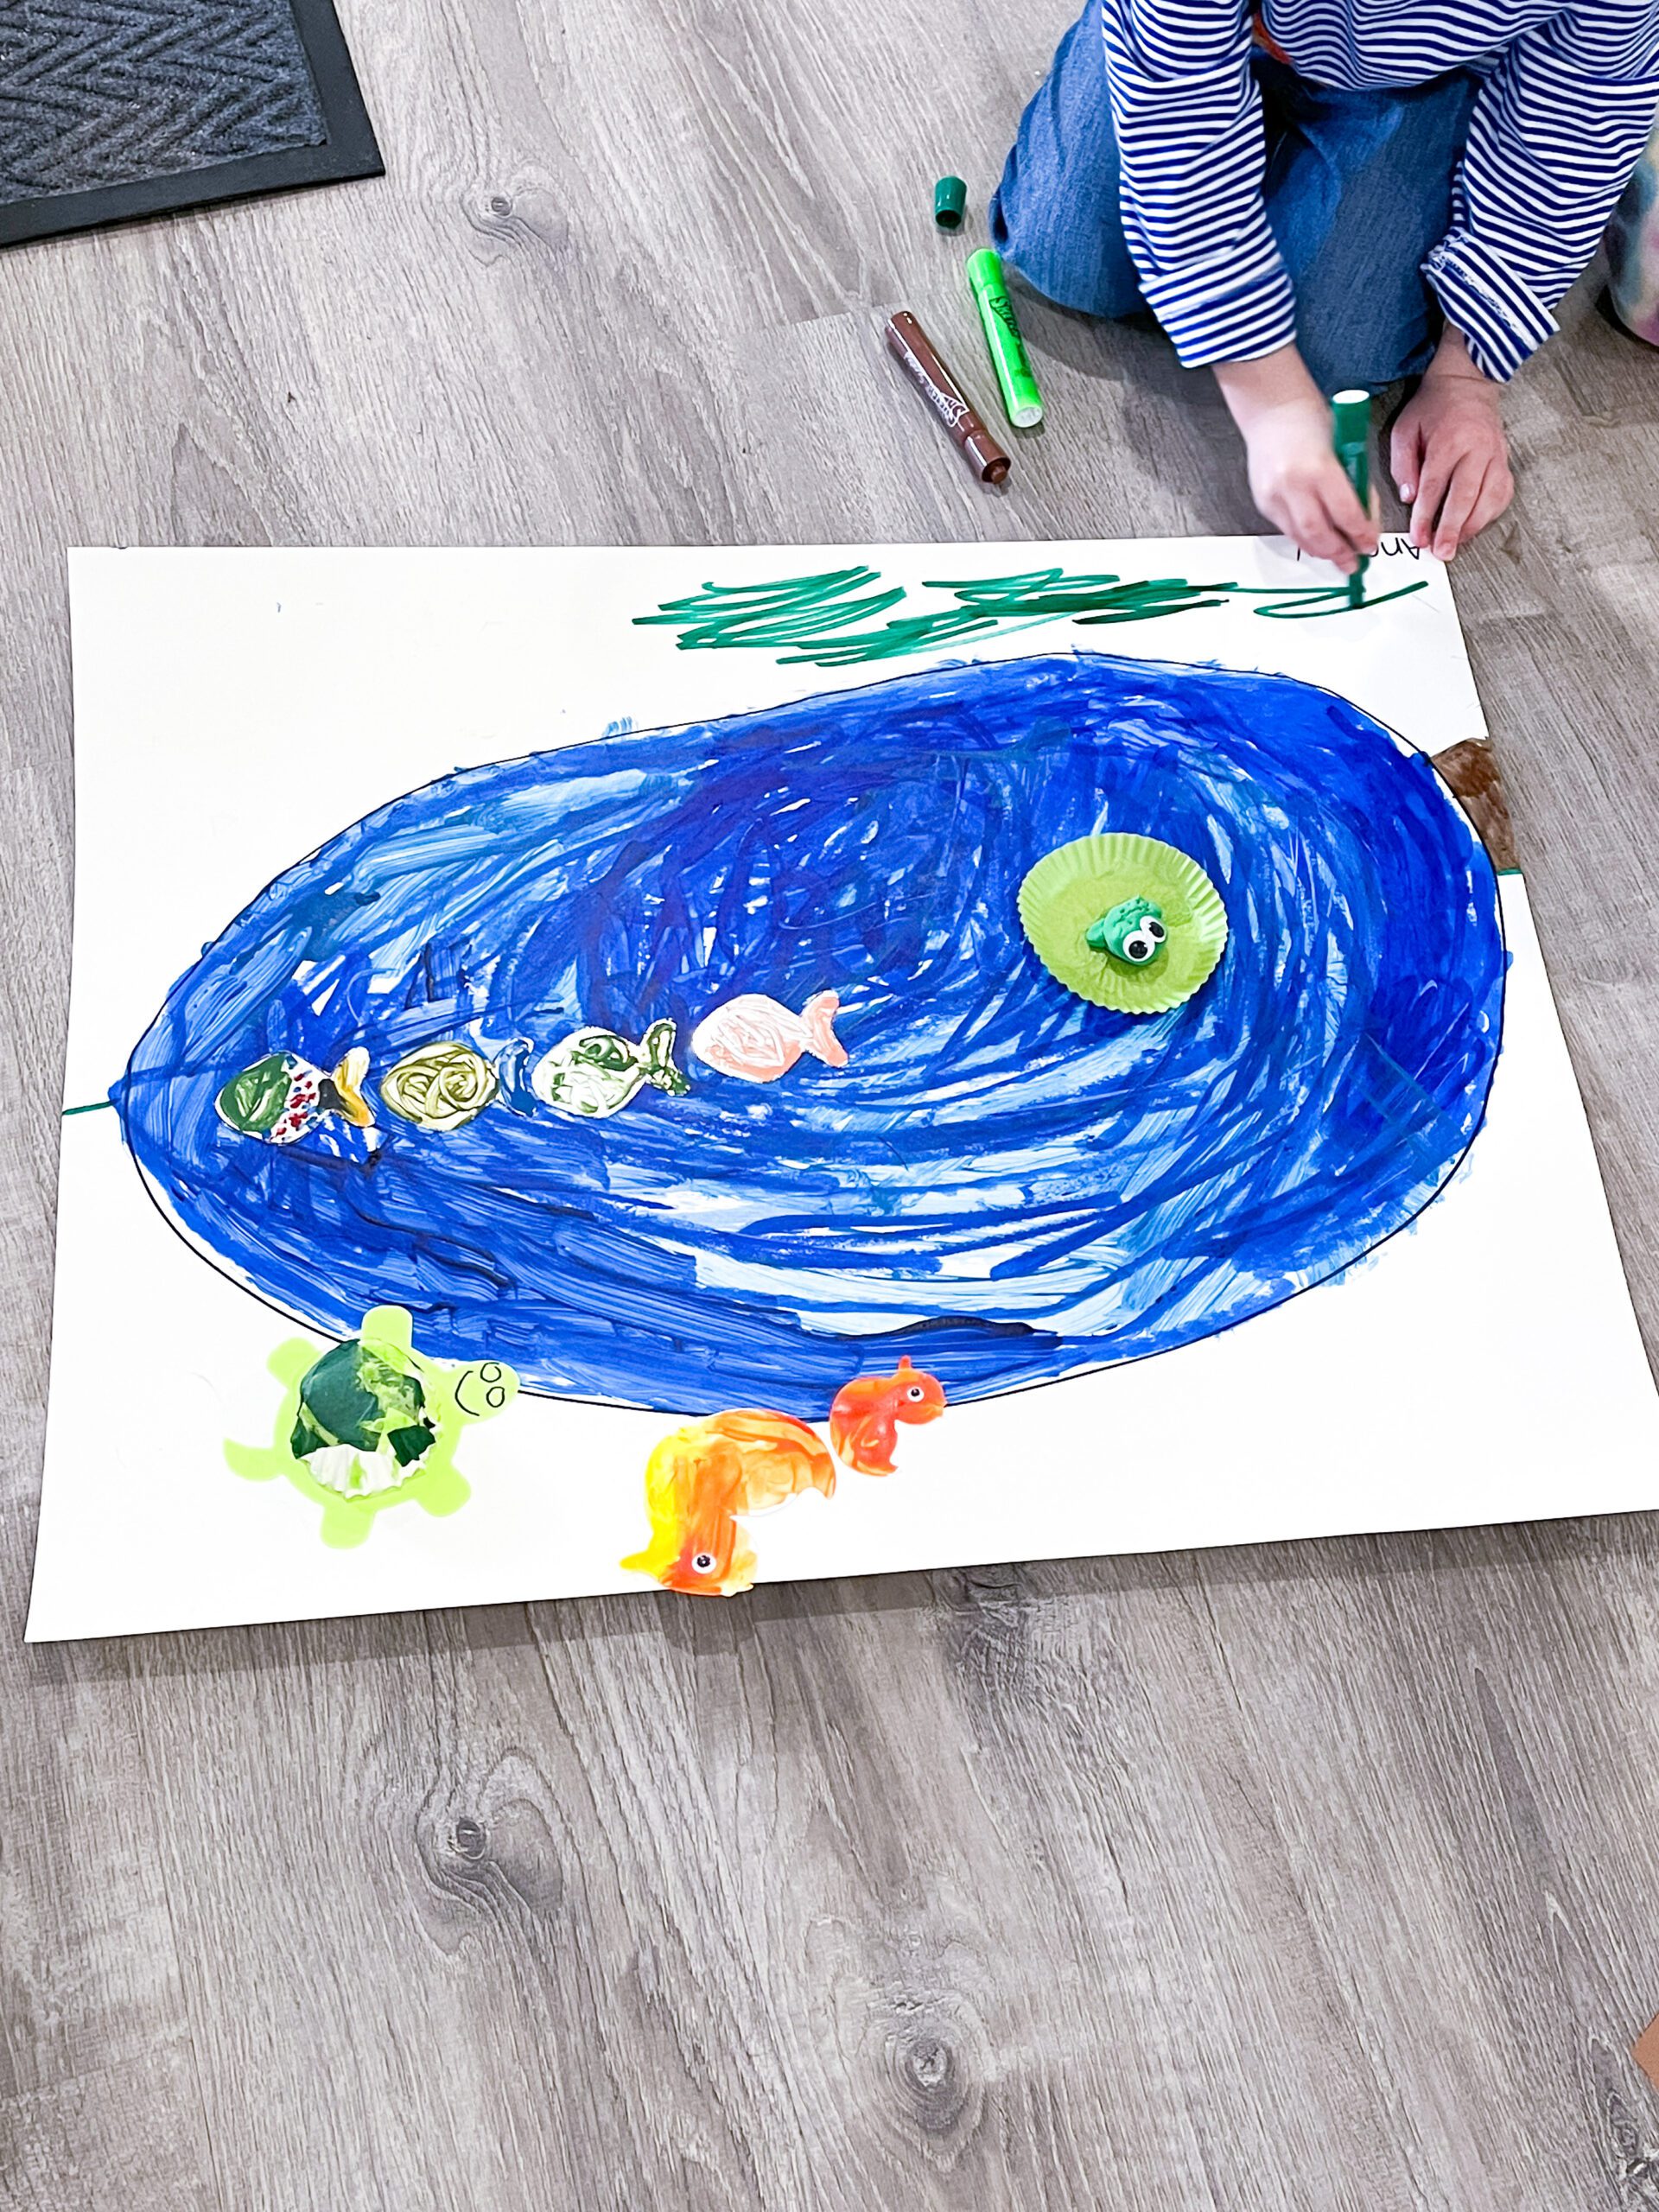
Day 1 – Laying the Groundwork for a Preschool Pond
Supplies Needed to make a preschool pond mural:
- white posterboard
- black marker
- blue paint, markers, crayons, kwik stix, etc.
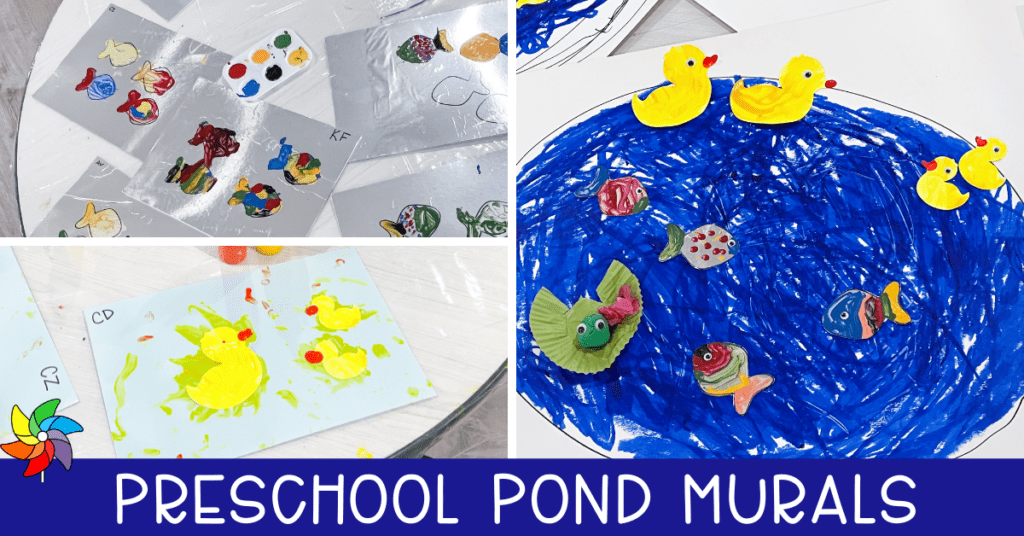
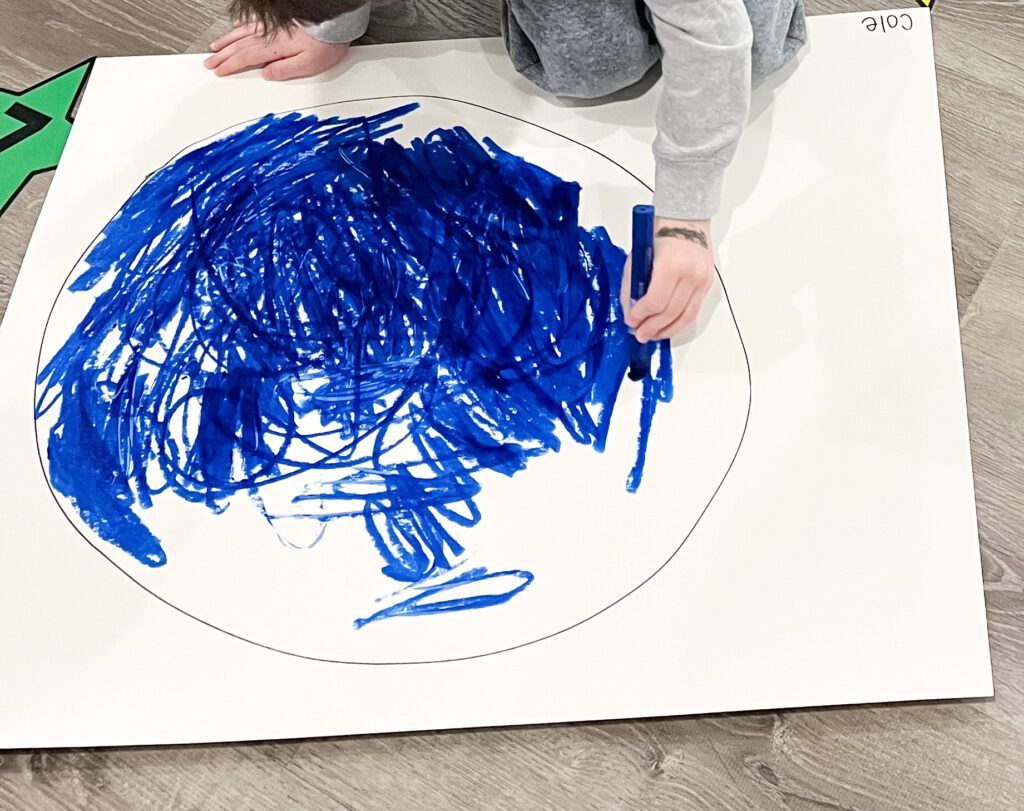
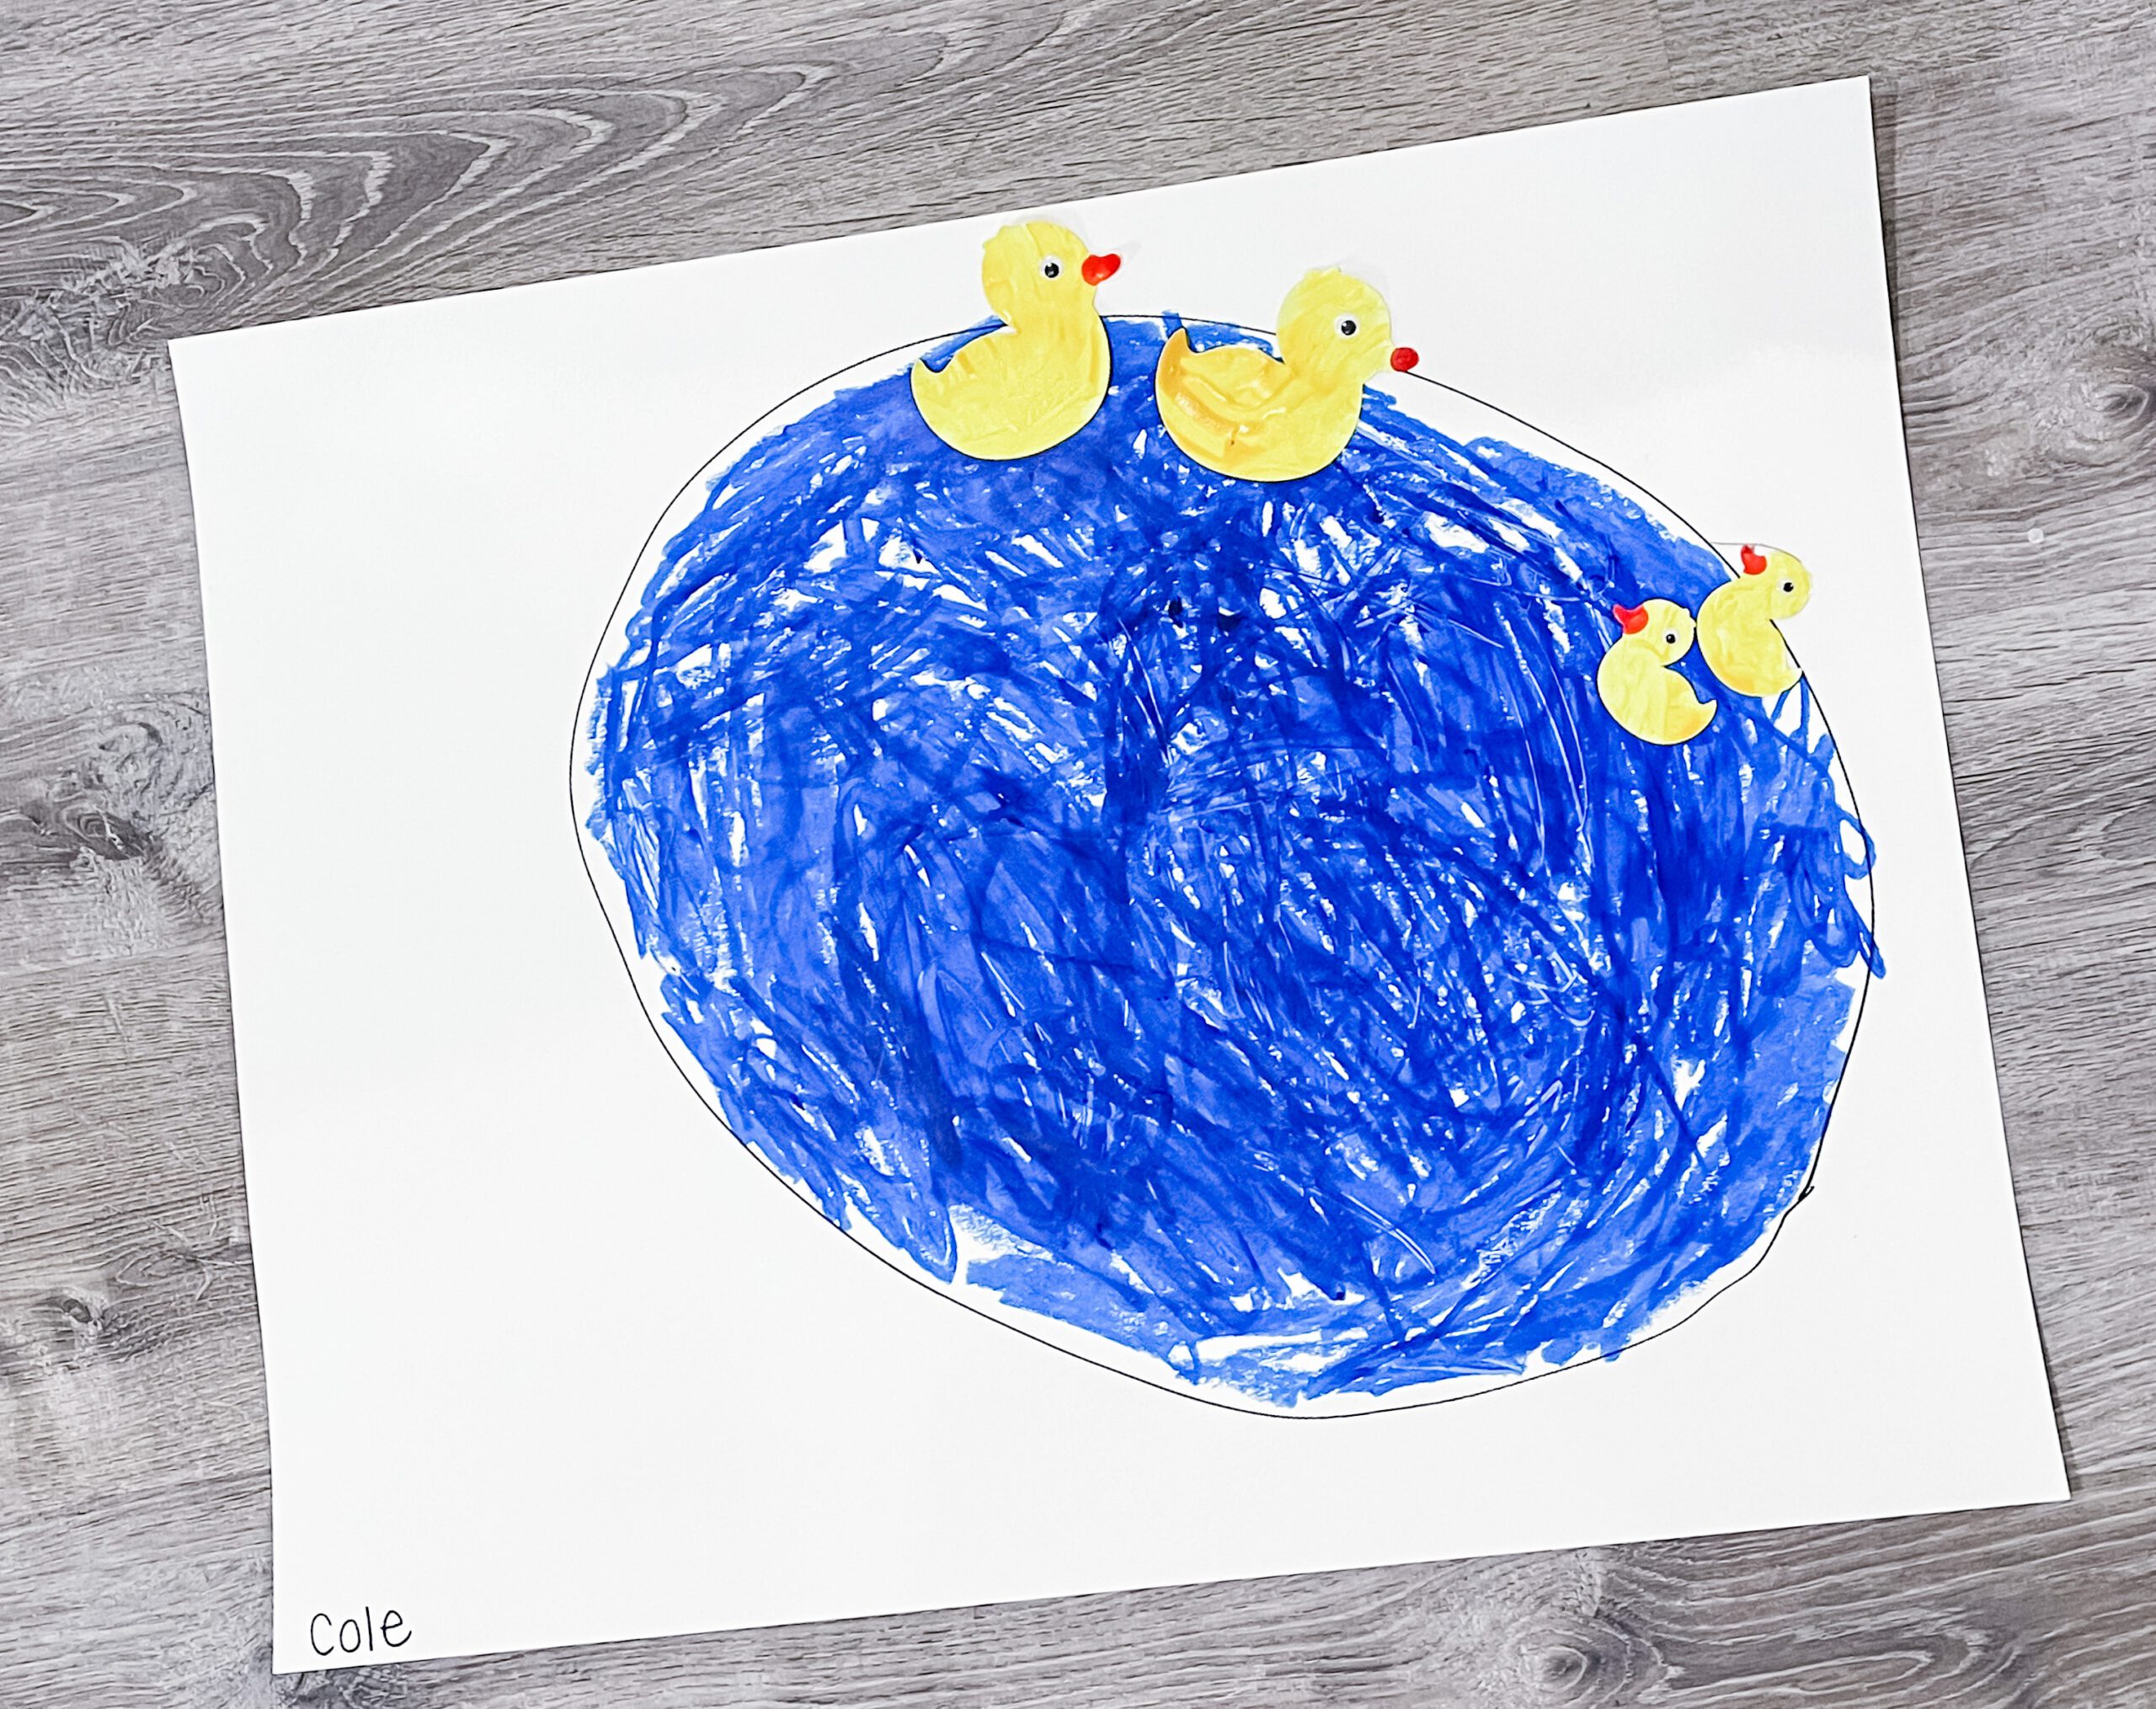
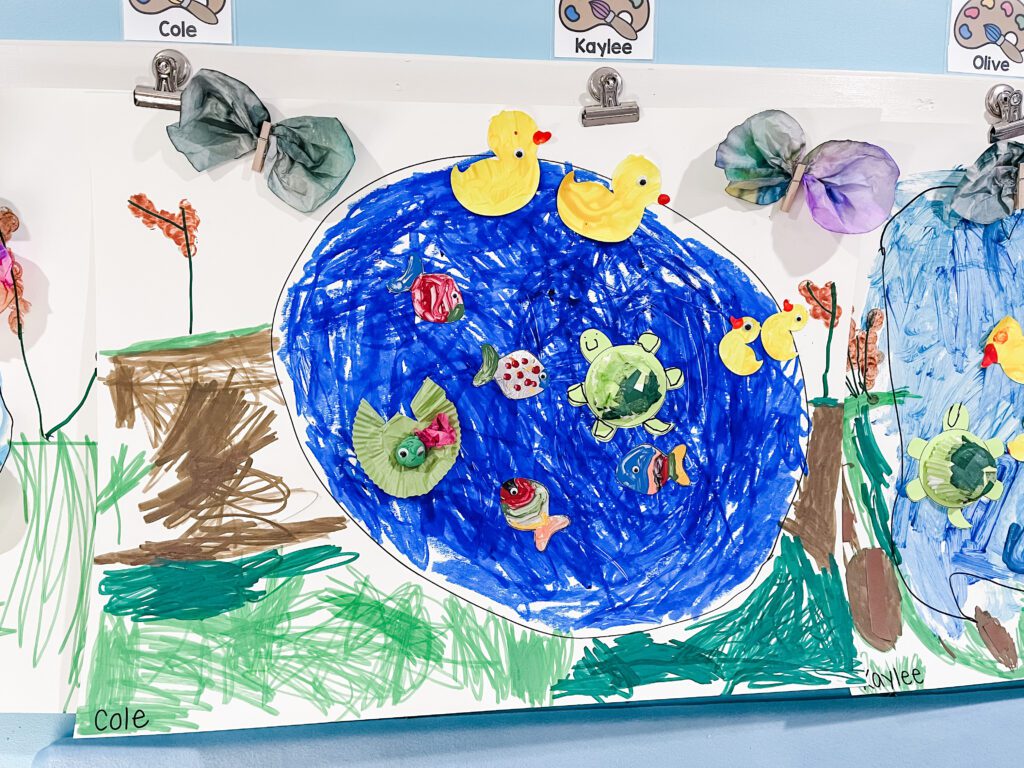
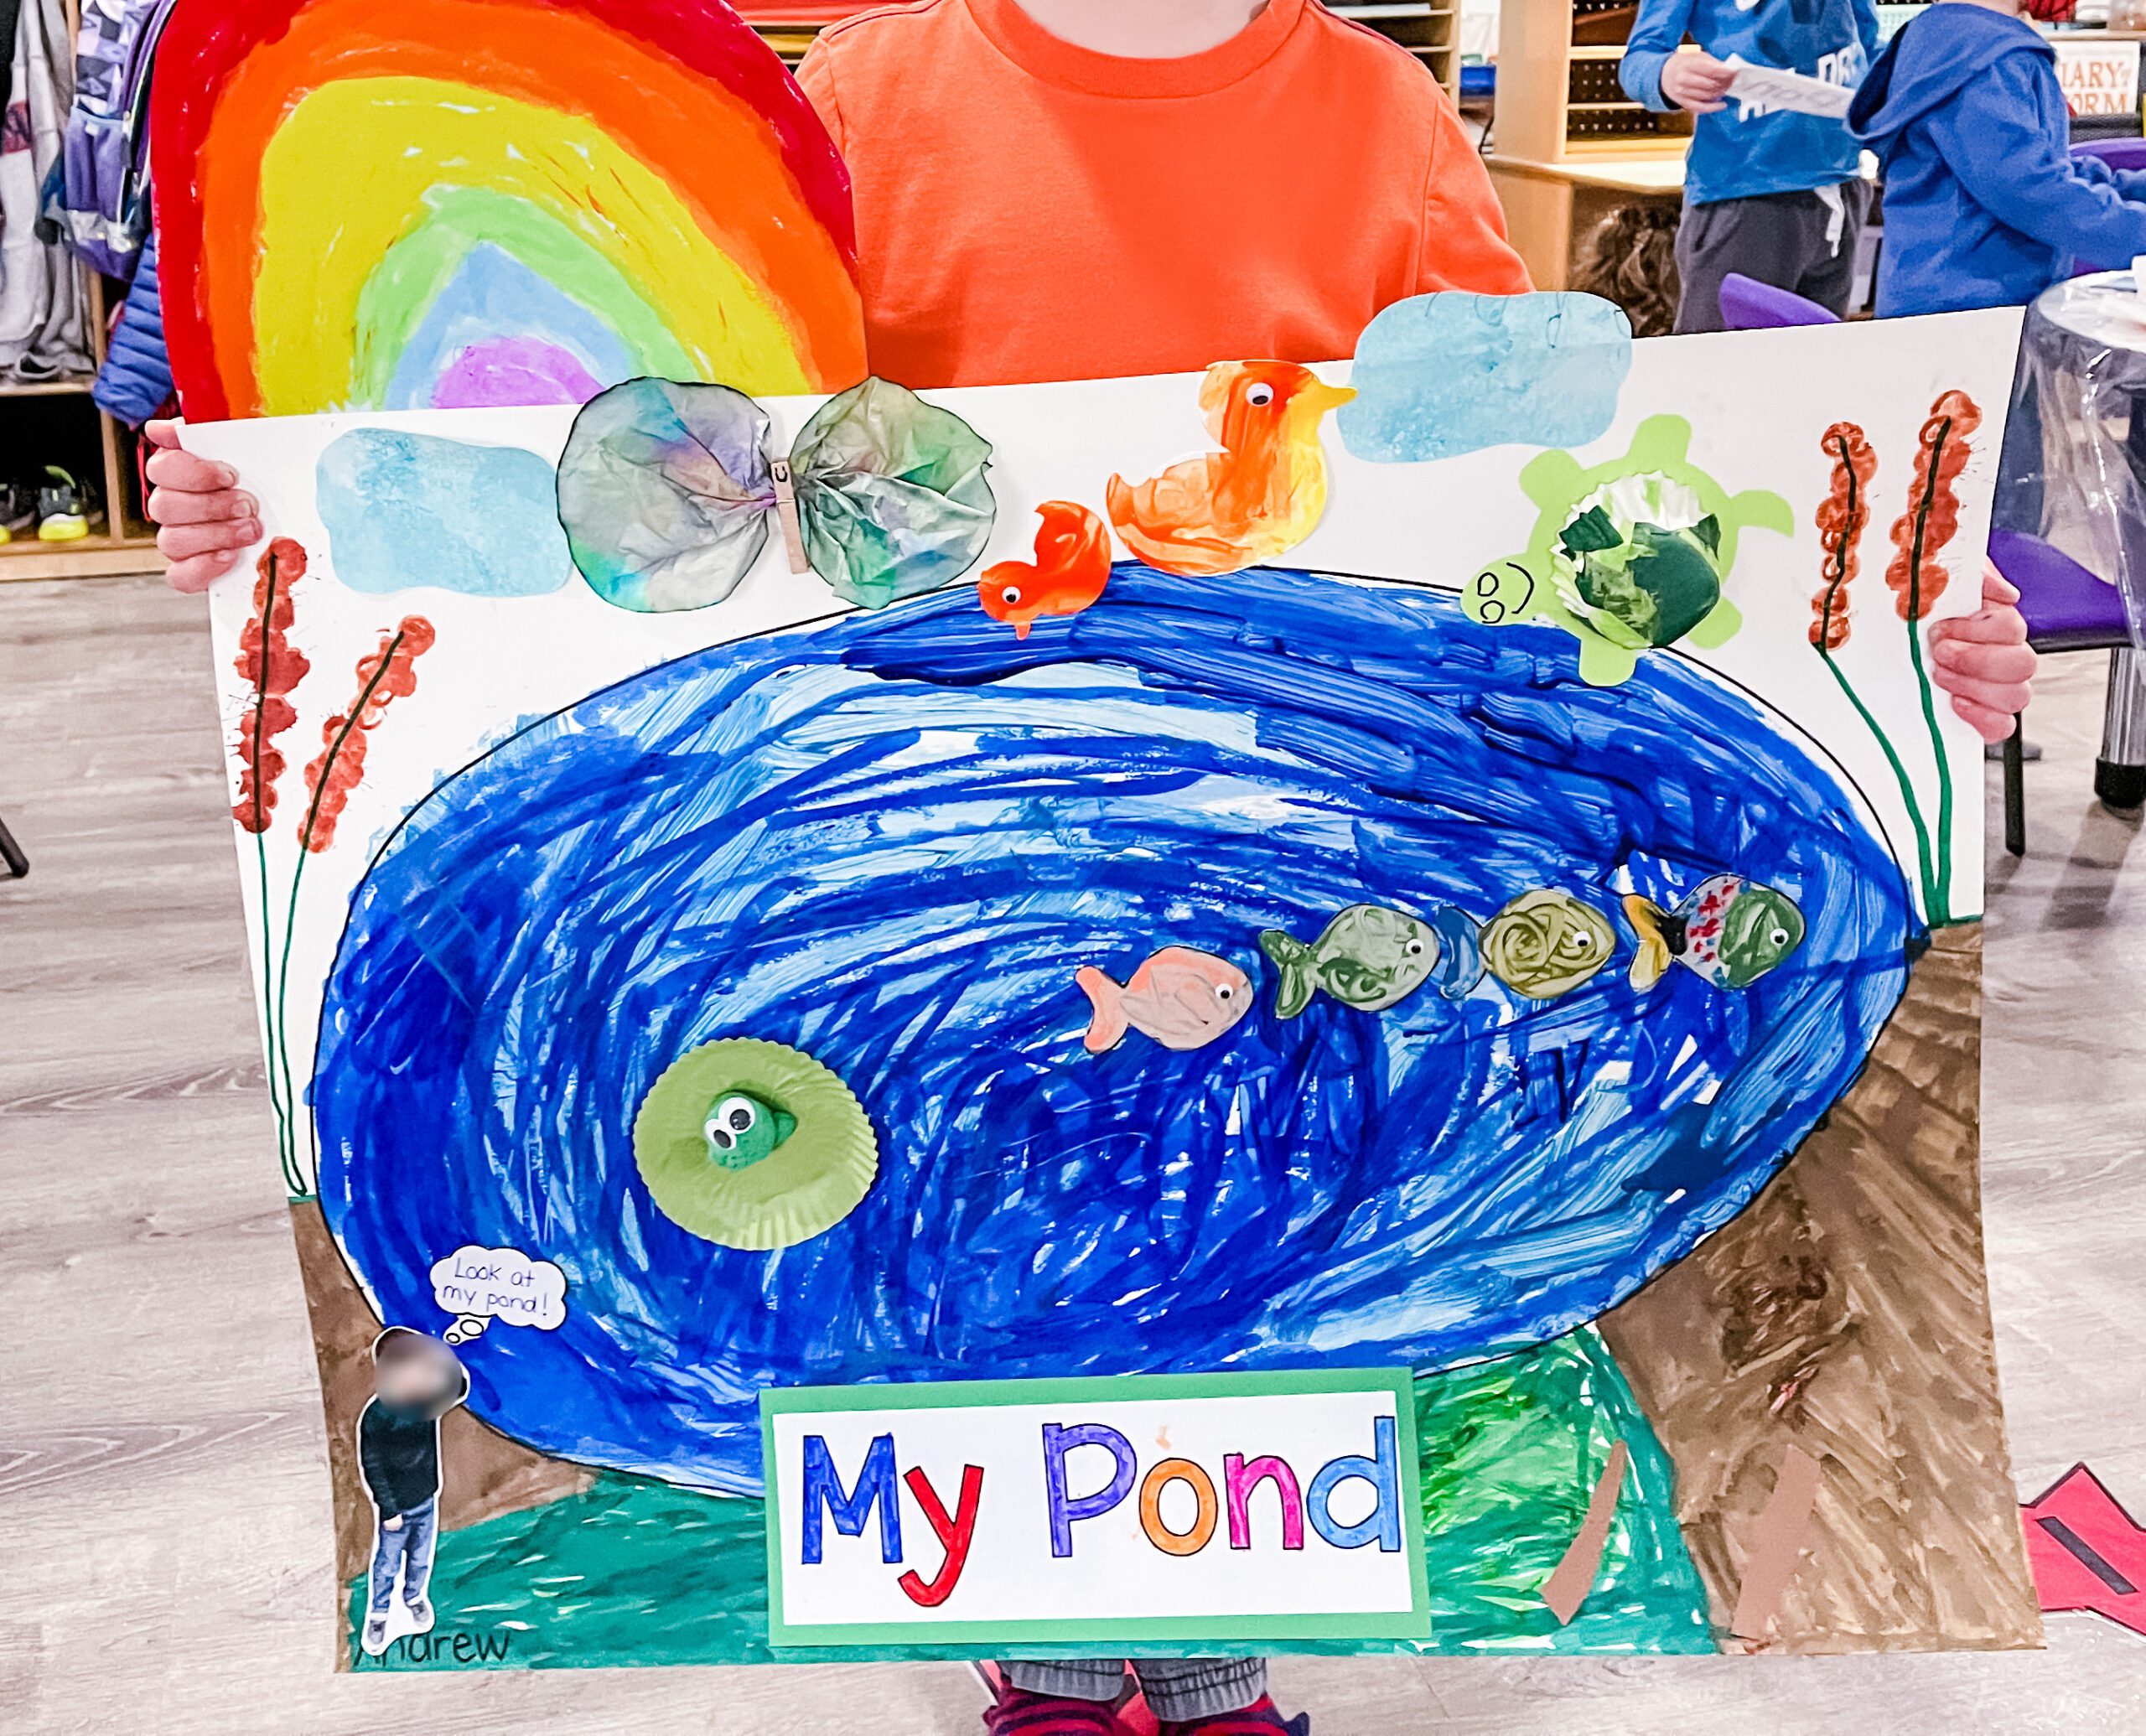
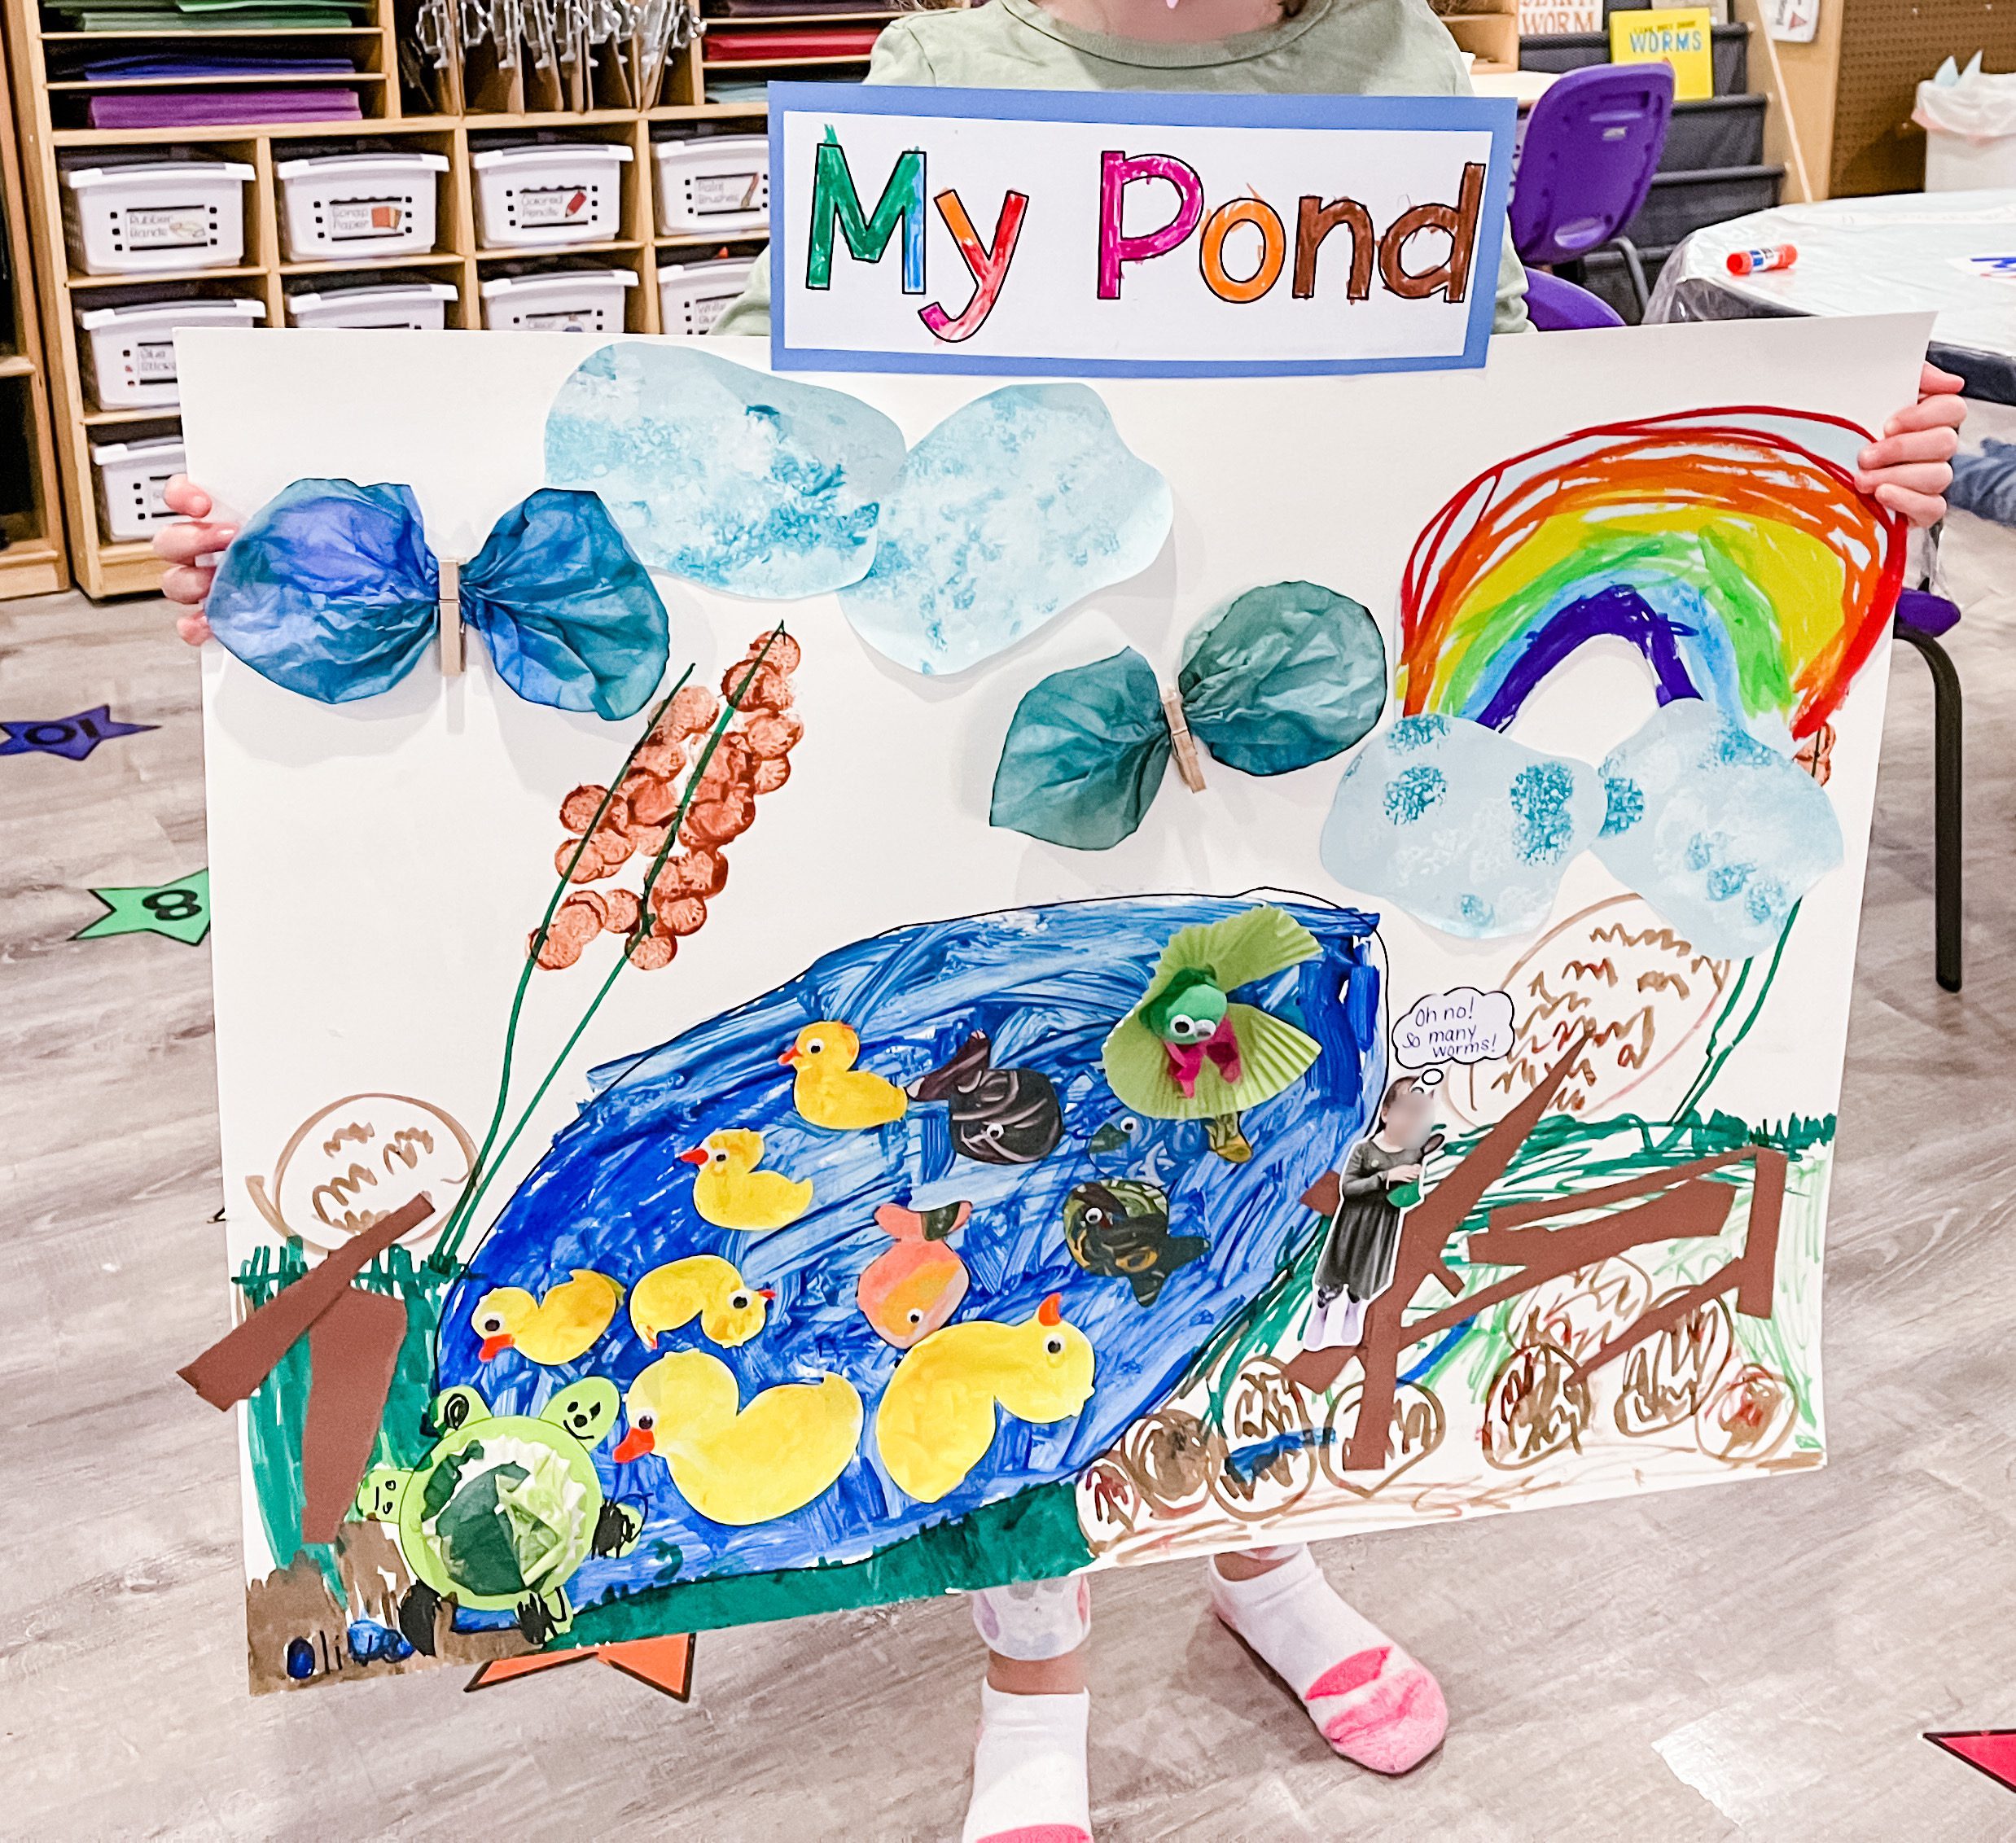
Day One is pretty simple, but it does take a little time. First, each student selects a piece of posterboard. They draw an outline of their pond on the poster board. And then, the long part – filling it in. Offer students choices on how they want to fill in their pond outline. Some children will be meticulous. Others will use a variety of media in one pond. Encourage the students to fill it in to the best of their abilities – no one wants to swim in an empty pond!
Day 2 – Just Ducky!
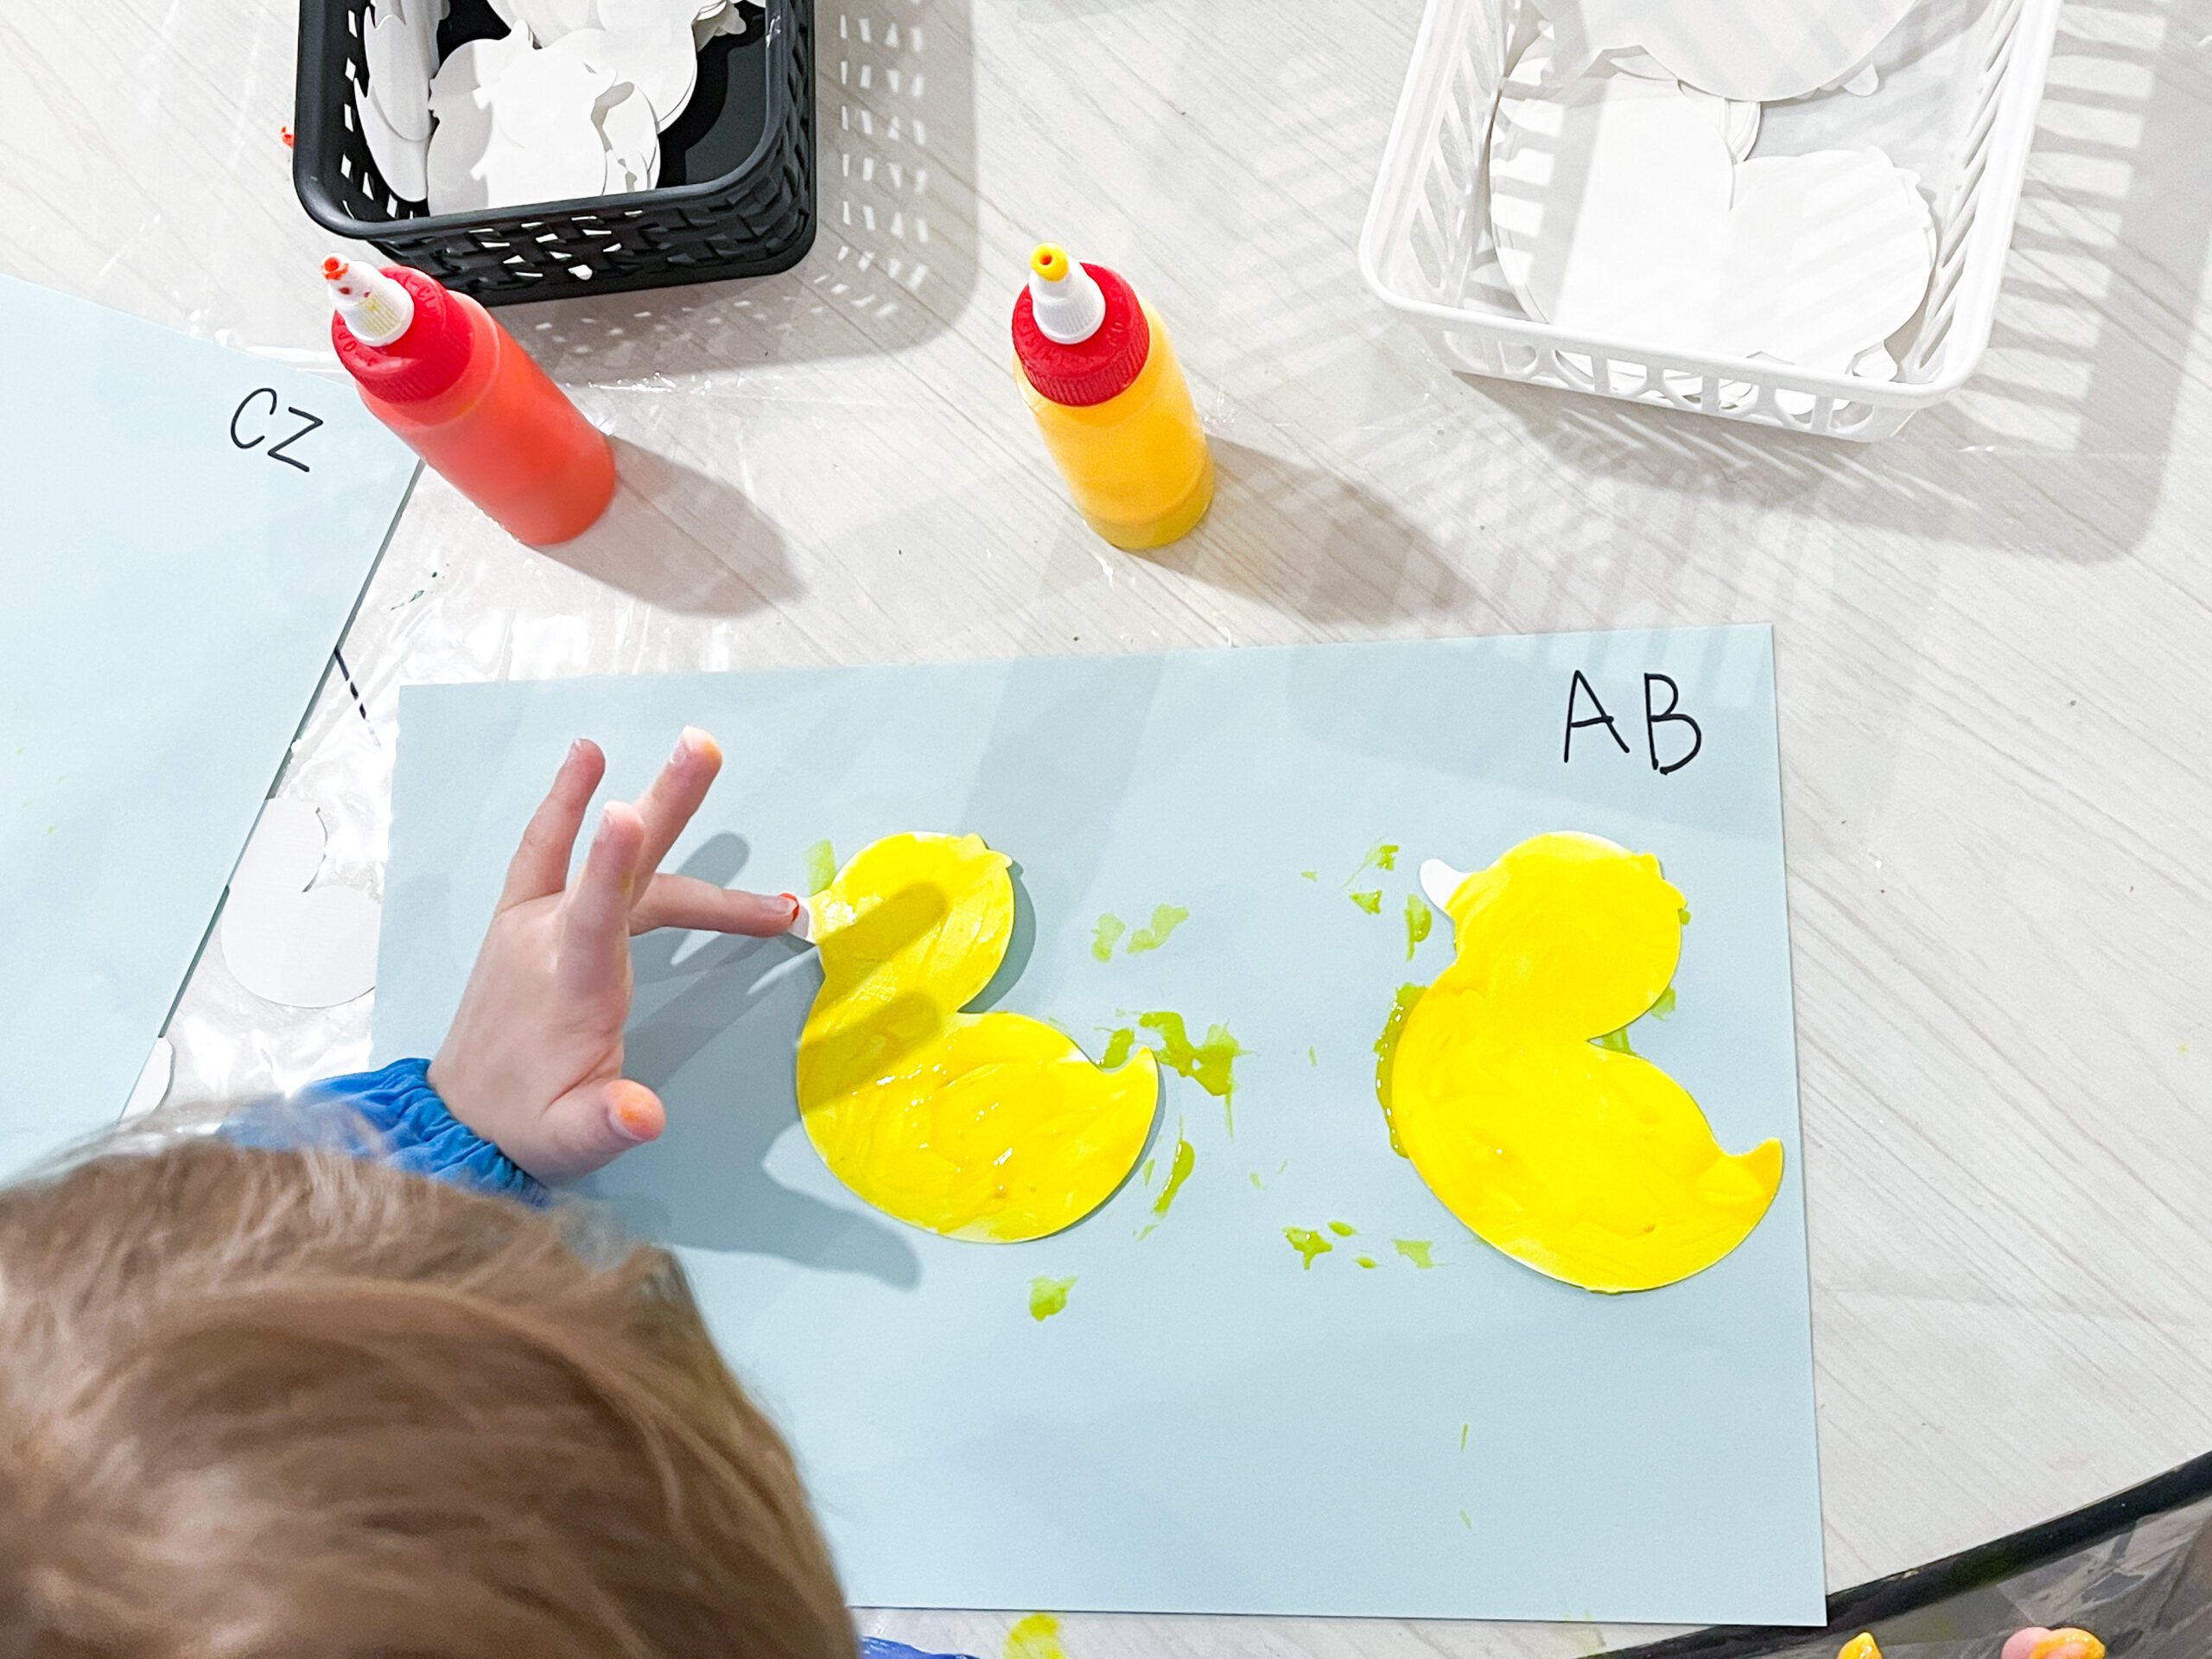
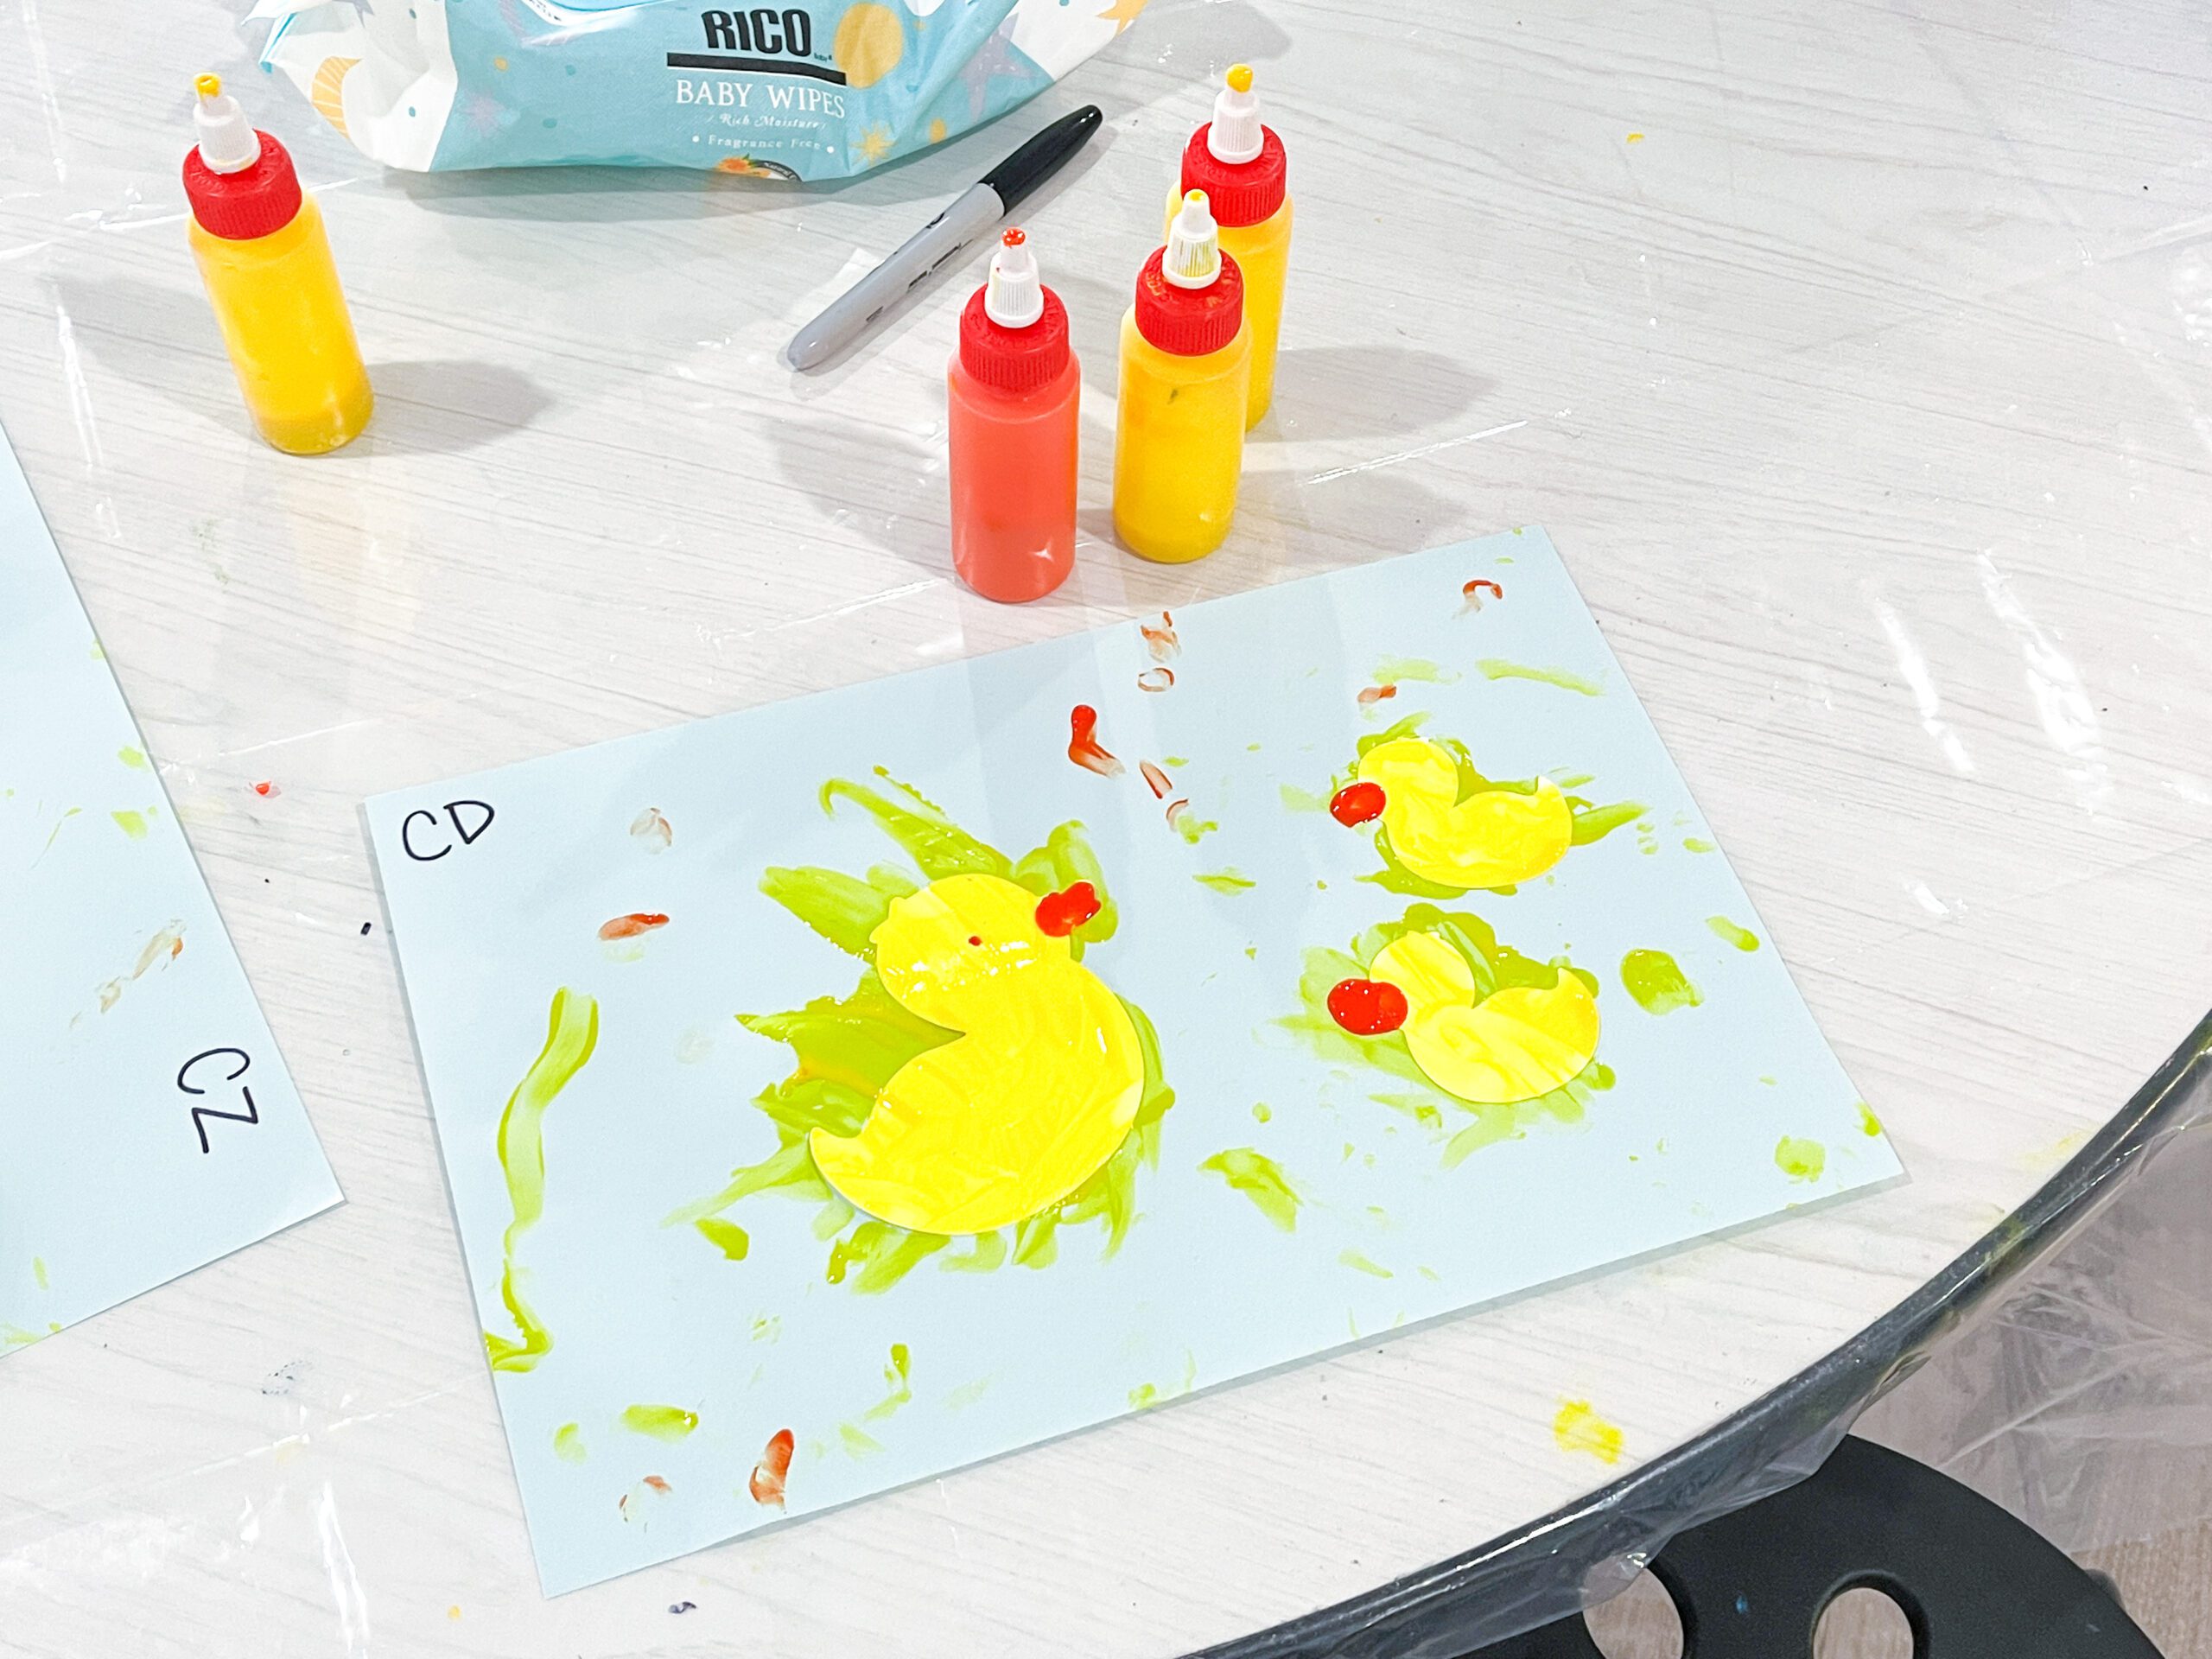
Supplies Needed for the Preschool Pond Ducks:
- pre-cut ducks on sturdy cardstock or heavy paper
- small squeeze bottles (We like these.)
- yellow and orange tempera paint
- googly eyes
- paintbrushes
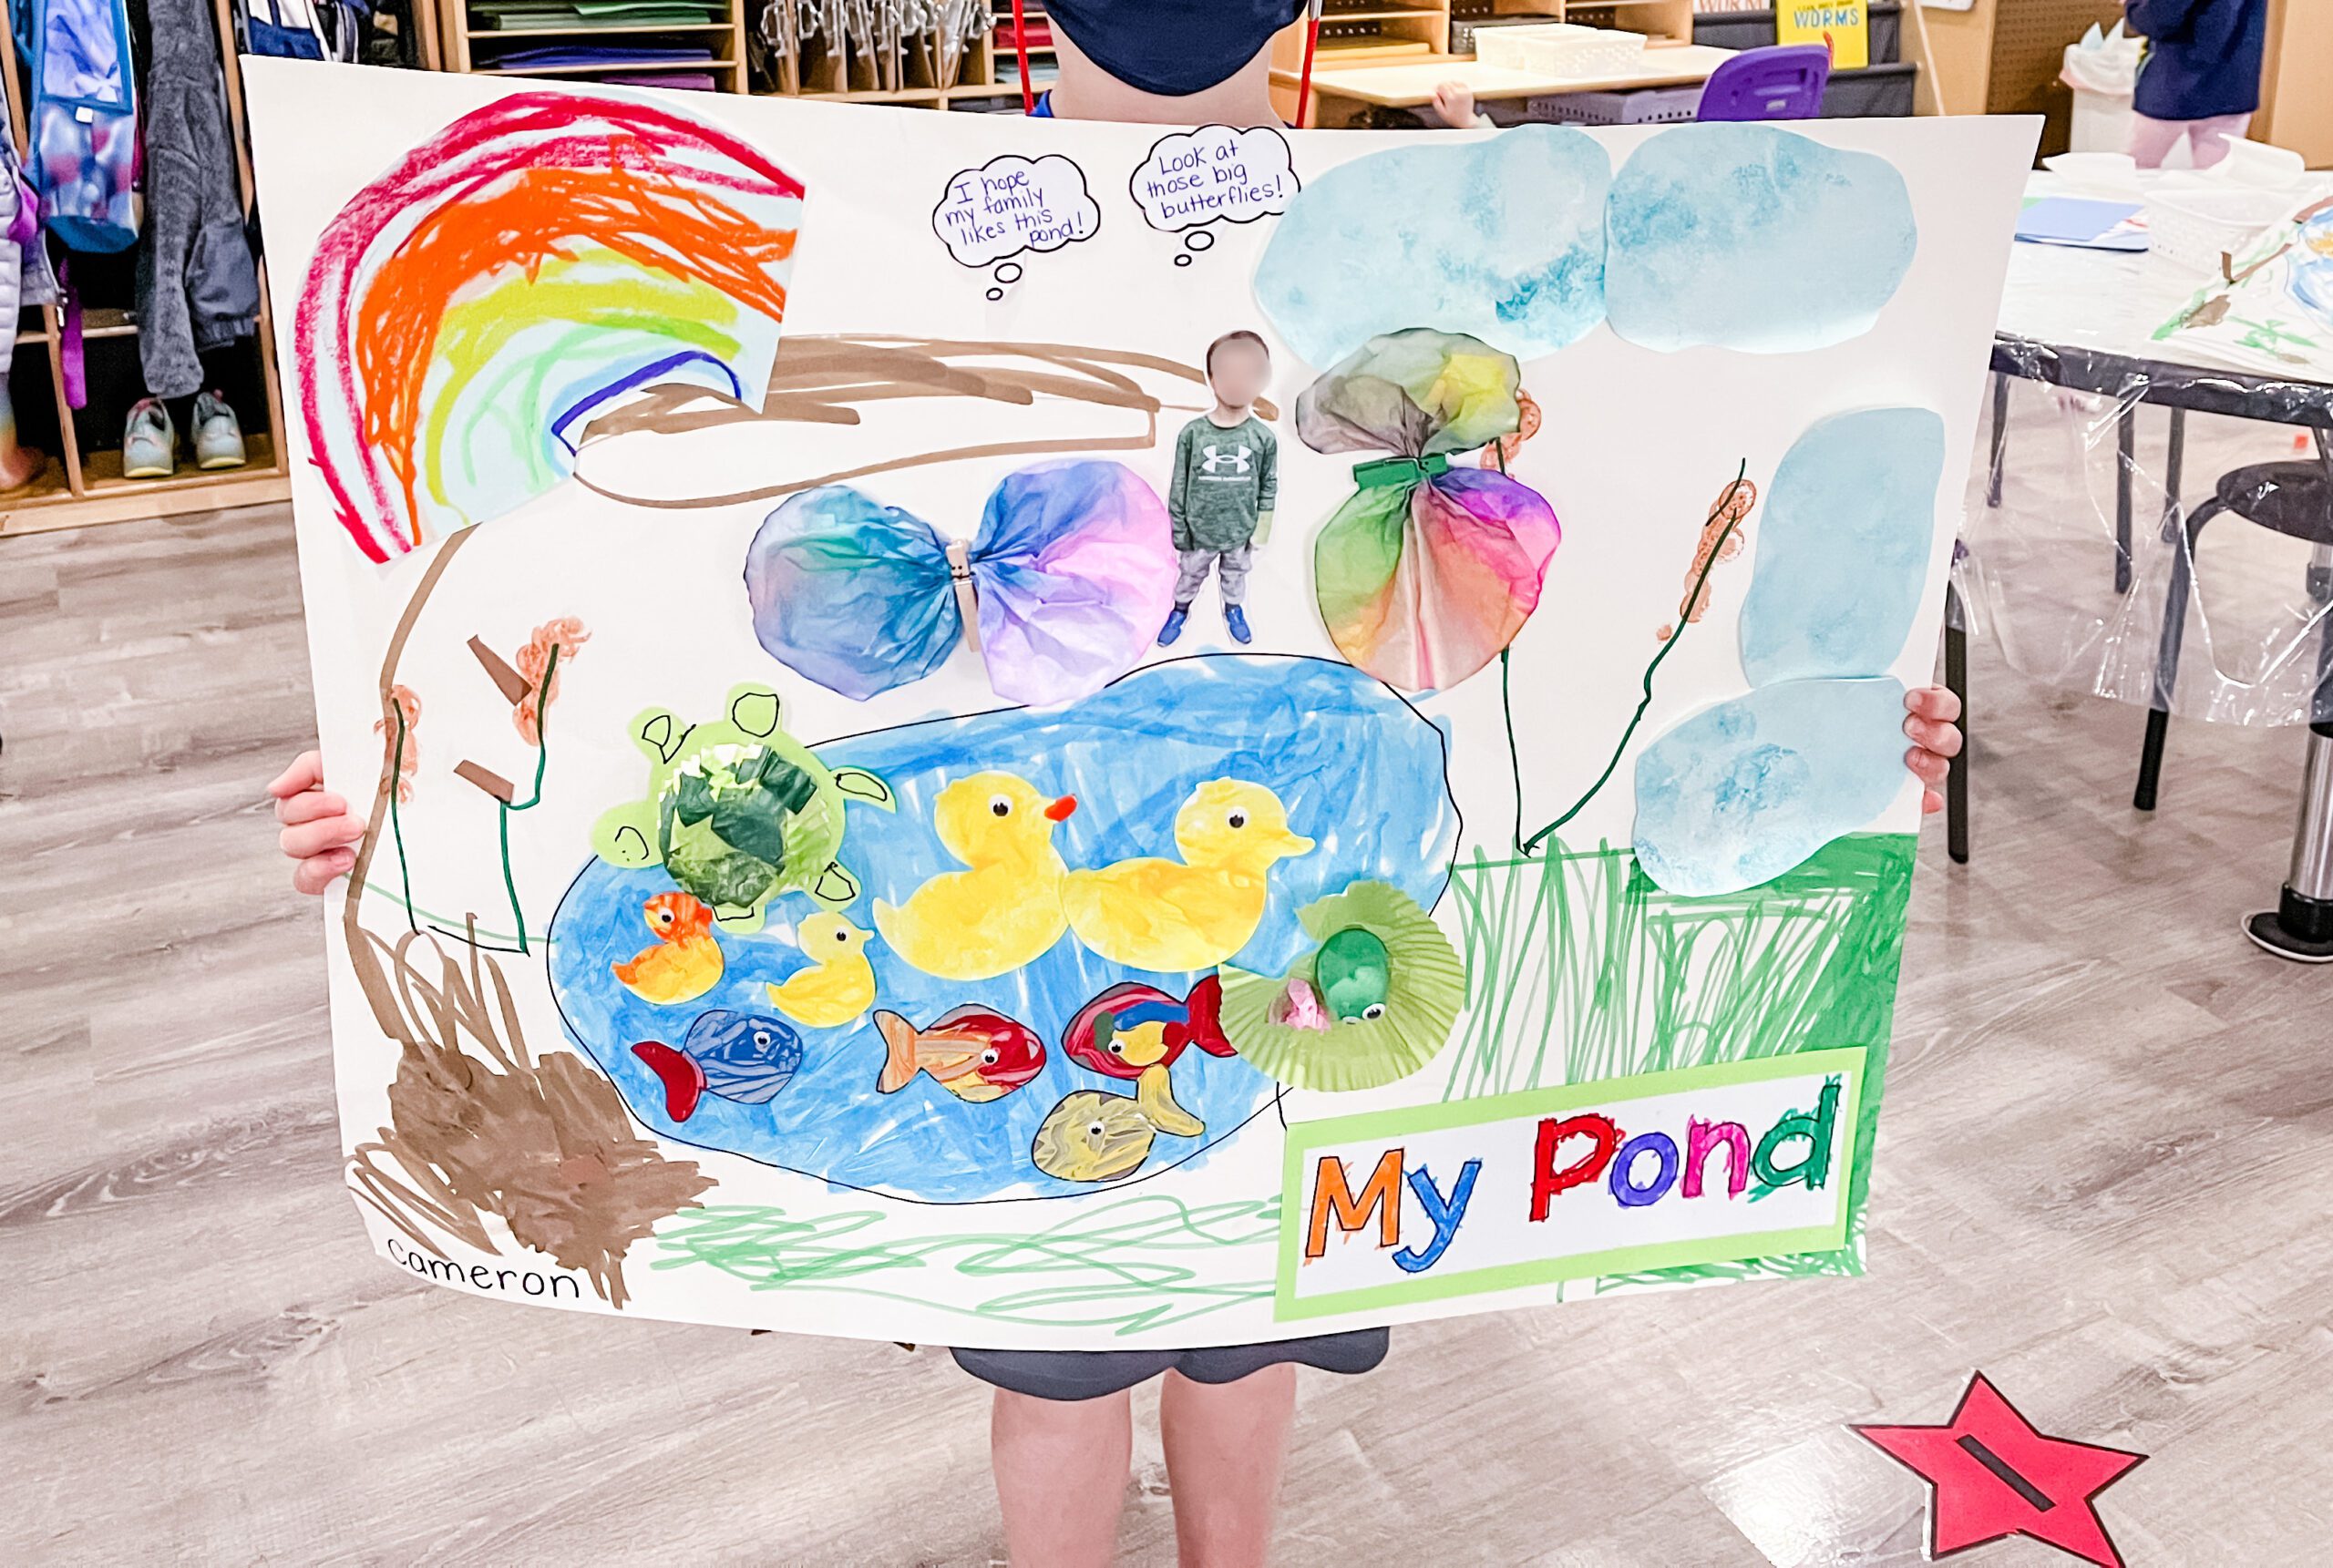
For this portion of the project, students squeeze drops of paint onto the pre-cut duck shapes. Fine motor muscles get a workout squeezing and controlling the paint flow from the small bottles. Next, students use either paint brushes or their fingers to spread the paint around to fill in the duck shape. After the duck is dry, add google eyes, eye stickers, or even just add the eyes with a permanent marker.
Tie this project into the rest of the lesson by singing “Five Little Ducks,” learn about ducks from the Pond Unit, and practice waddling like a duck out on the playground!
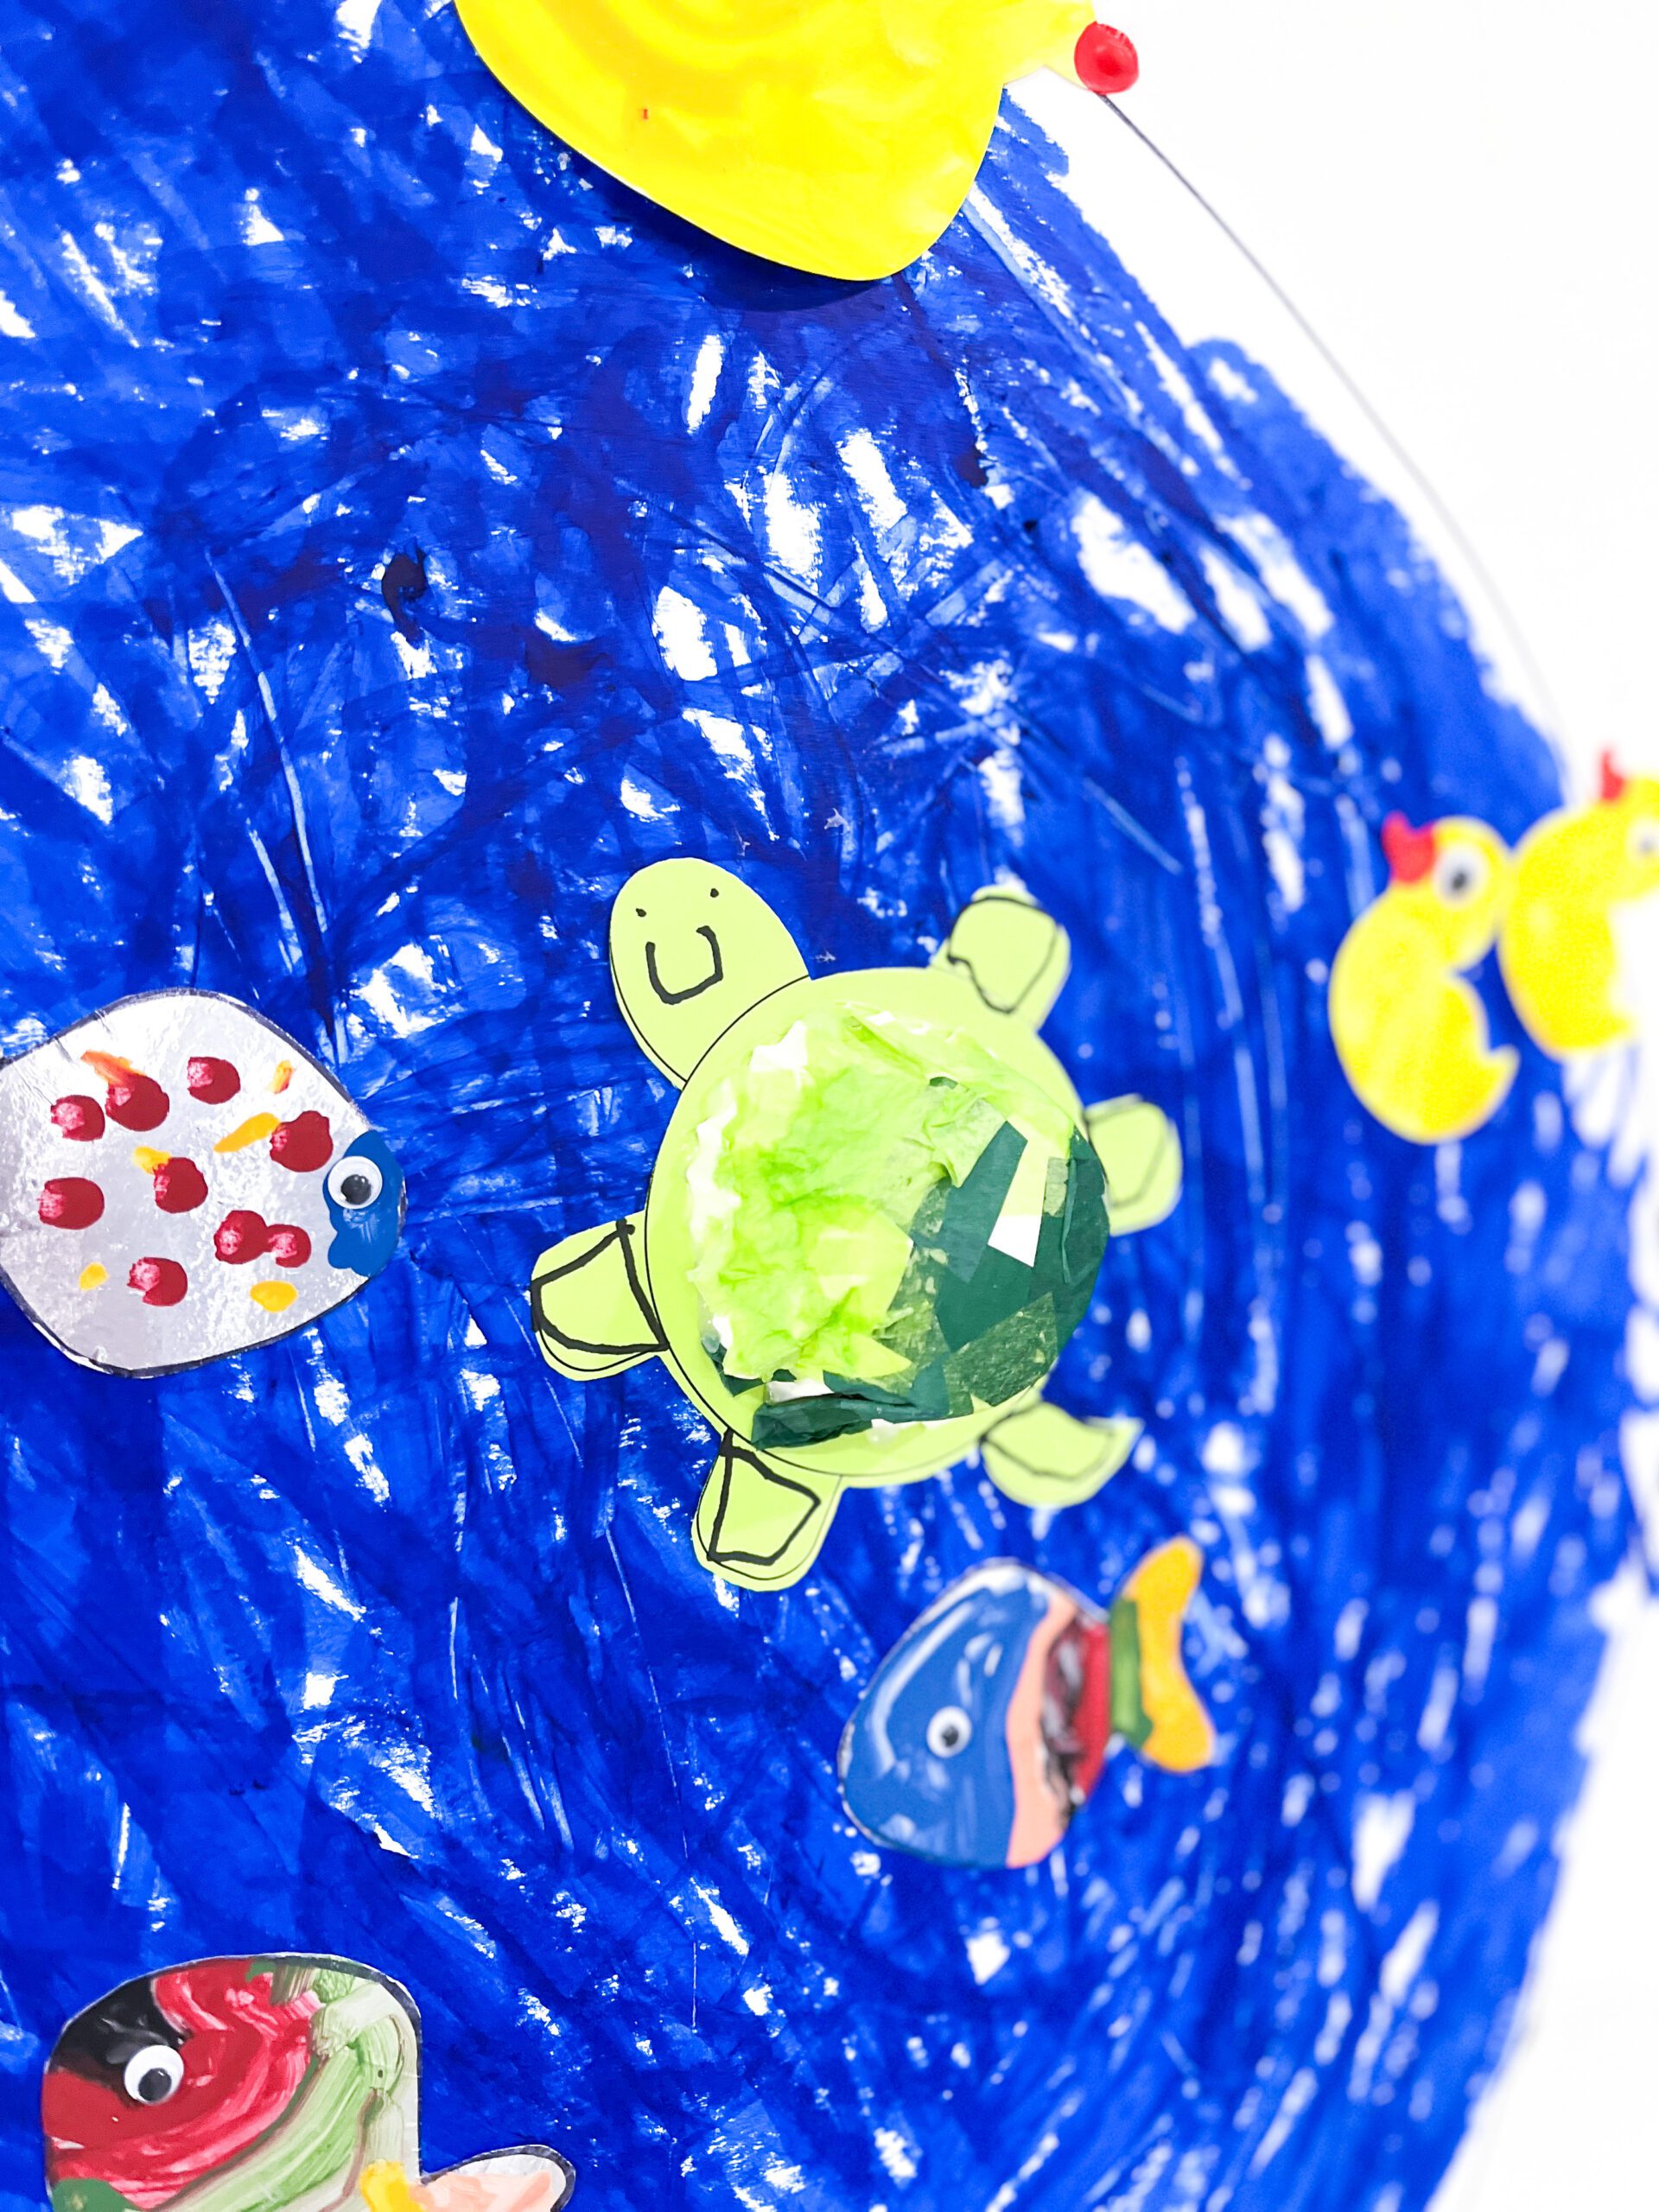
Day 3 – Go Fish!
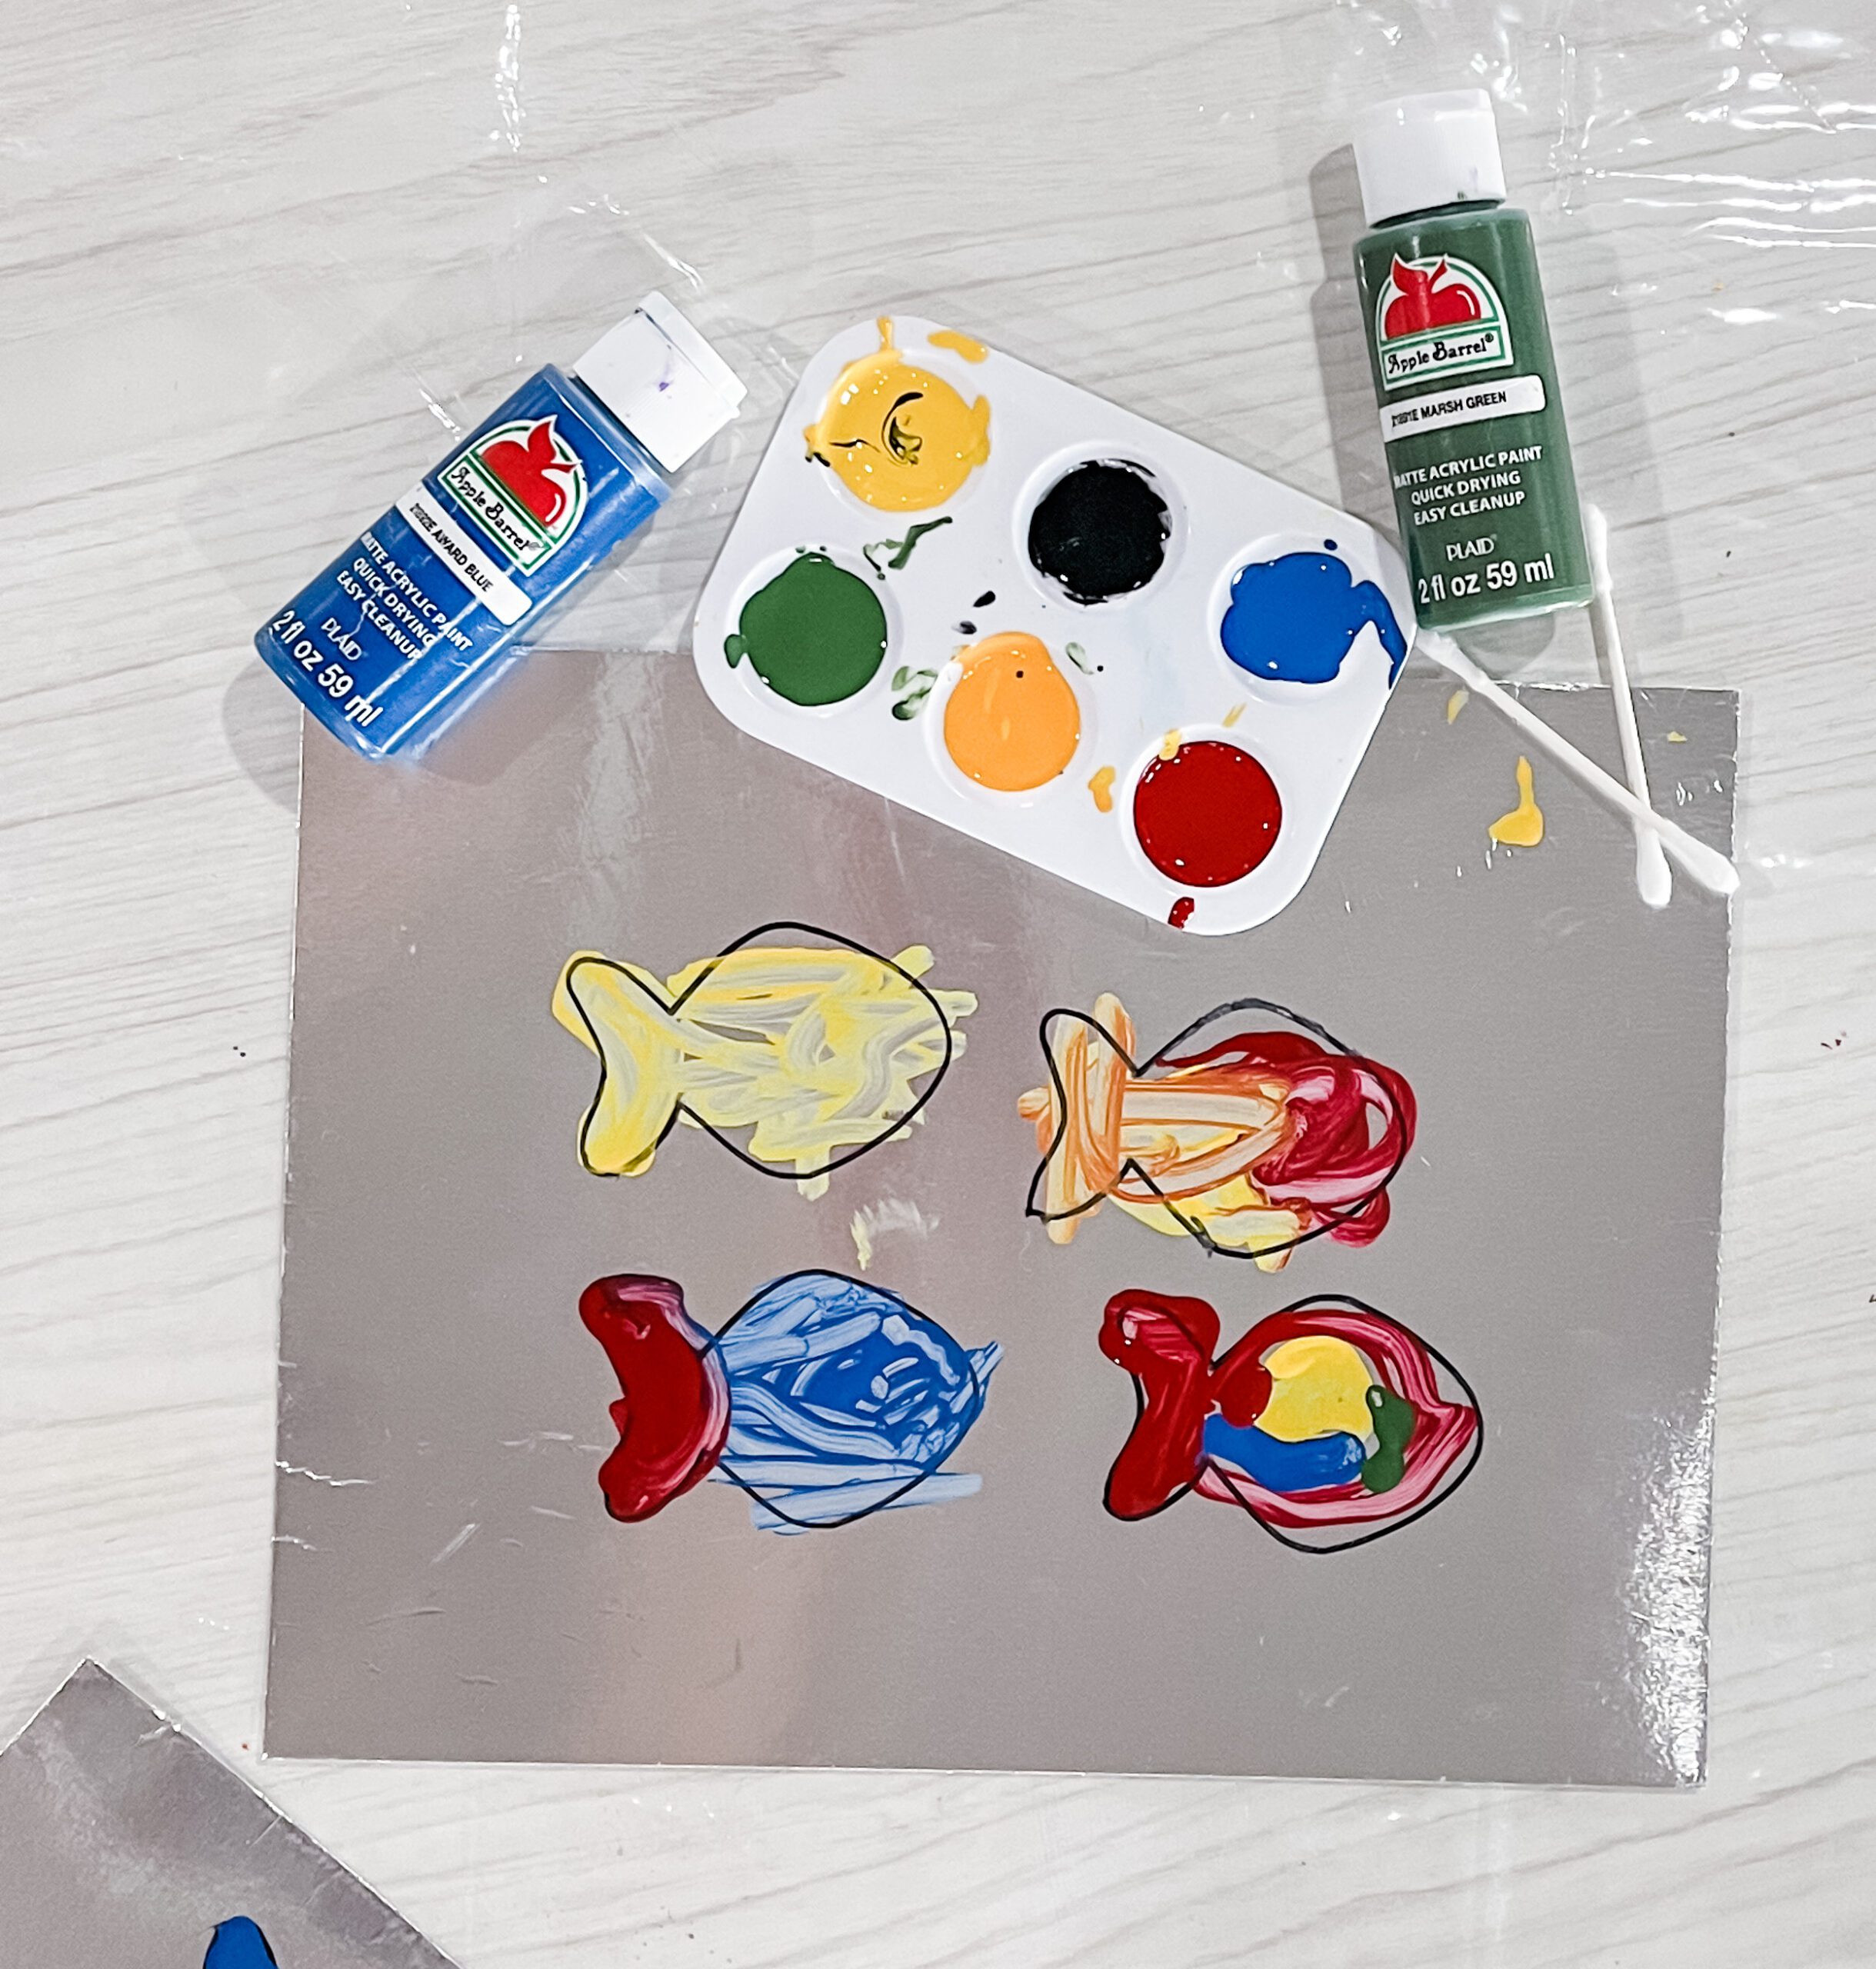
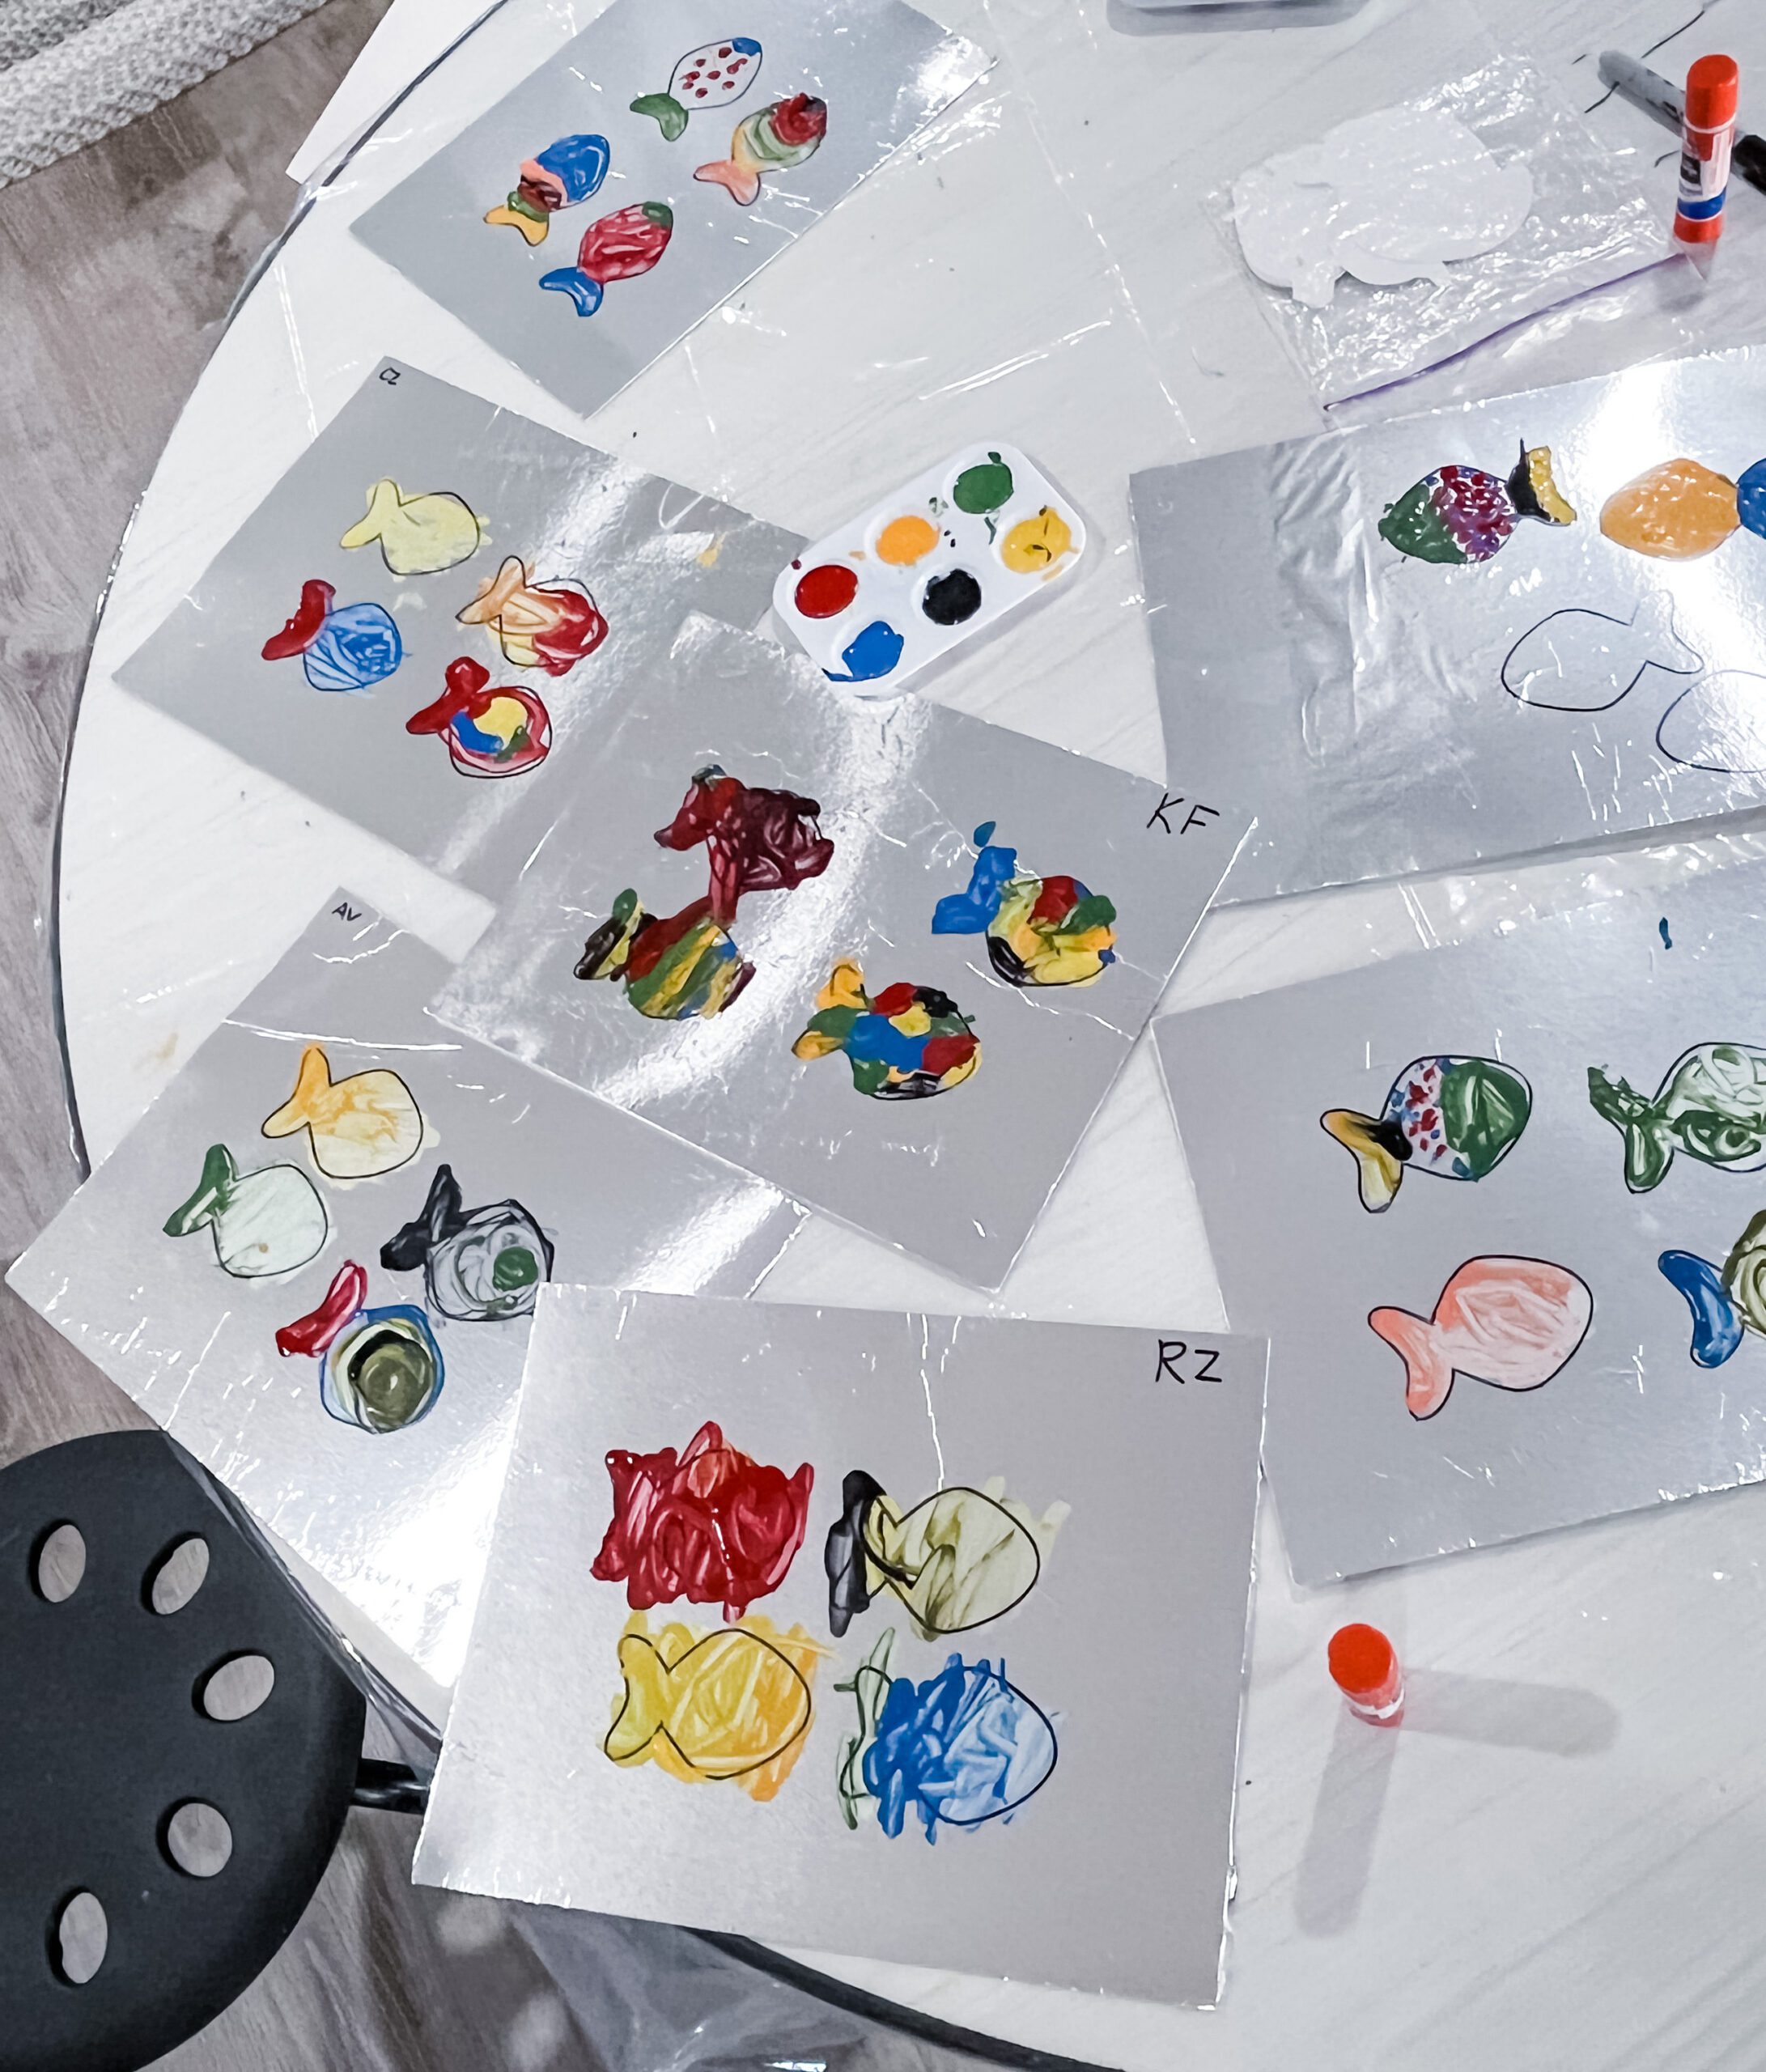
Supplies Needed to make Shiny Fish:
- aluminum foil
- thin cardboard, poster board, or cardstock
- black marker
- acrylic paint
- cotton swabs
- google eyes
To prepare, glue sheets of aluminum foil to the pieces of cardboard for stability. Draw or trace a fish outline four times on each piece of foil. Provide students with acrylic paints in various colors and cotton swabs. Students express their creativity by swirling, dotting, and filling in the fishy outlines. No worries if they don’t cover it completely, as the aluminum foil shines through like shimmery scales!
Day 4 – Hop To It!
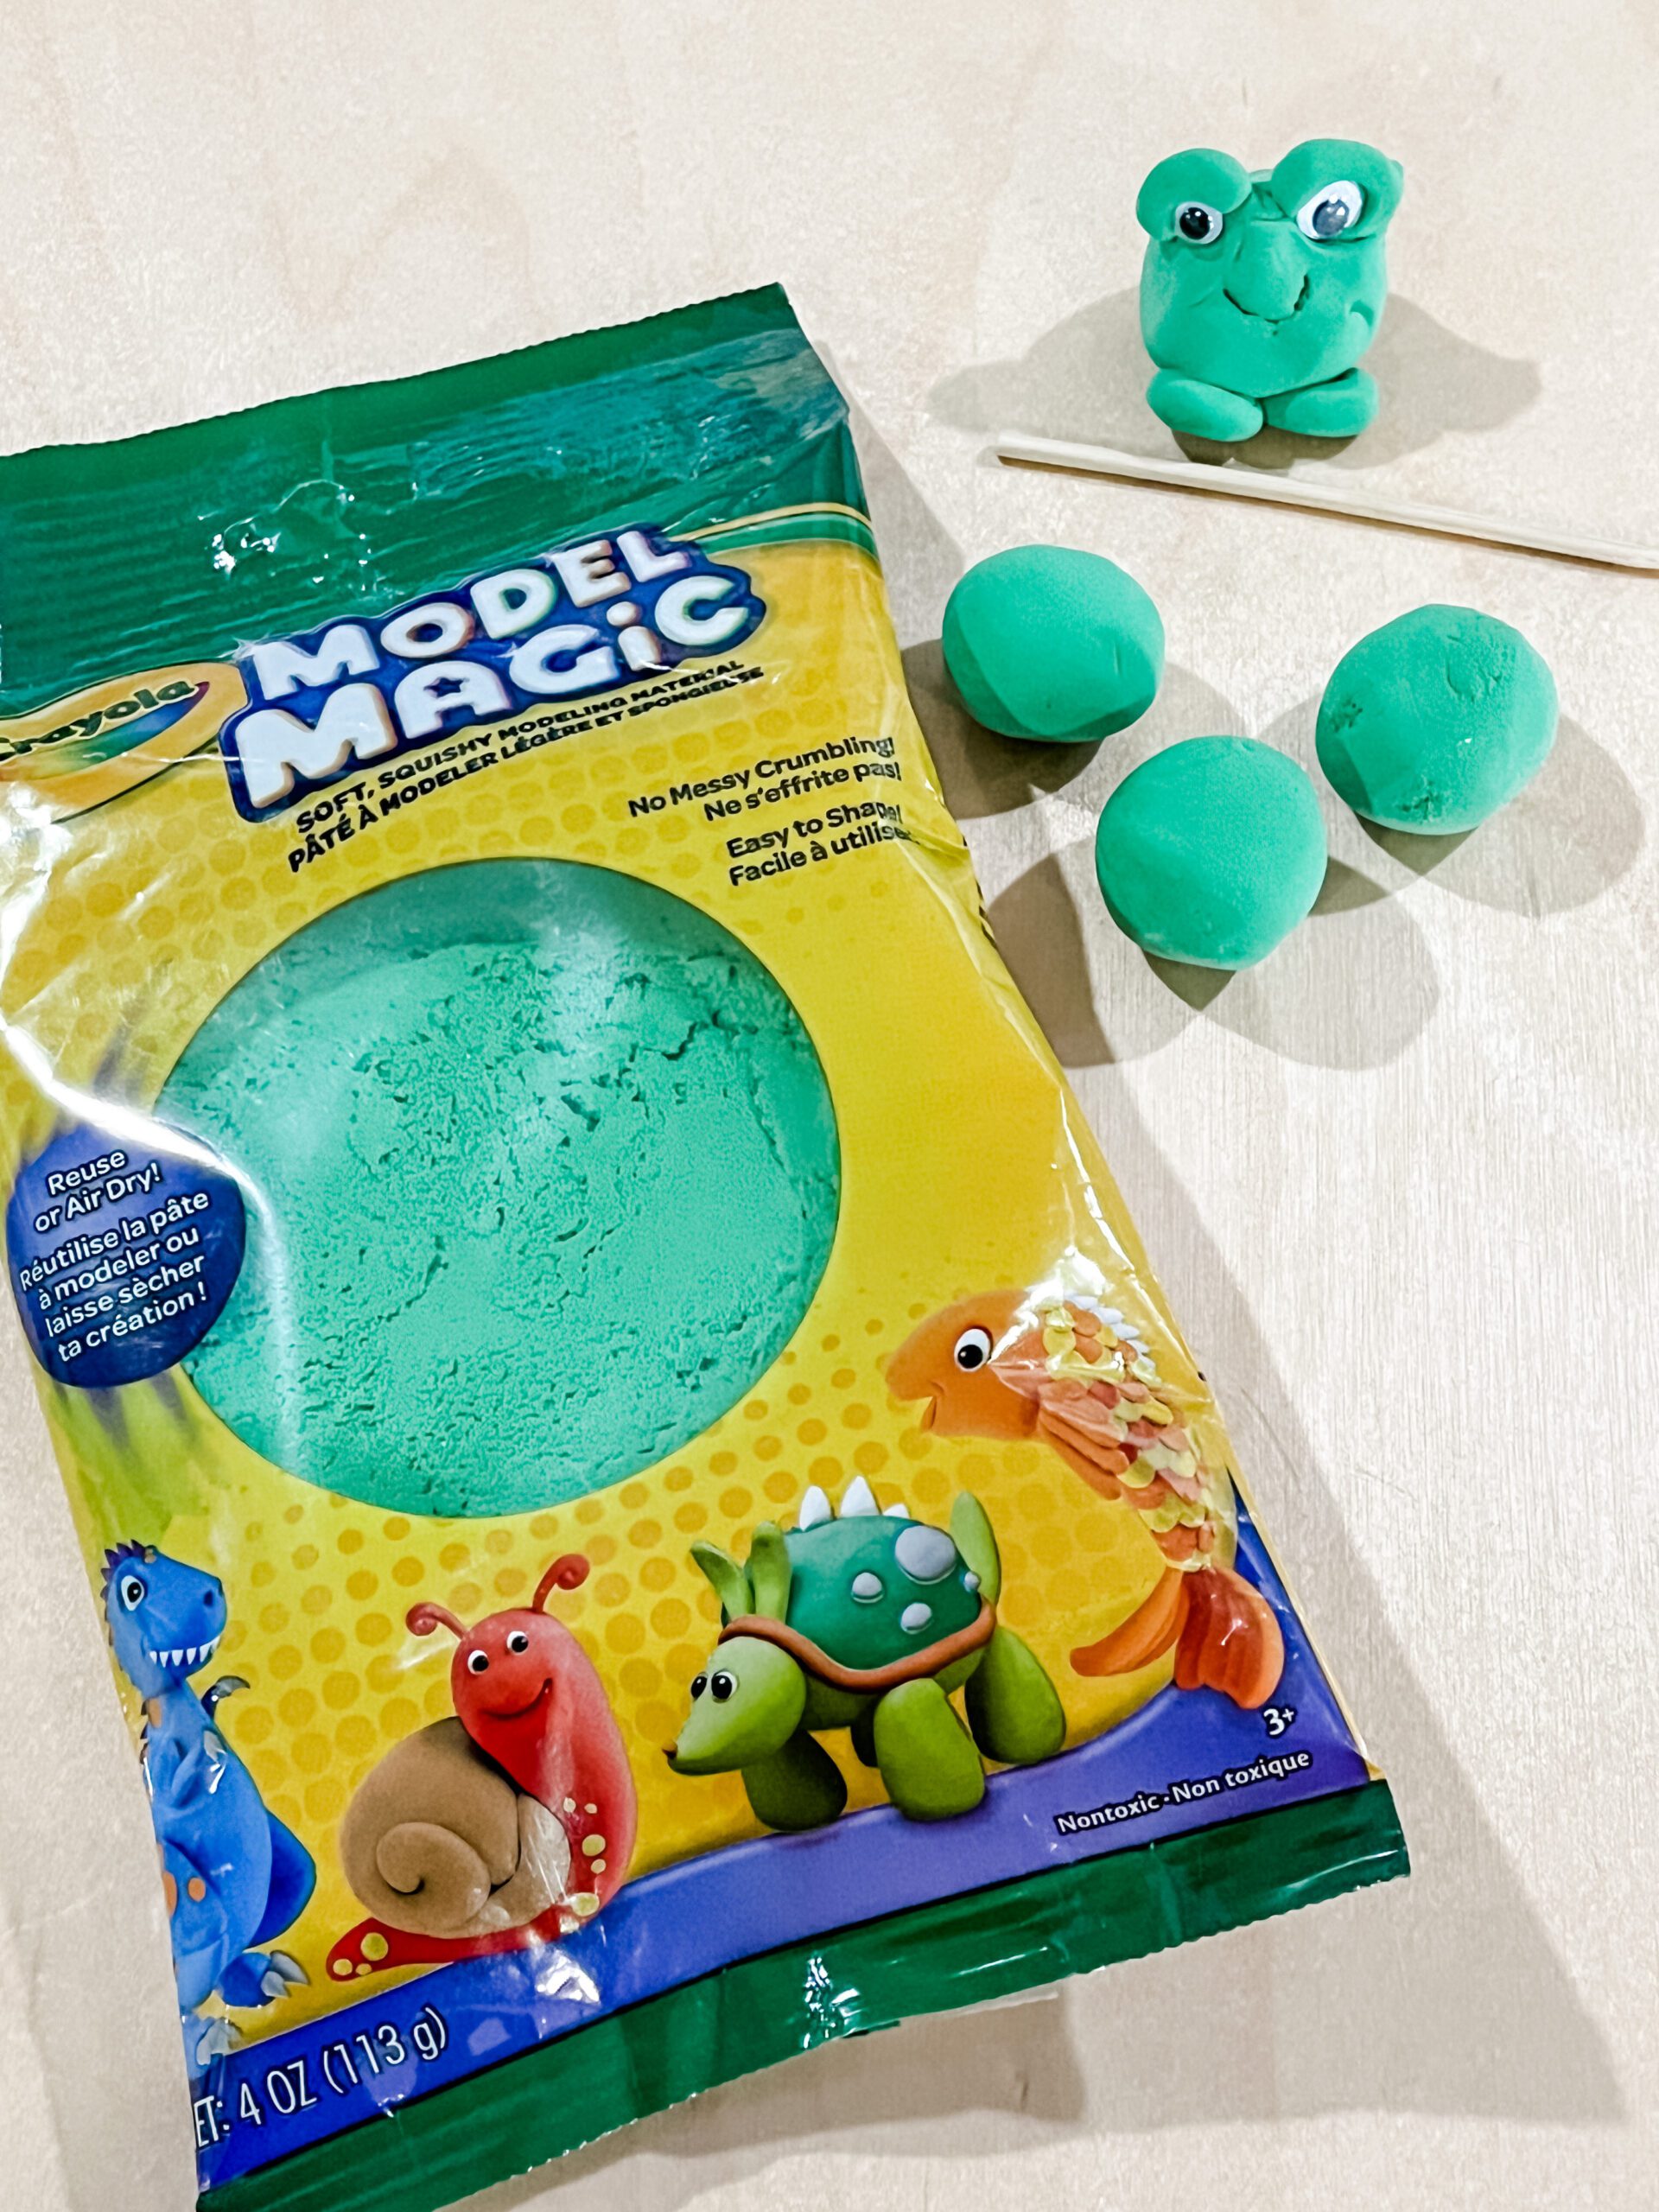
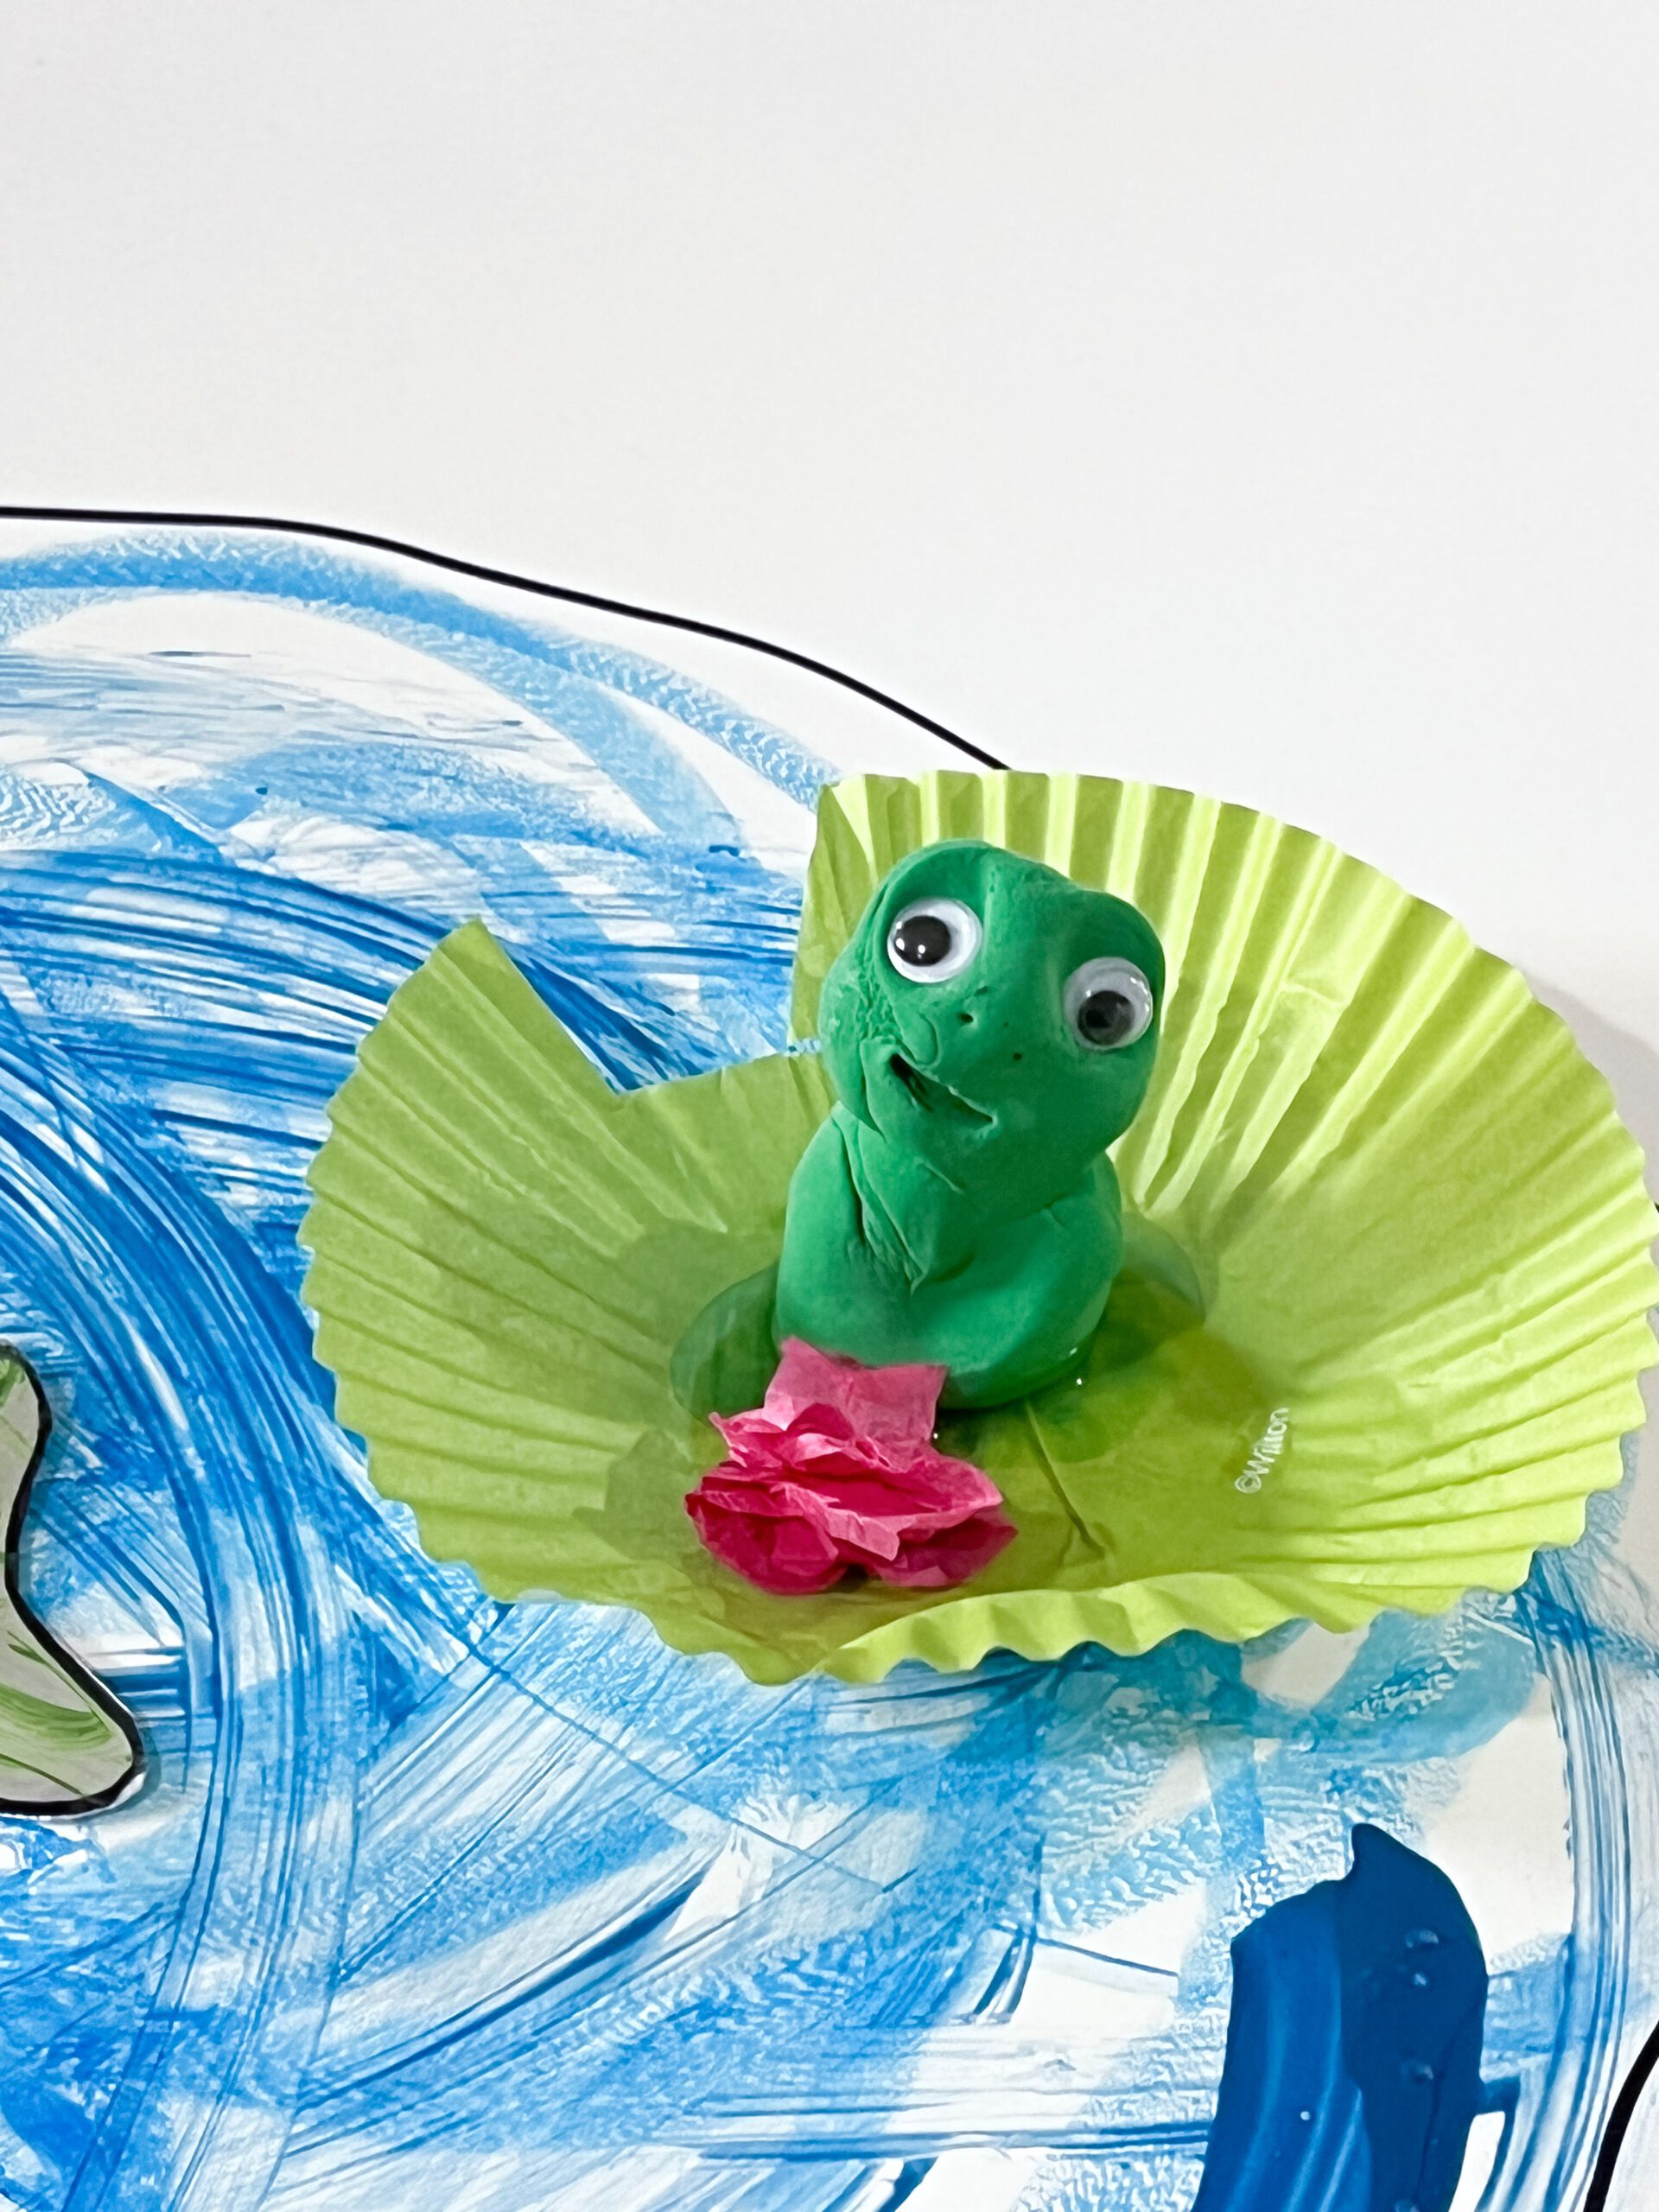
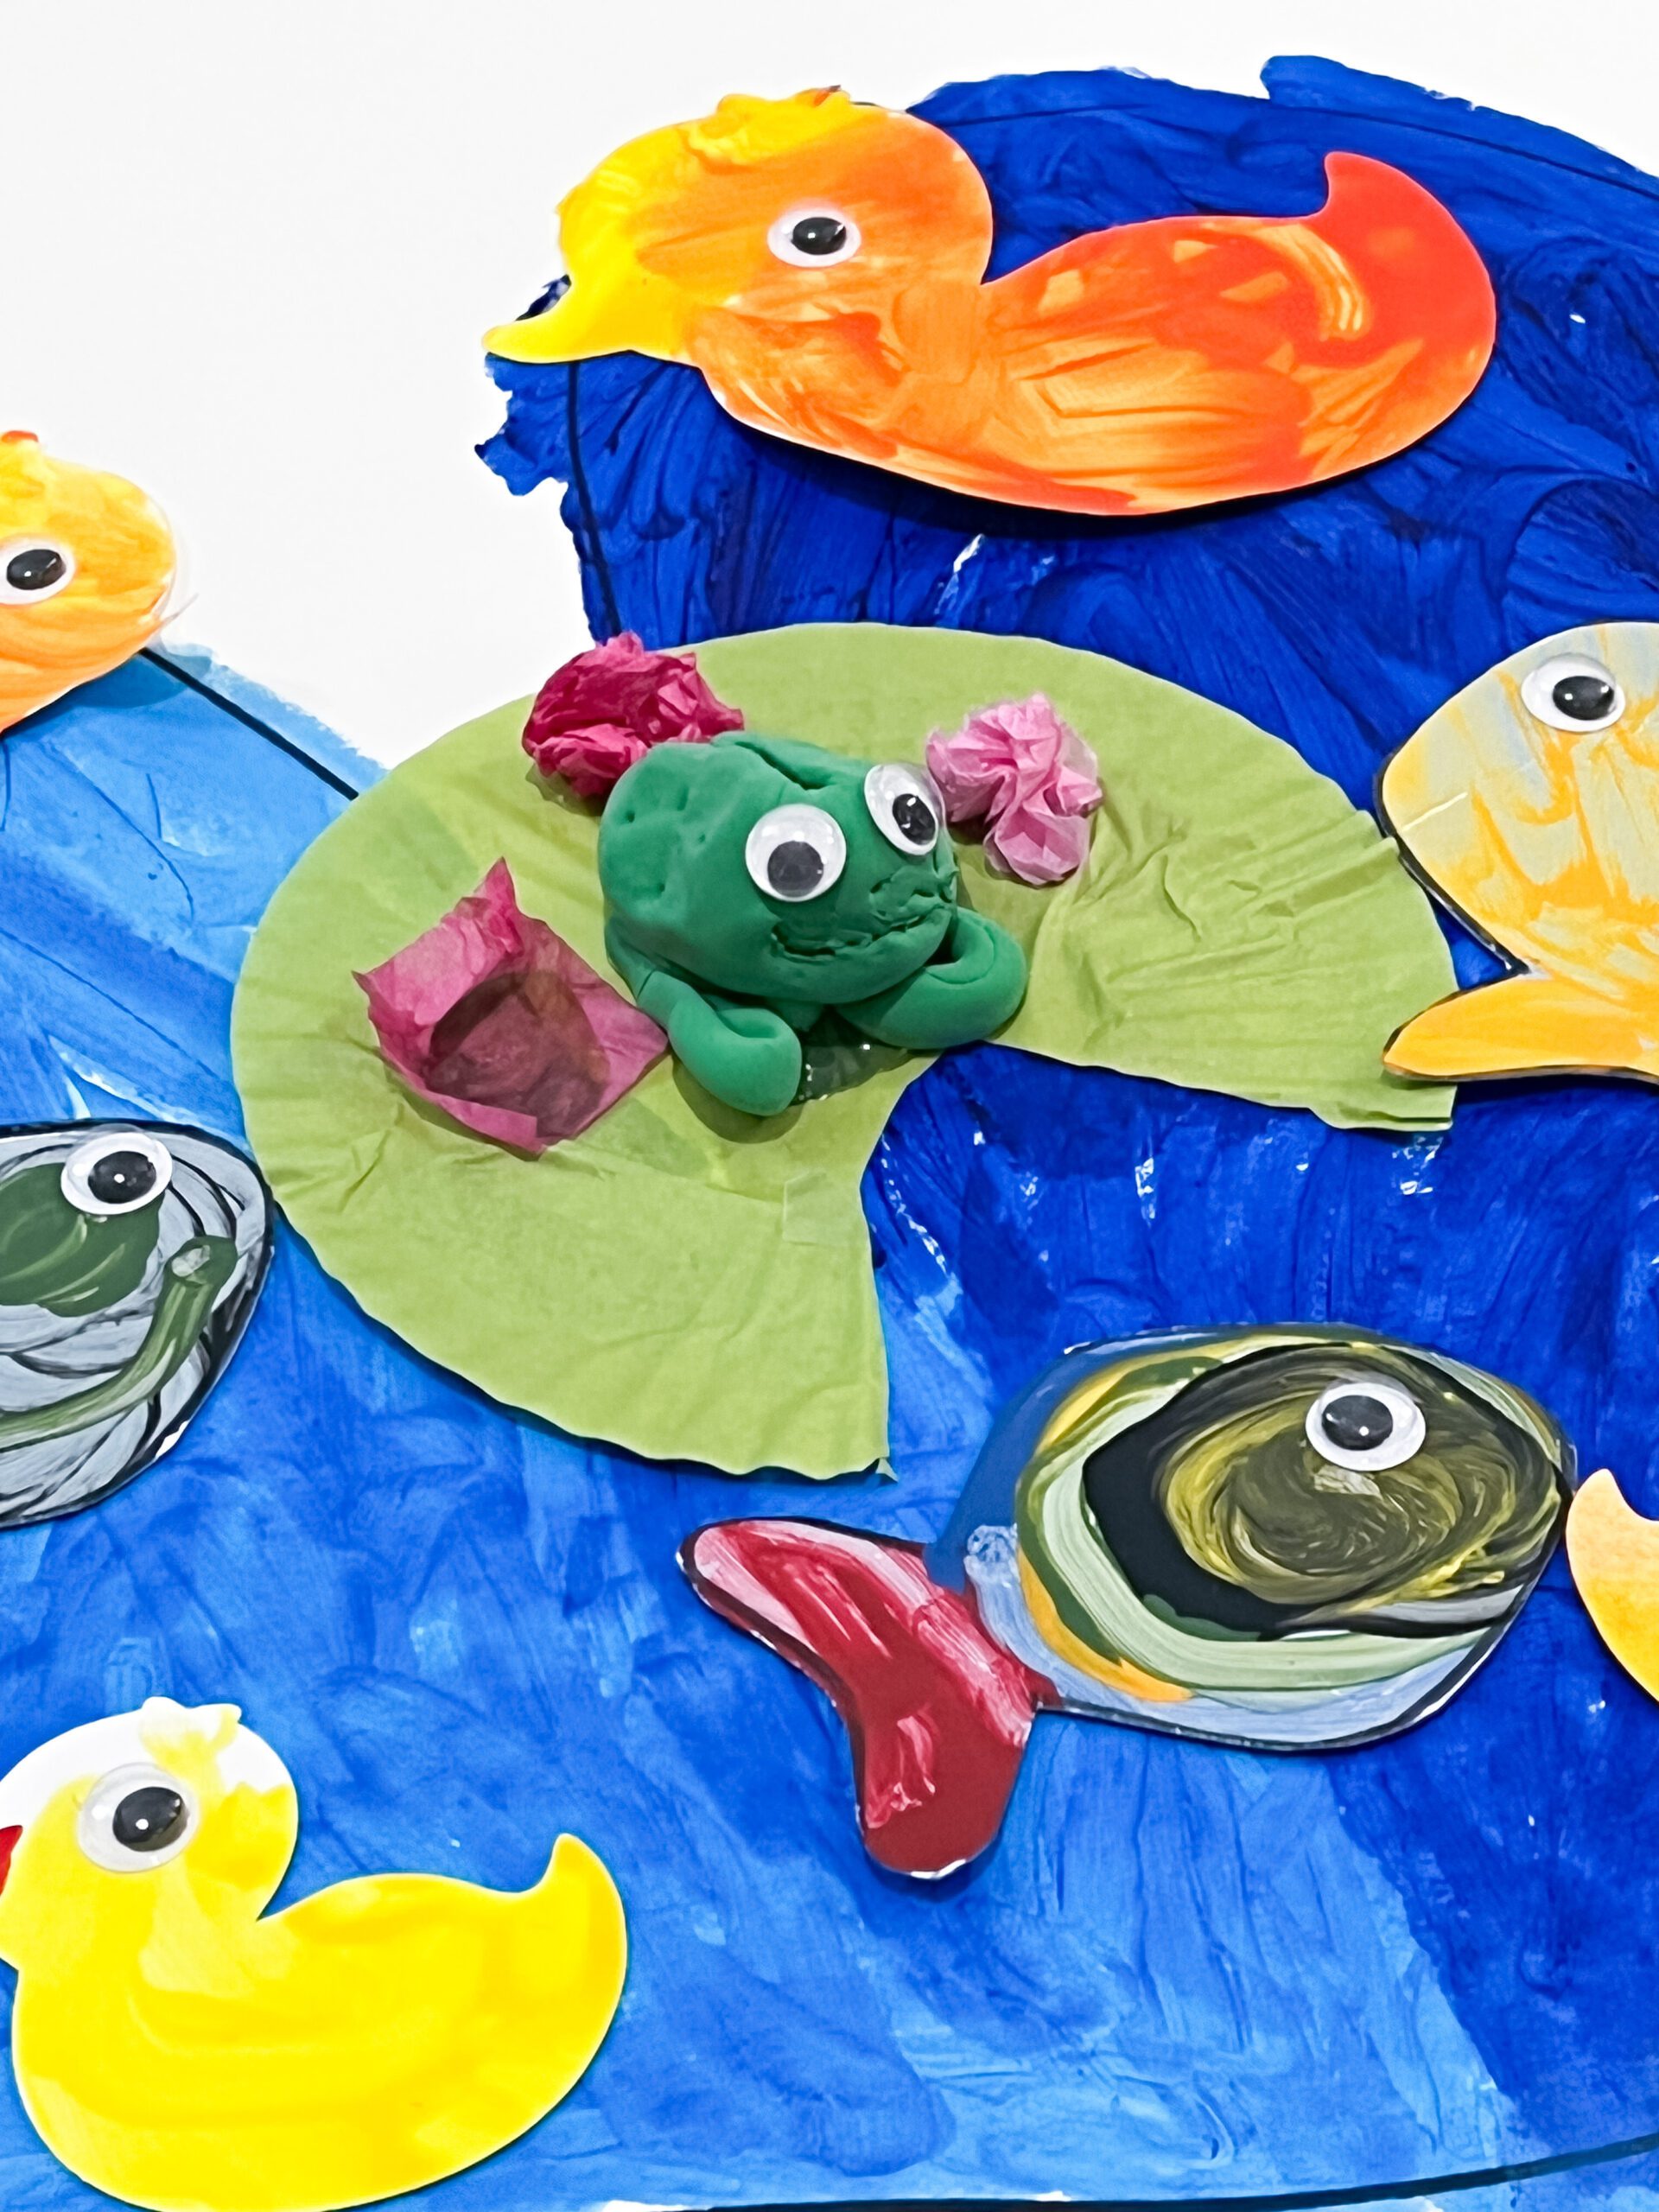
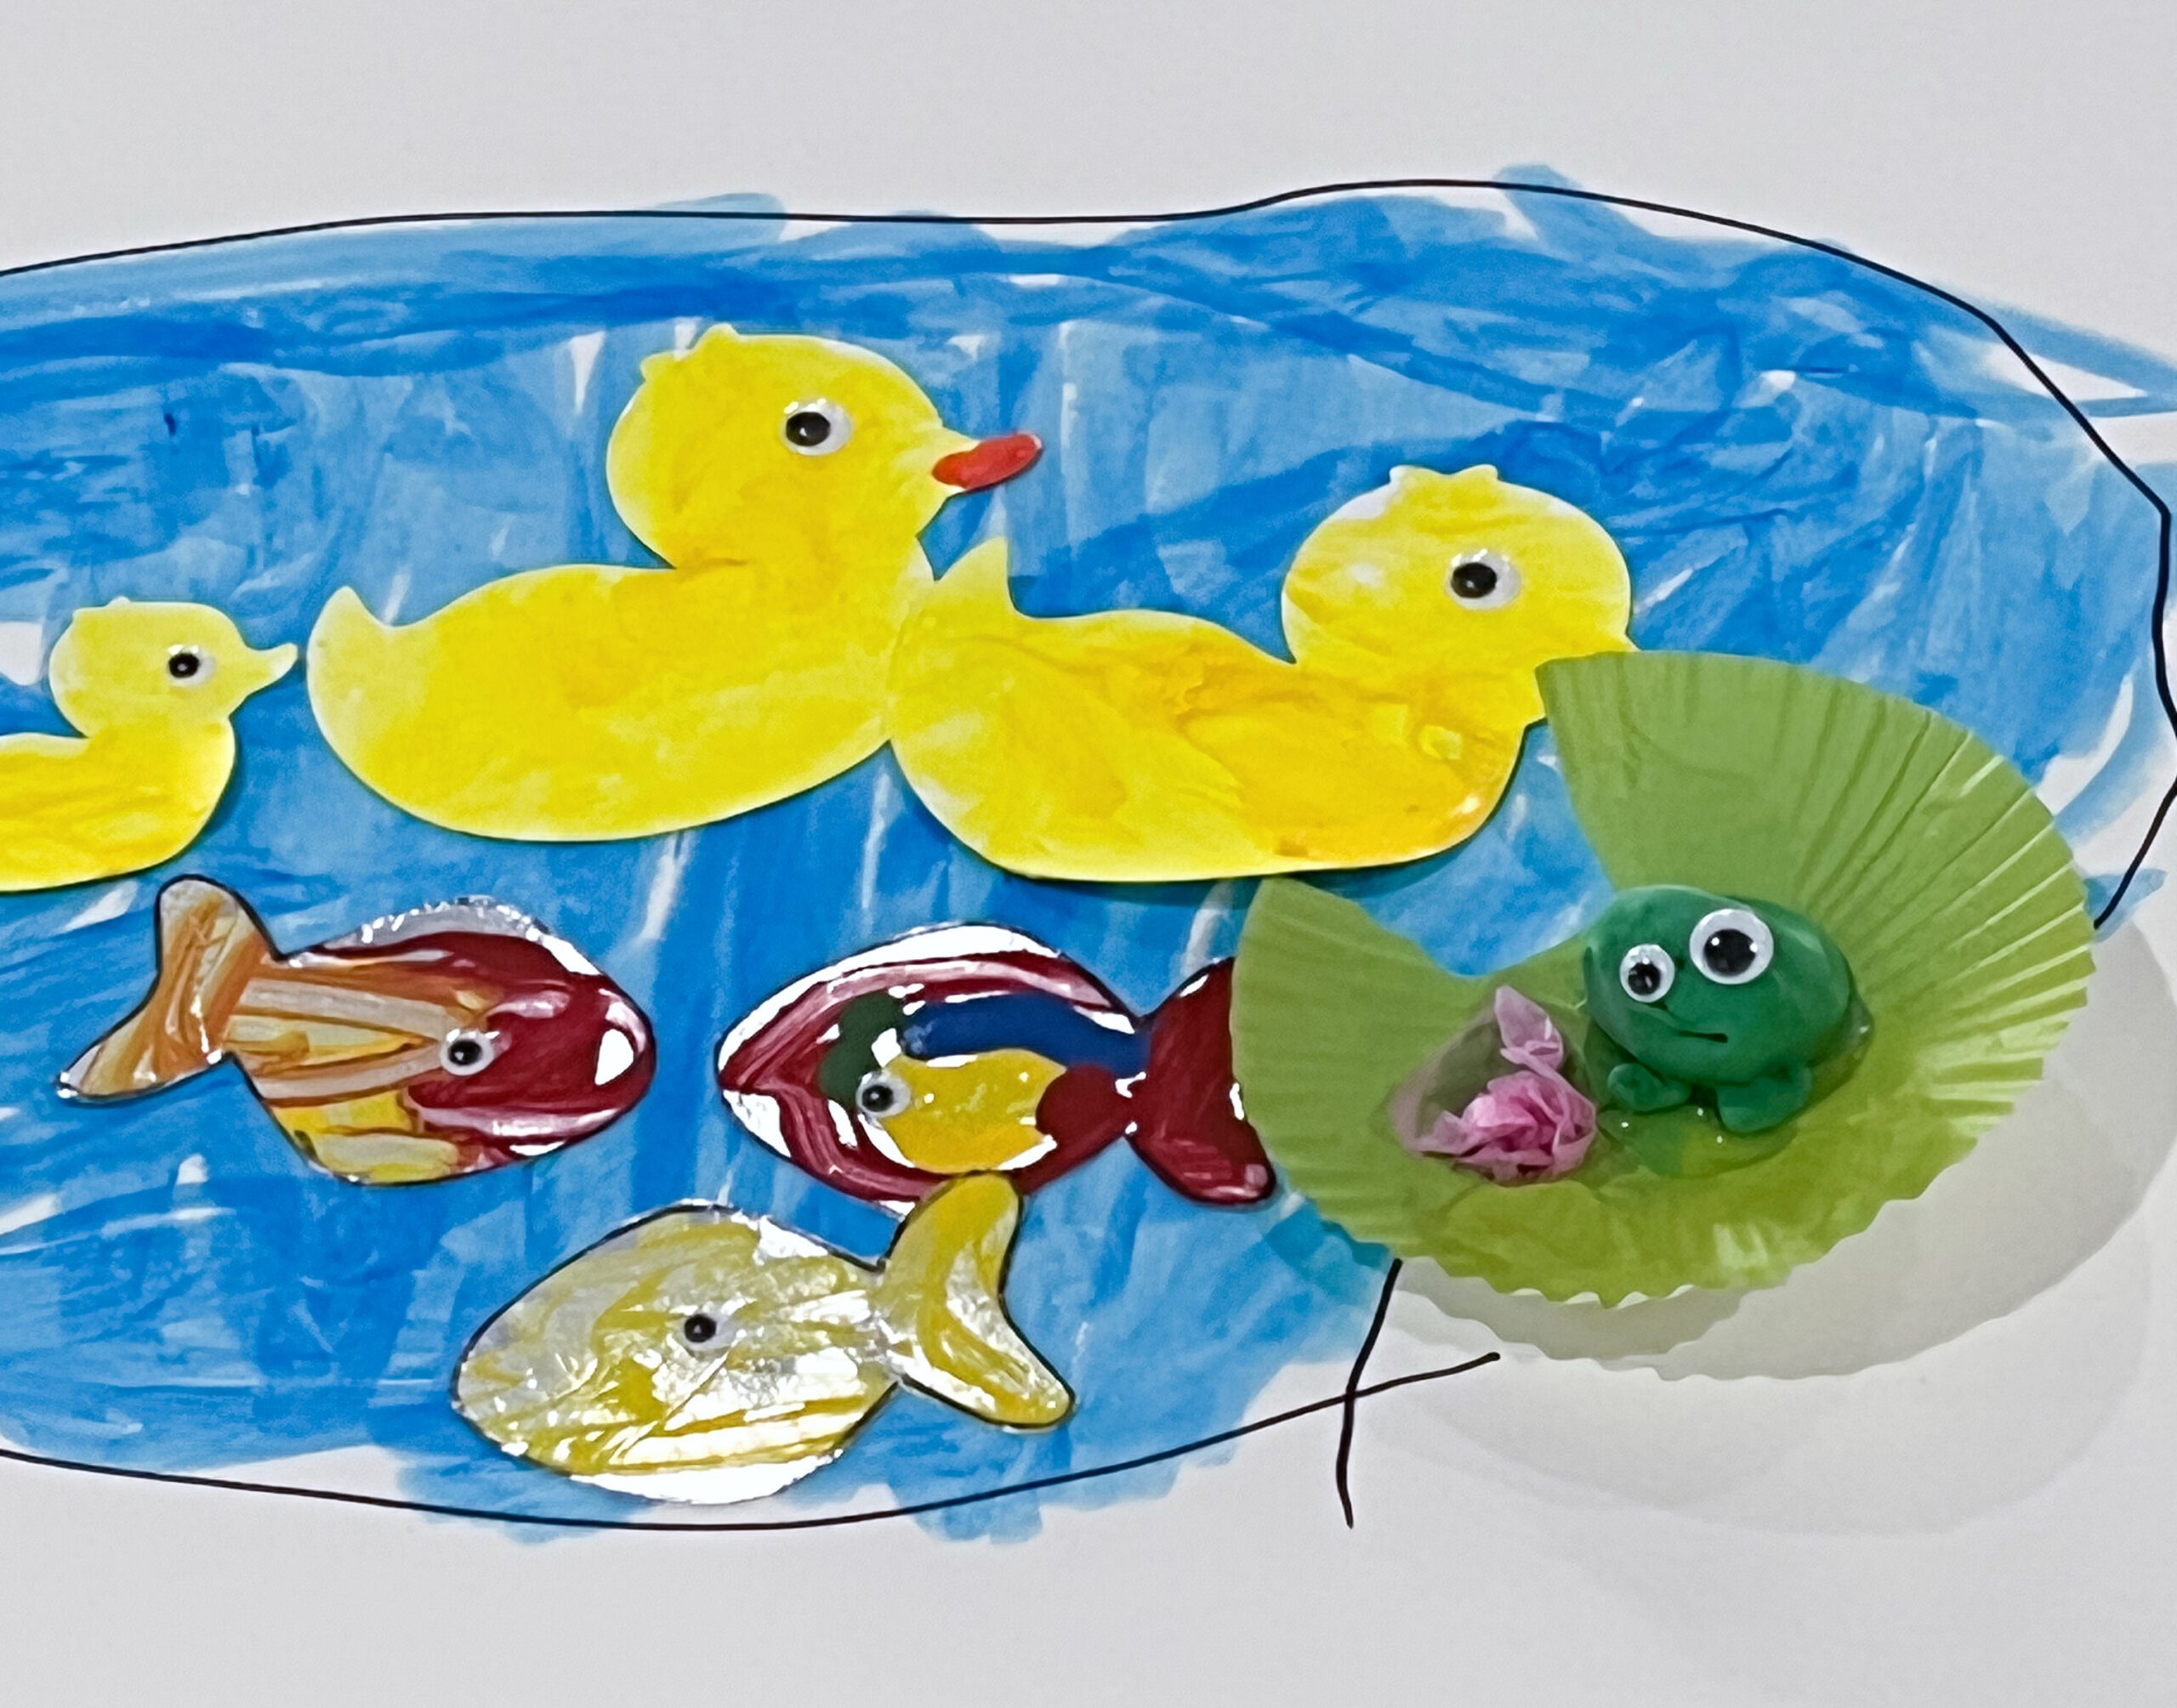
Supplies Needed to add Little Frogs:
- clay frogs (details here)
- Clear glue
These adorable little frogs are just begging to hop into the pond project! First, create the frogs using the method described in this post here. The students decide where they’d like the lilypad to be placed and attach it using glue.
Day 5 – Slow and Steady!
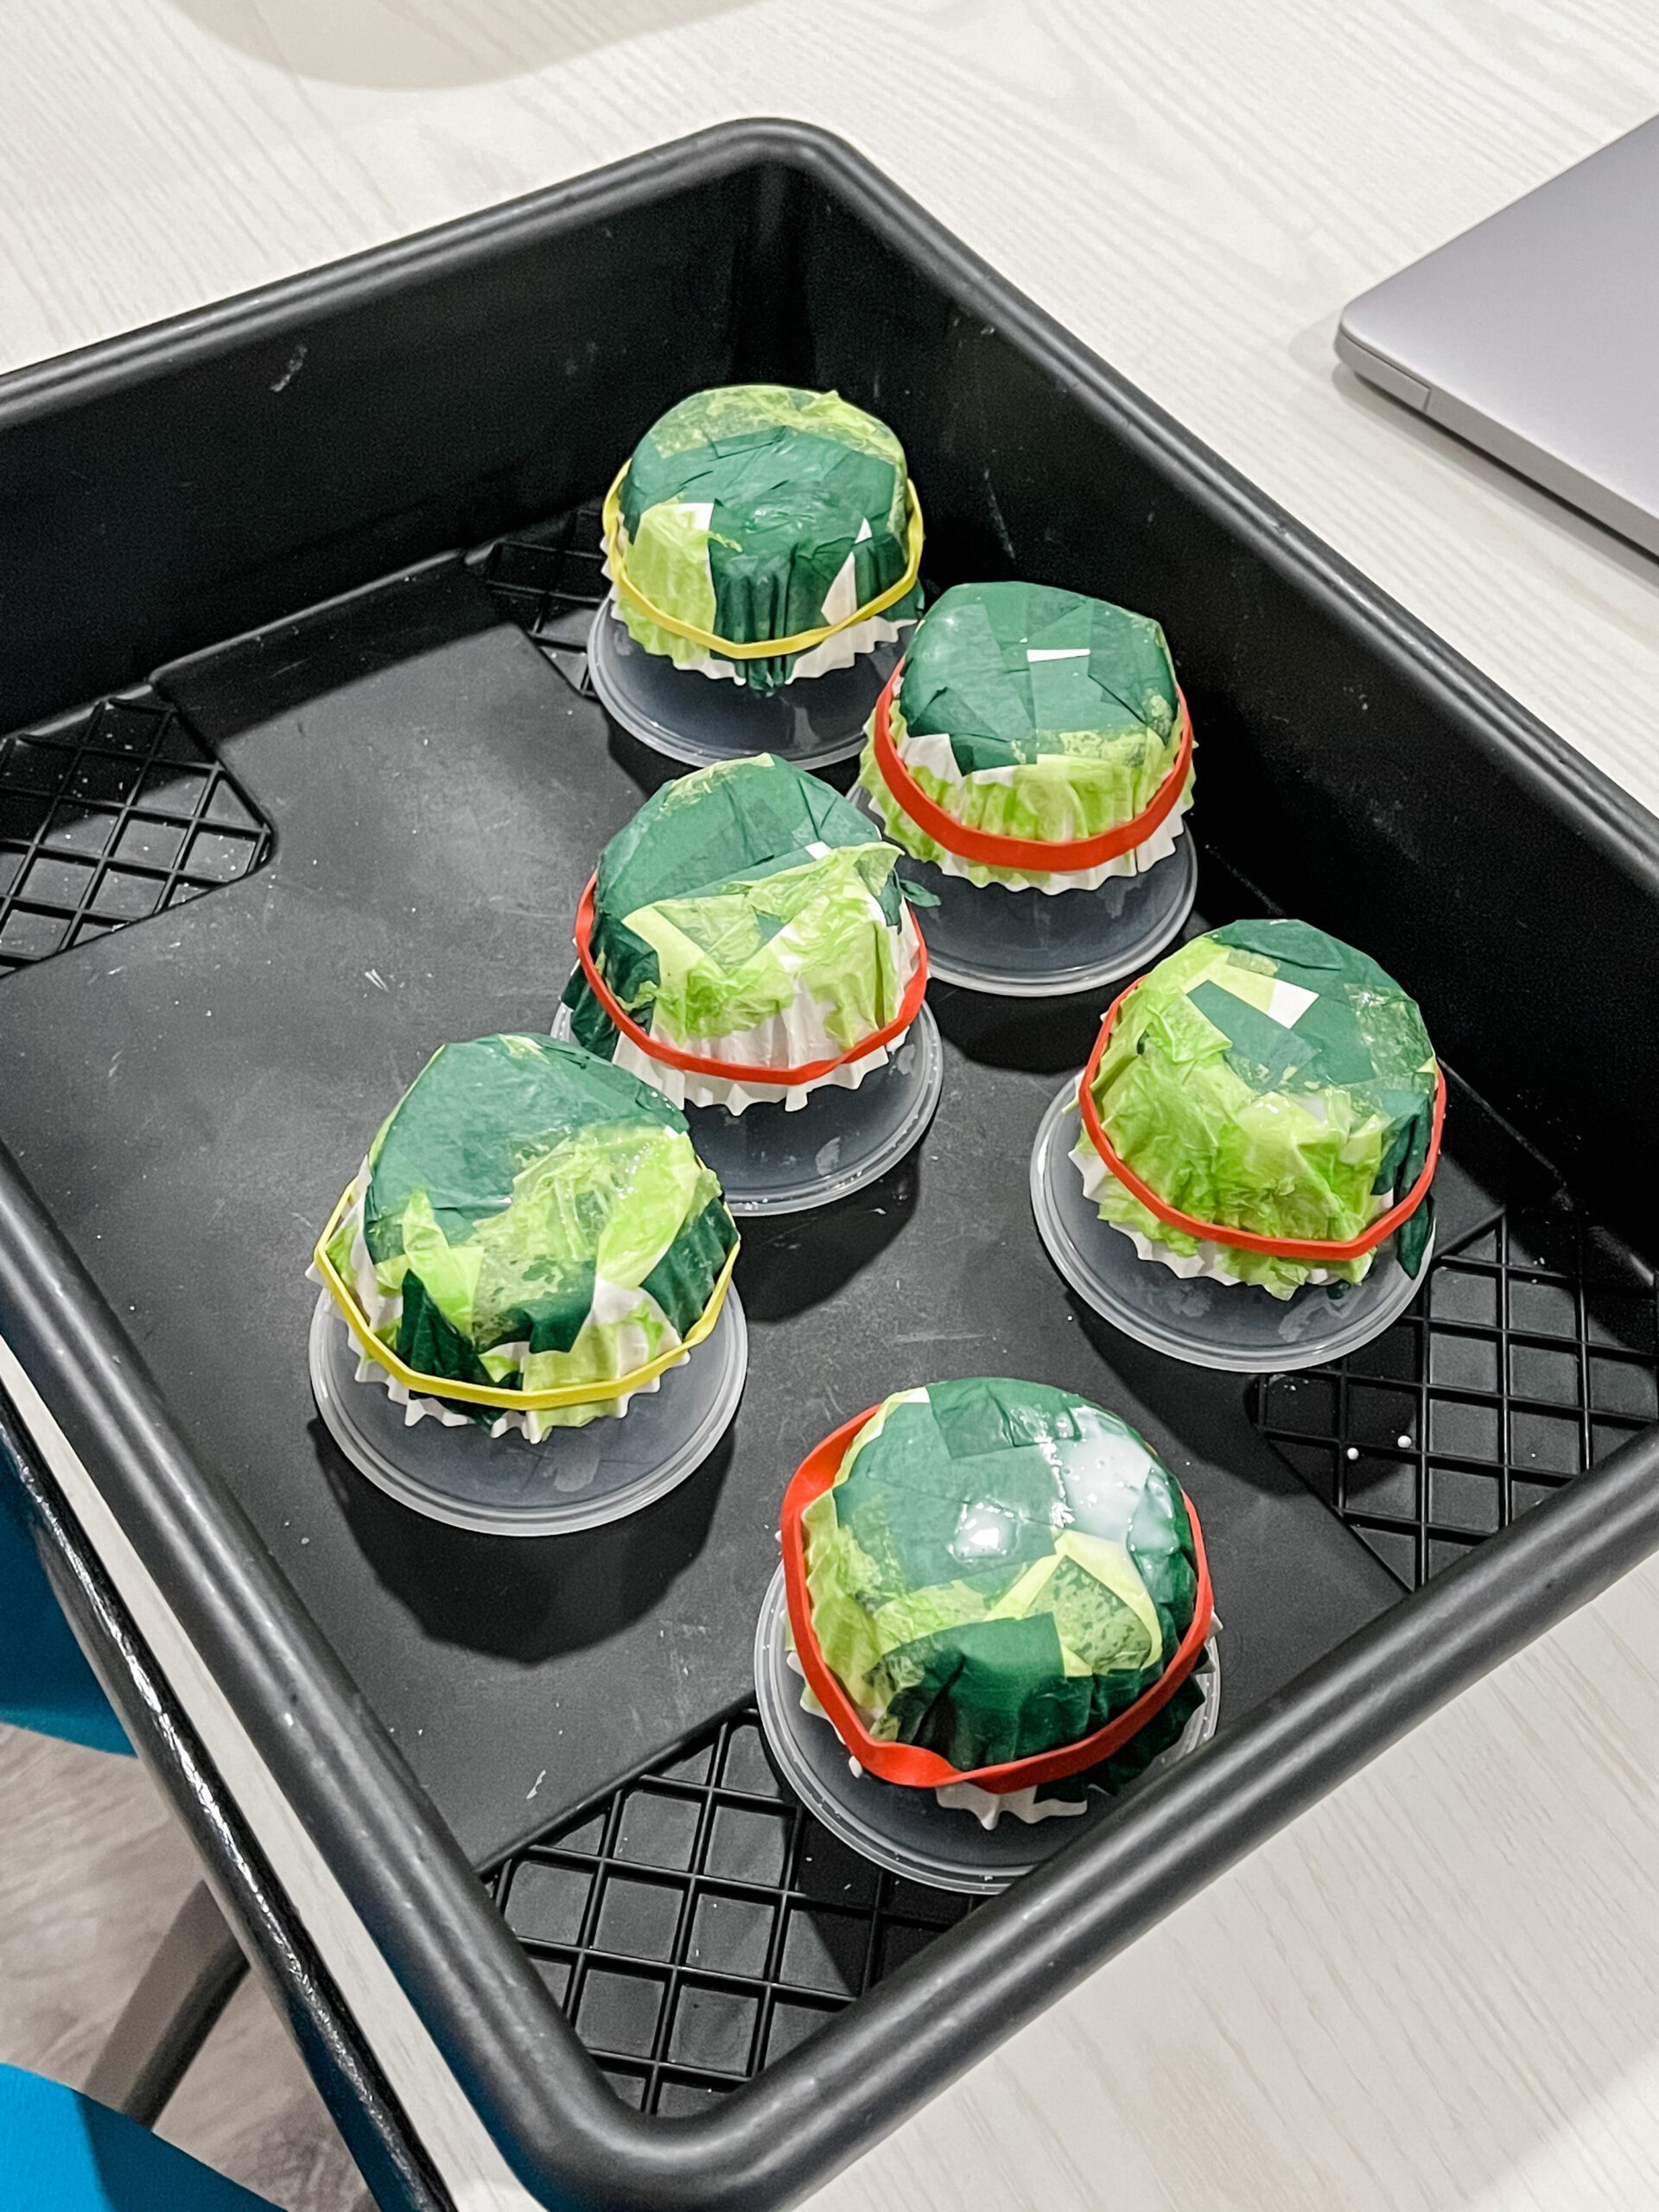

Supplies Needed to make Decopouge Turtles:
- small disposable cups
- various shades of green, white, and brown tissue paper
- rubber bands
- cupcake liners or these craft cups from Discount School Supply
- white glue
- happy turtle body printed on cardstock or heavy paper
First, students tear the tissue paper into small pieces. Next, they apply the tissue paper pieces to the outside of the craft cups using white glue and paintbrushes. After all of the tissue is applied, students paint the outside of the craft cup with a thin layer of white glue.
Take the craft cups and put them over the bottom of small plastic disposable cups or inverted muffin tin. Secure with a rubber band to hold the shape, and let it dry. While the shell is drying, students can cut out and color the happy turtle shape. (Click HERE to download the turtle shapes.)
When the shell is dry, remove the rubber band, and attach it to the decorated turtle shape using a little hot glue (grownups only, of course!).
Day 6 – Grass, Mud, and Worms
Supplies Needed for this step of the preschool pond:
- brown and green construction paper
- brown and green markers, crayons, quick stix, etc.
- scissors
- glue
Look at pictures of a real pond or, if possible, visit one. Talk about what is around the pond – the tall grasses and, of course, the mud! Discuss how the mud and tall grass help animals live at the pond. Students then decorate the area around their ponds with construction paper and coloring materials.
Day 7 – Beautiful Butterflies
Supplies Needed for Beautiful Butterflies
- Coffee Filters
- markers, bingo daubers, or something similar to color the filters
- clothespins
- pipe cleaners (optional)
- pipettes, eye droppers, or small spray bottles
First, students flatten and color the coffee filters. Next, they spray them or drip water on them to make a watercolor effect. Scrunch the filter in the middle and clip it with the clothespin. Voilá! A butterfly! Attach the butterflies to the pond murals using glue. Need more in-depth instructions? Check out this post by Fireflies & Mudpies!
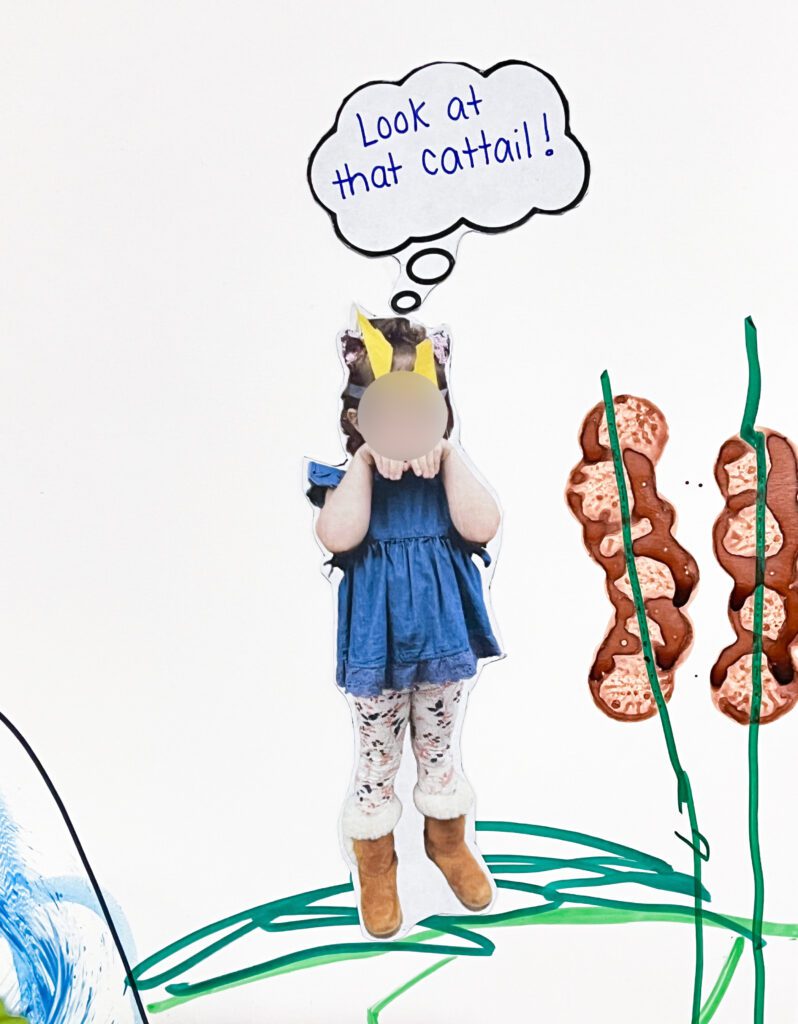
Day 8 – Cattails
Supplies Needed for Cattails
- green markers
- brown bingo daubers or paint
This is an easy step! Look at pictures with cattails, or even better, explore some real examples in the classroom. Then students add the stems to the mural with a green marker and the brown tops with the bingo daubers or thumbprints.
Day 9 – Adding Students to the Preschool Pond Mural
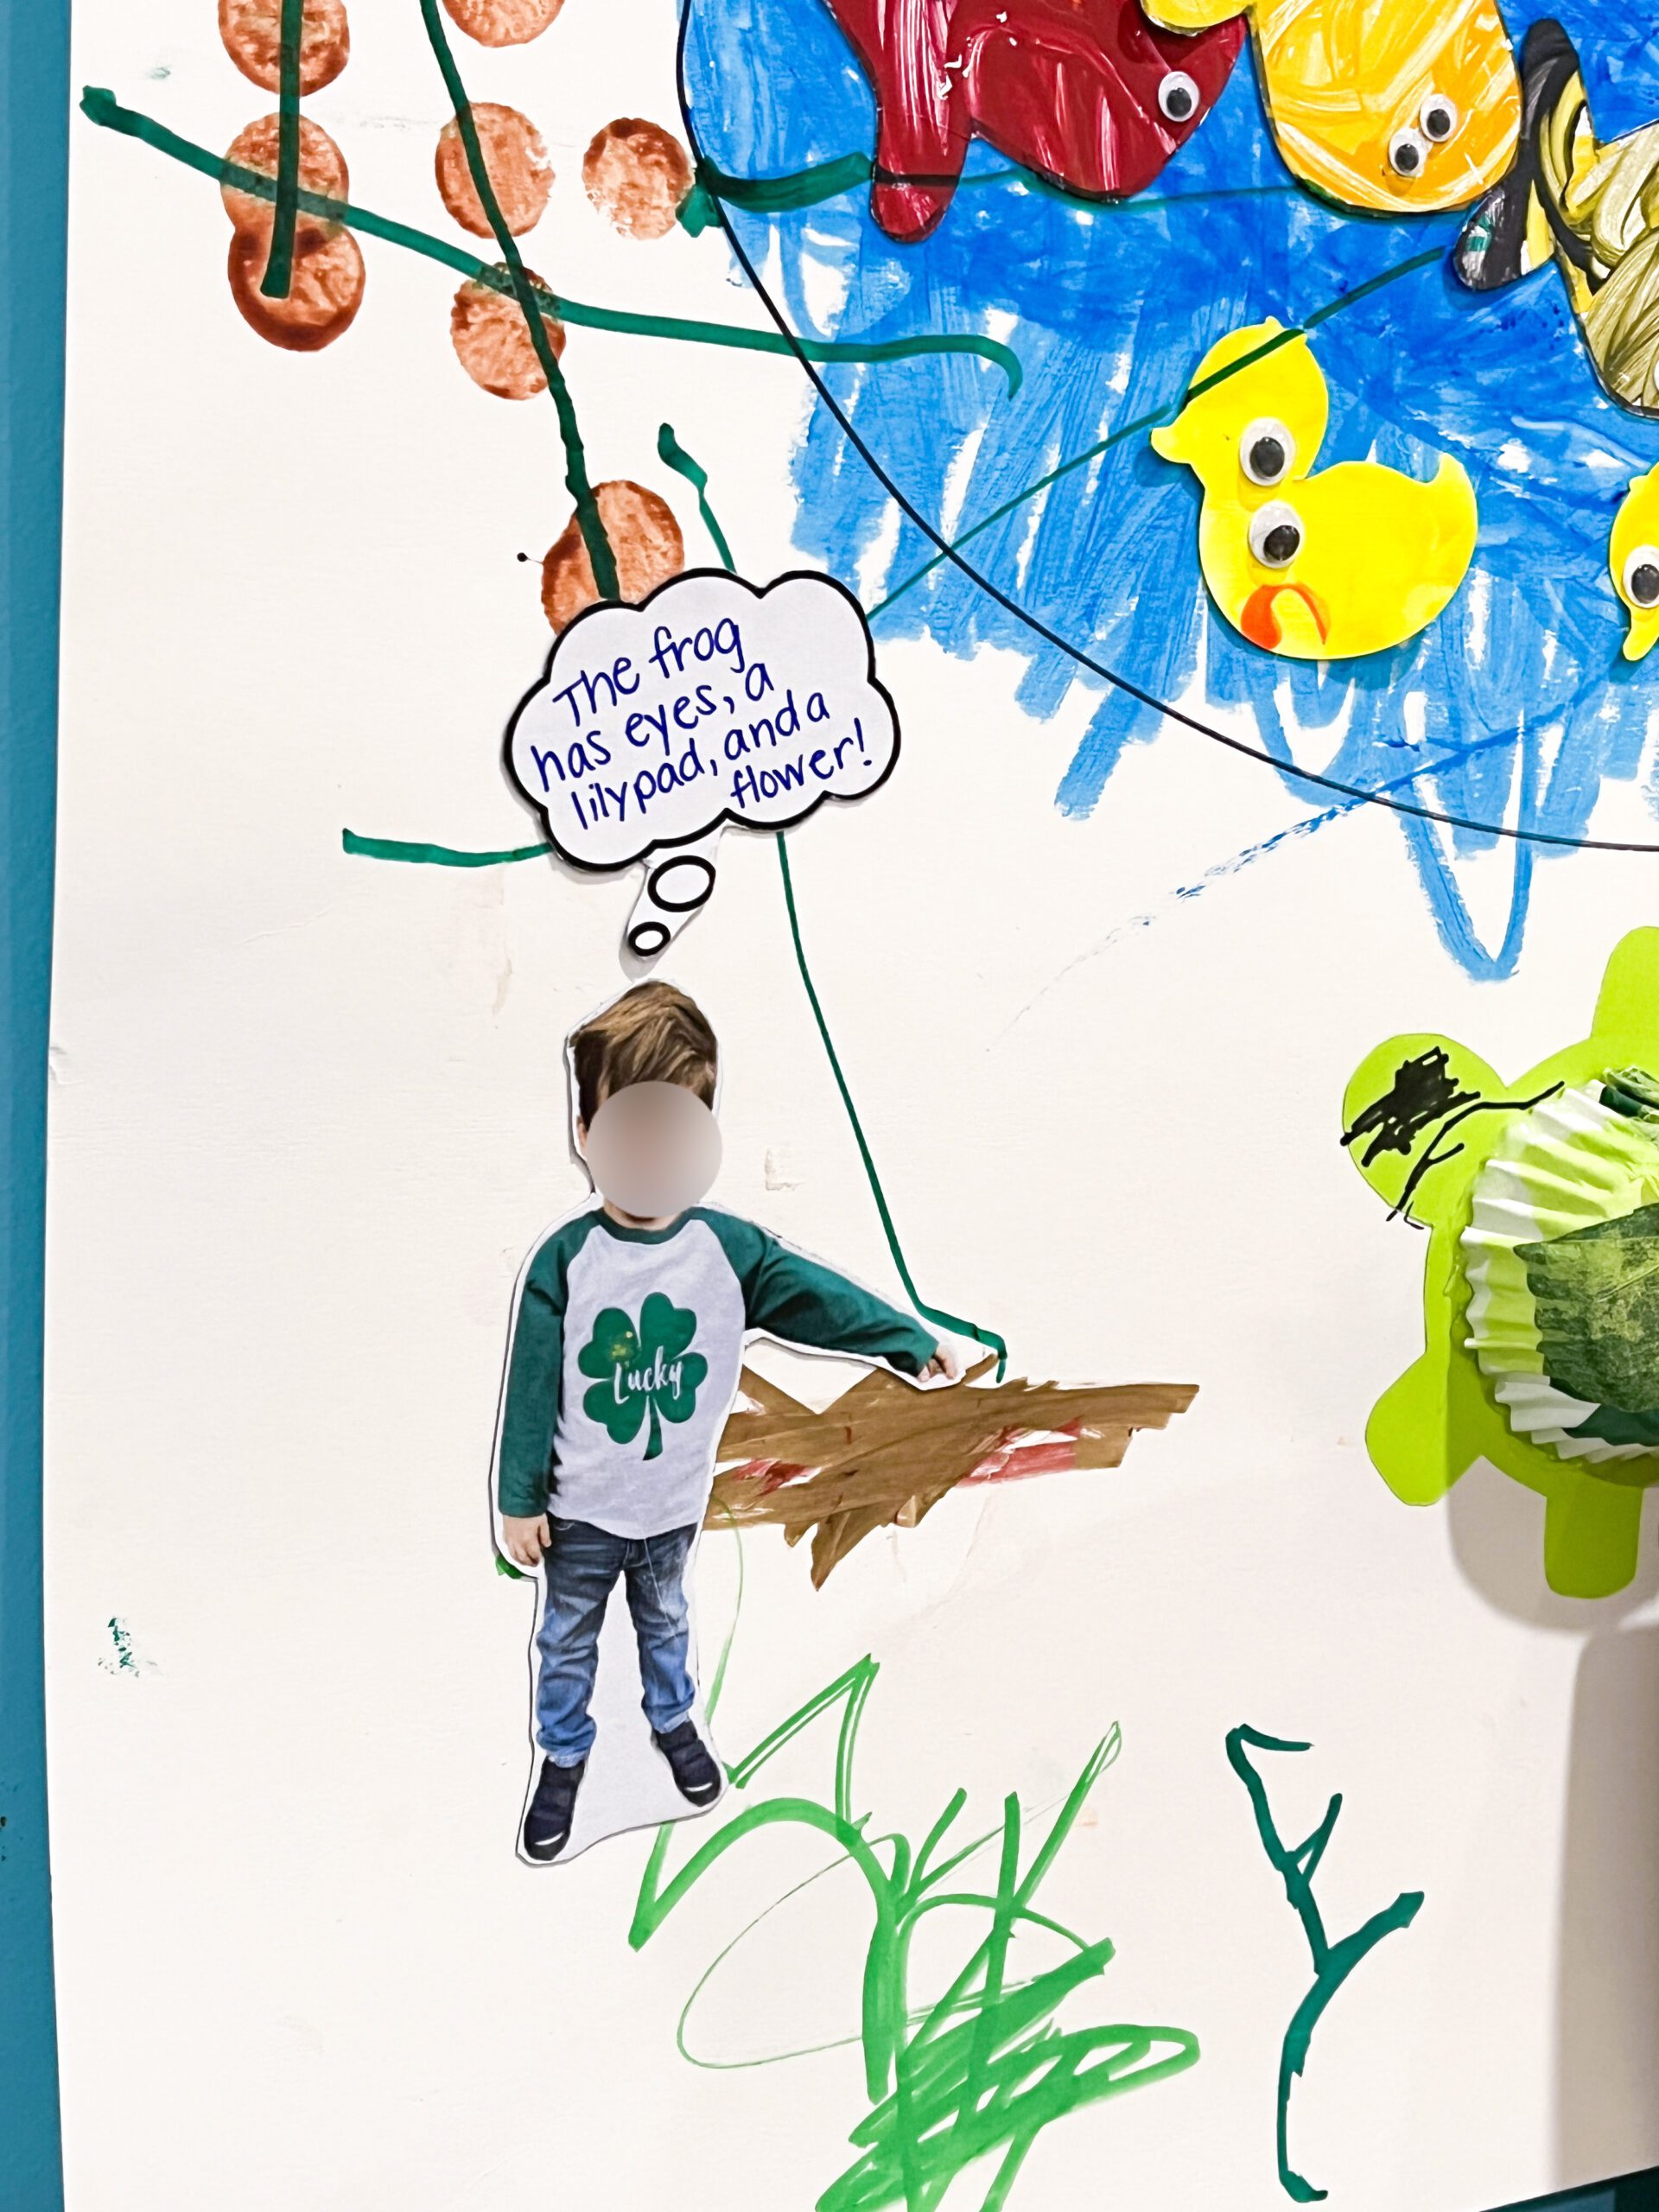
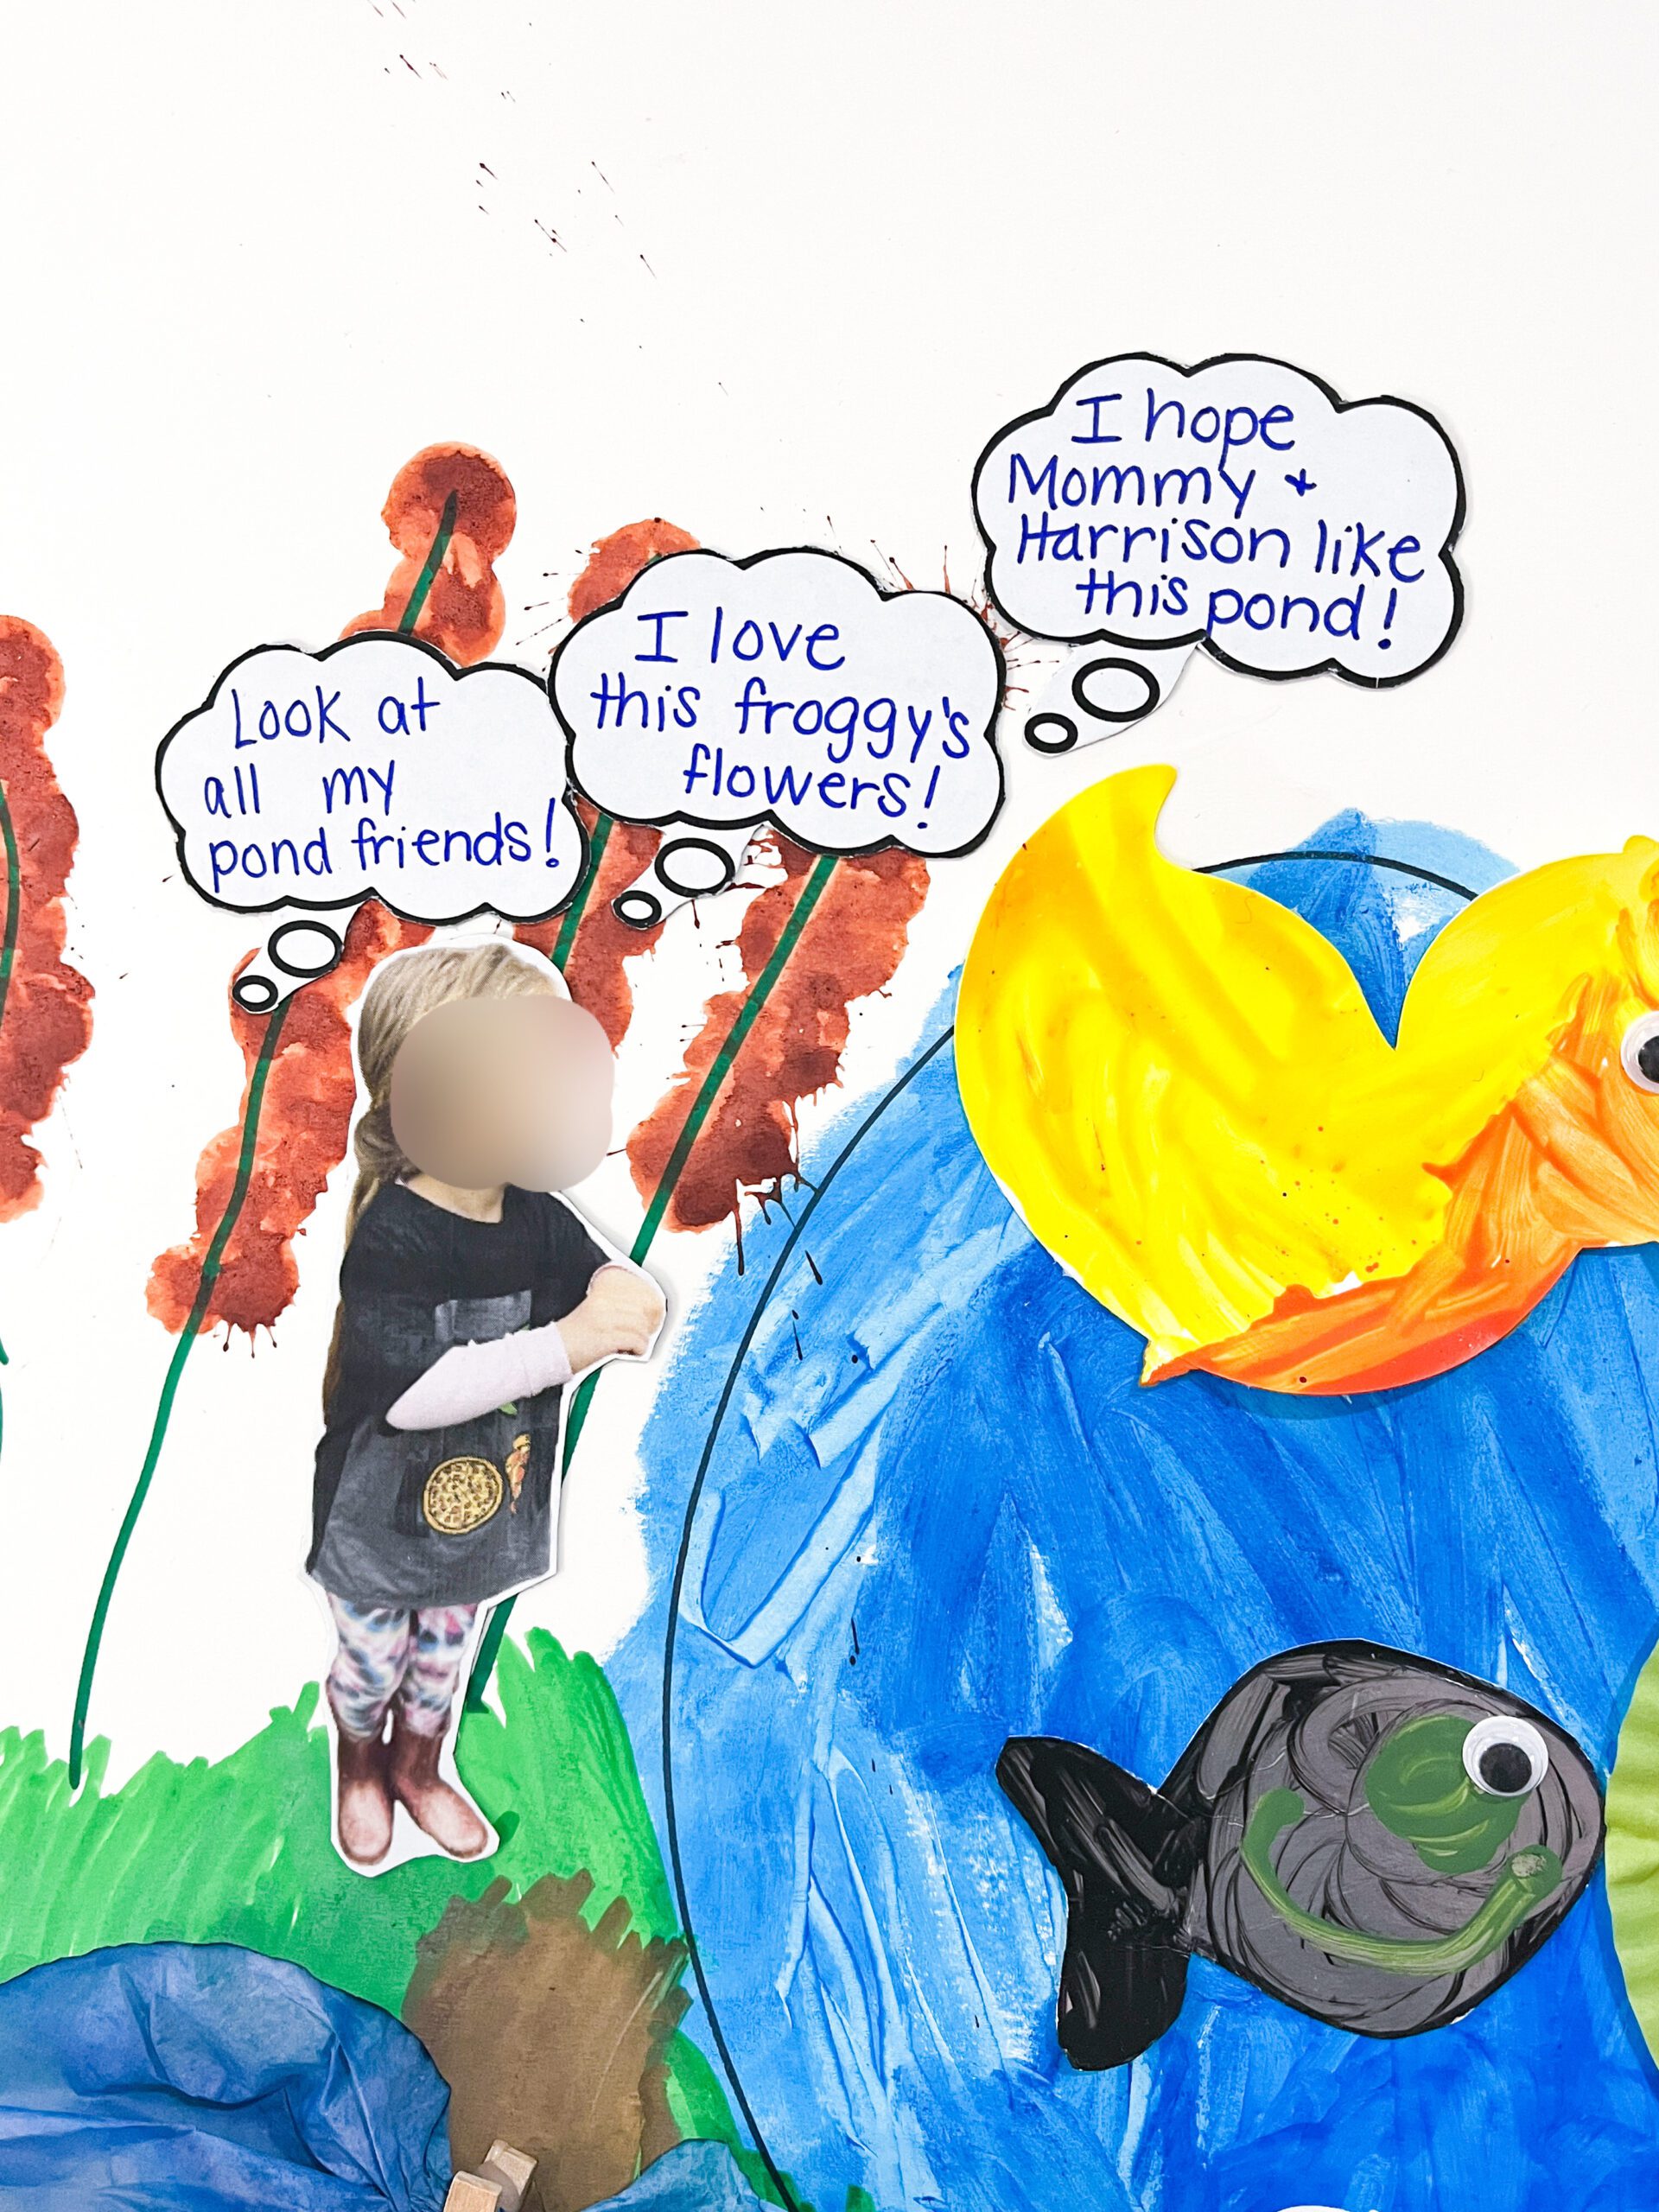
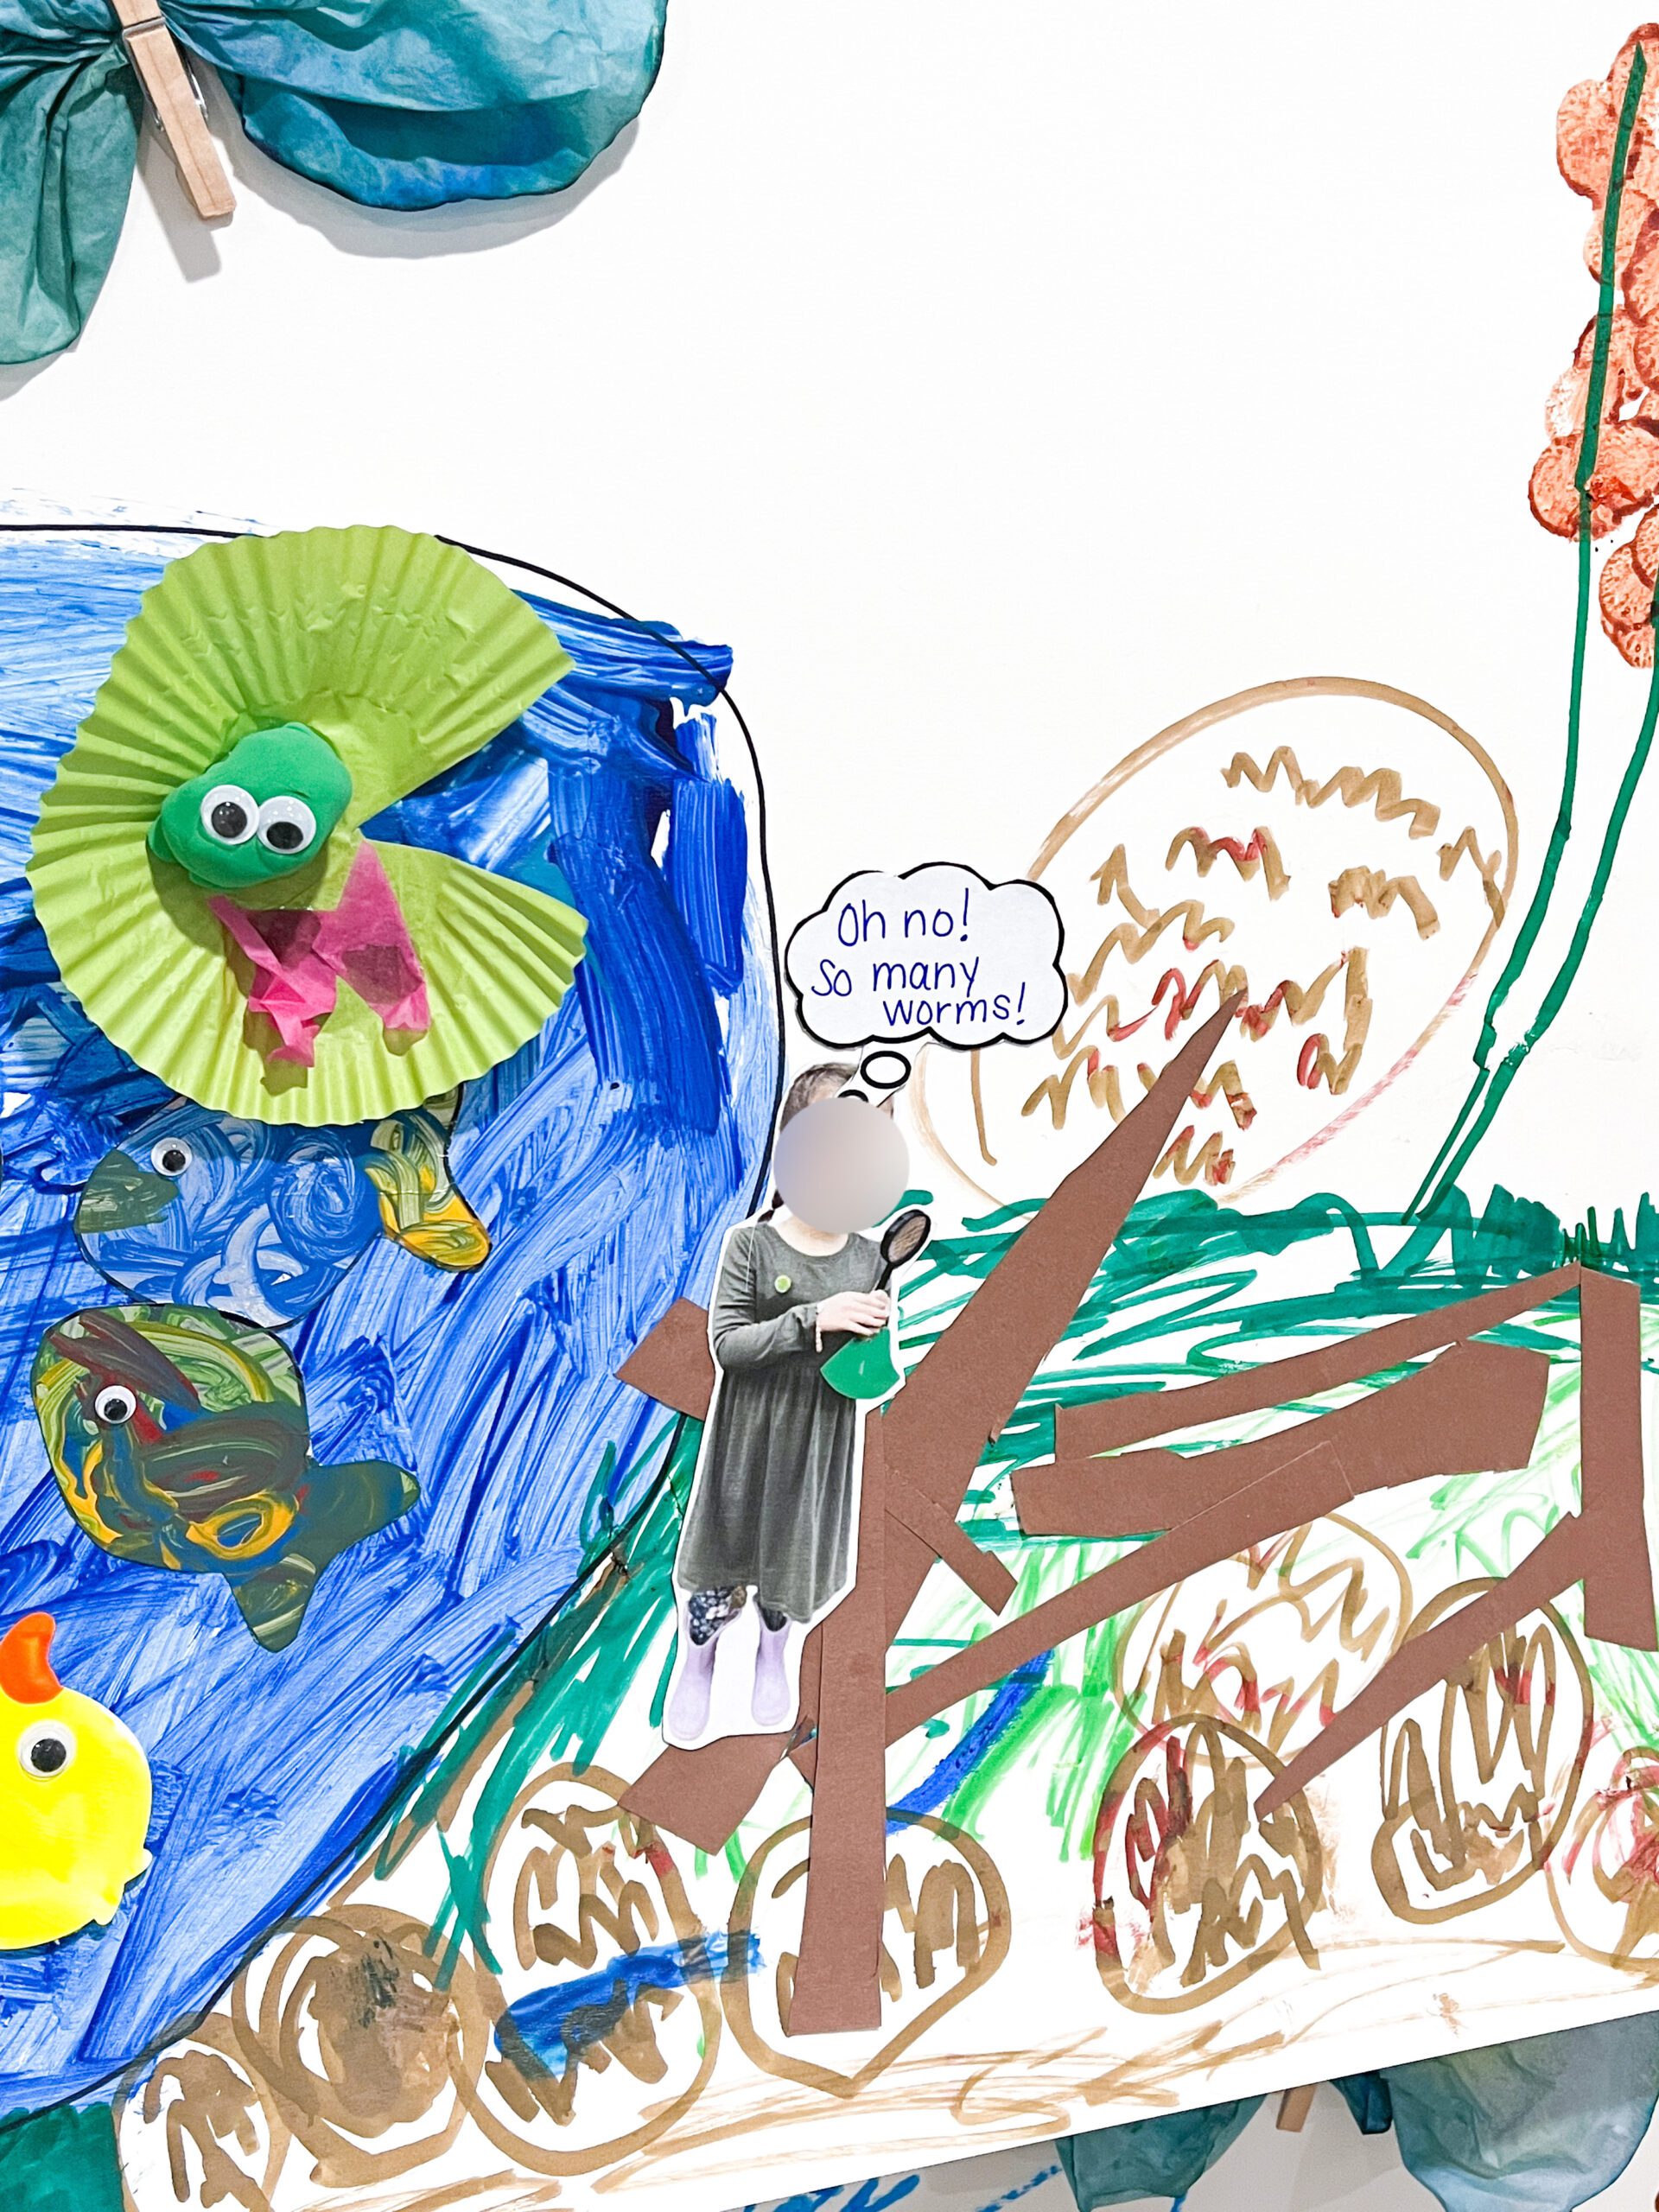
This is the only step of the mural that isn’t exactly process art – but it’s worth it! Take photos of the students in various poses. Print the images, and cut out the students. Have the student decide where they’d be standing, and ask them what they’d be thinking. Capture those thoughts on speech bubble stickers for a truly personal touch!
Day 10 – Finishing Touches on the Preschool Pond

For finishing touches, students can color the sign that says “My Pond.” As an extra, add rainbows and sponge-painted clouds to complete the scene.
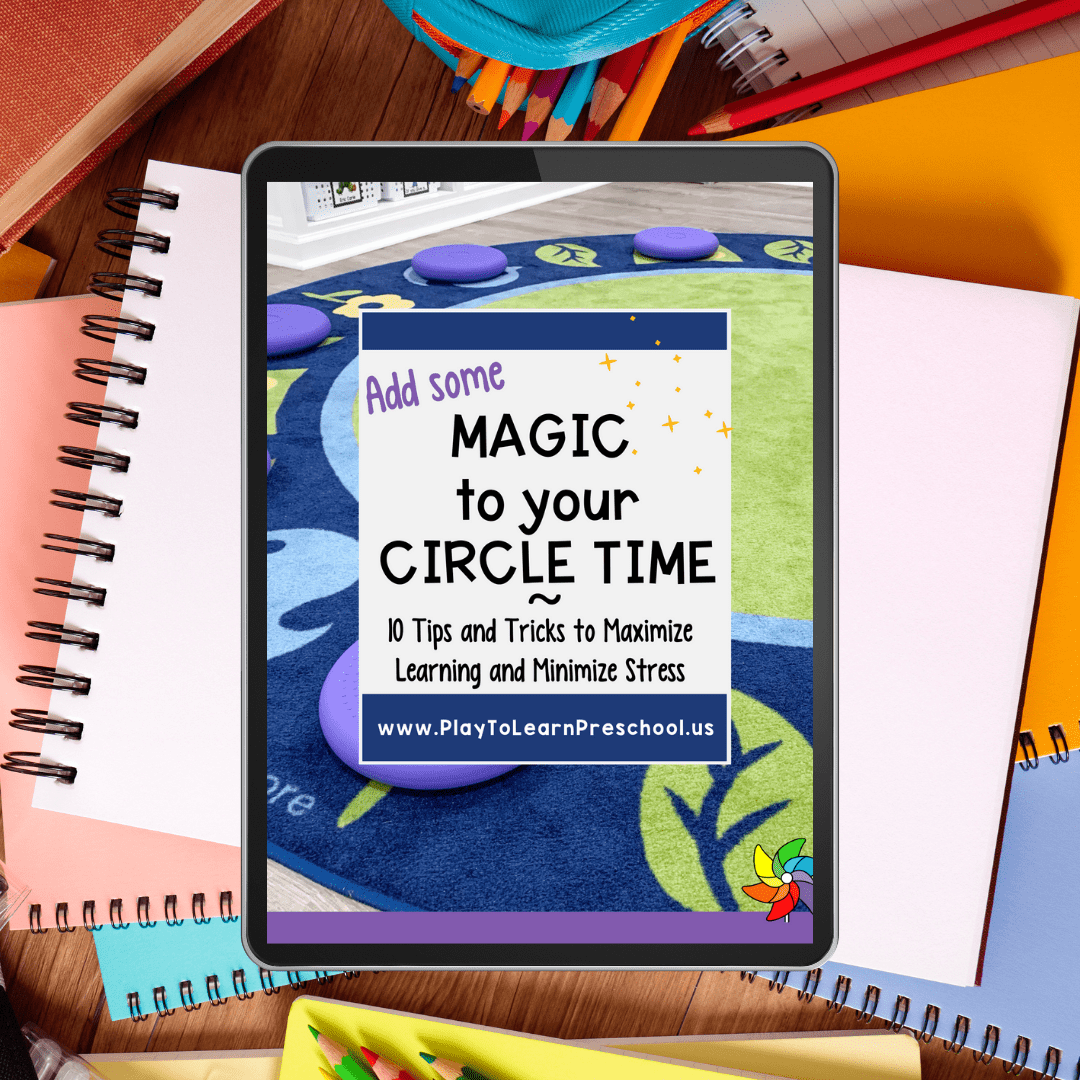
FREE Circle Time Ebook!
Tips and tricks to maximize learning and minimize stress!
After you subscribe, you will be redirected to the FREE Ebook. We respect your privacy. Unsubscribe at any time.