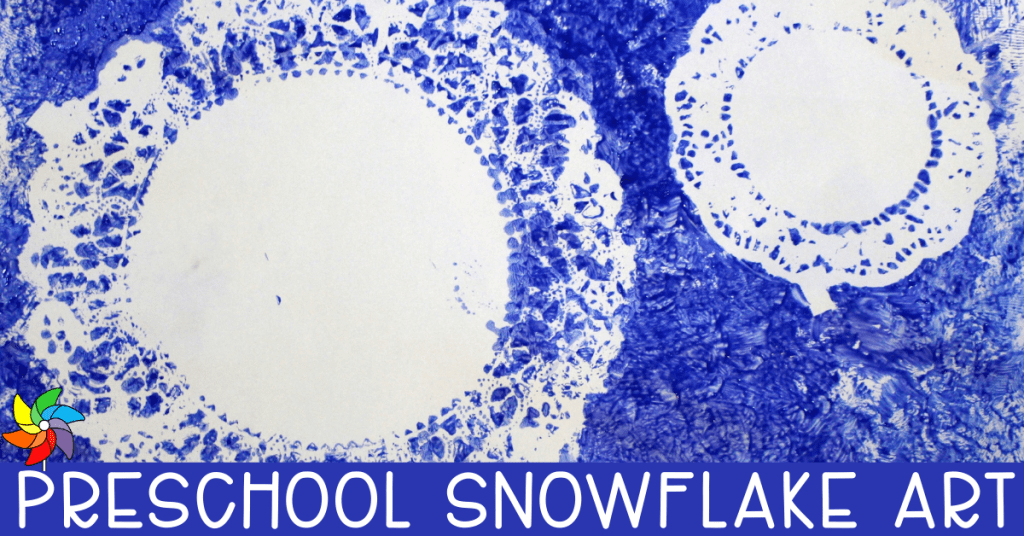
It doesn’t have to be a winter wonderland to enjoy snow! Get out the paints and practice some easy art skills with this adorable preschool snowflake art!
When considering an art project, thought needs to be given to the supplies, time, and skill level required. For this preschool snowflake art project, artists of any age and skill level succeed at creating masterpieces in a very short amount of time.
How to Create Preschool Snowflake Art
When creating a snowflake paint print, the process is dipping and tapping simple objects into the paint to create fridge-worthy art. Couple that with only a few simple steps, and this is a project that students will be excited to create.
Supplies Needed
- white construction paper
- doilies
- tape
- bath poofs
- tempera paint
Step-by-Step Directions
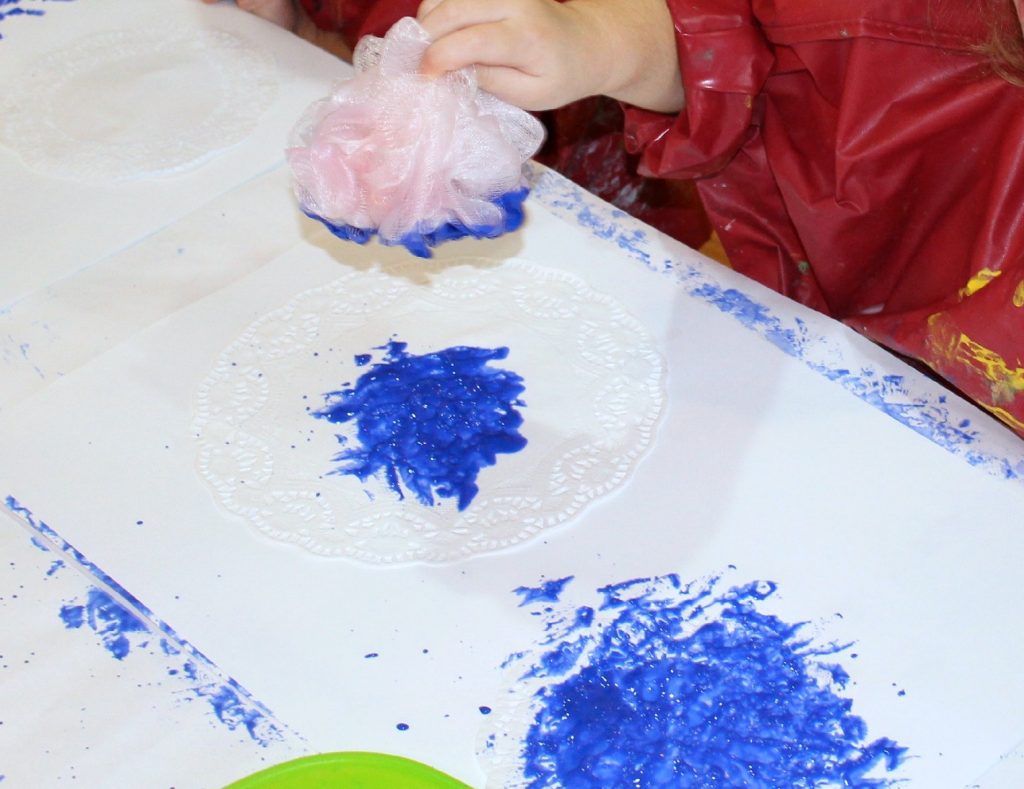
- Tape doilies to the constuction paper. Multiple doilies can be used to create a winter wonderland scene.
- Put blue paint onto plastic plates next to each station. A little can go a long way!
- Provide bath poofs for each student.
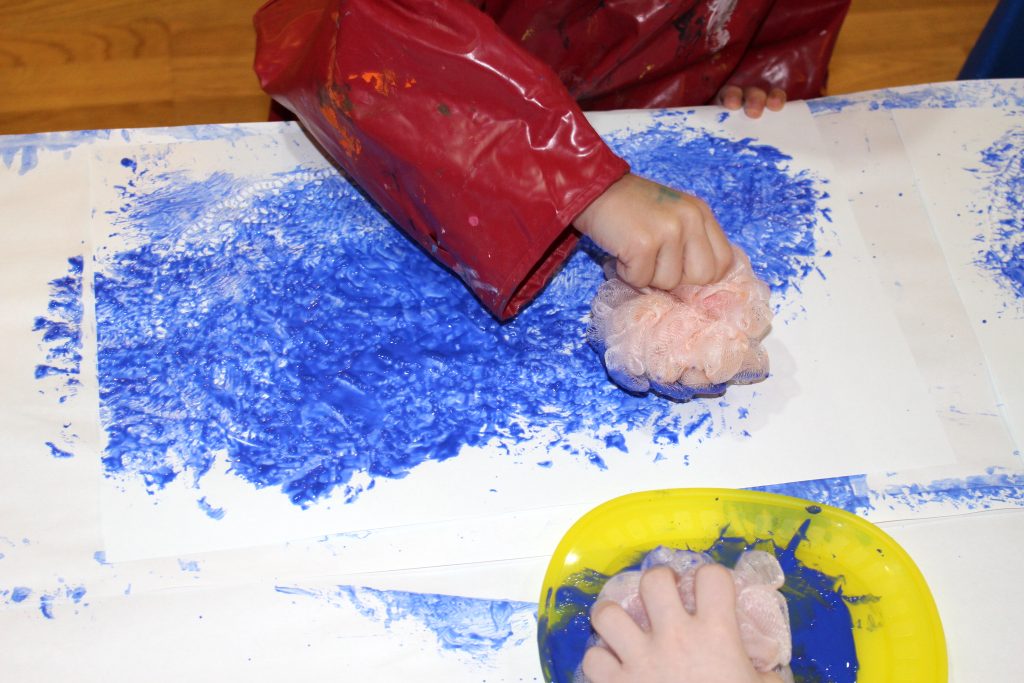
- Students dip the poof into the paint, then tap the paint all over the construction paper.
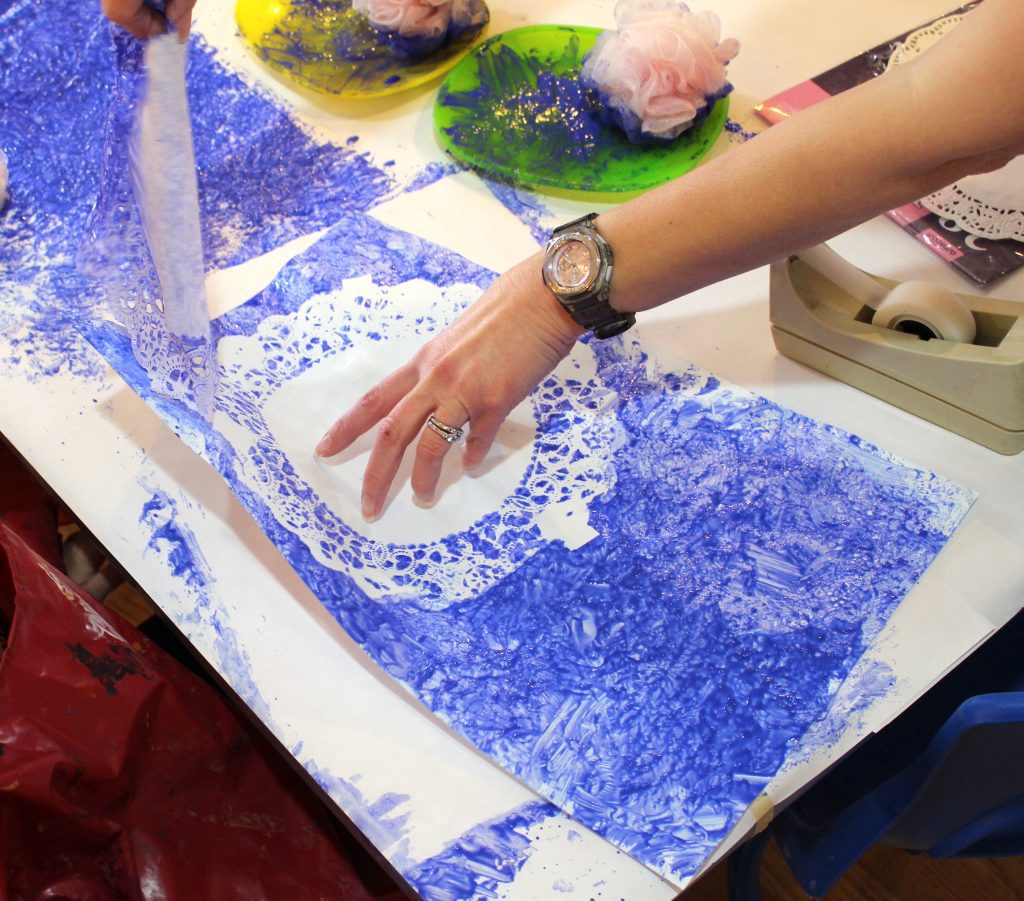
- When students have dipped and tapped to their heart’s content and the paper is covered, have a teacher or adult carefully remove the doilies to reveal beautiful surprise snowflakes.
Looking for more Frosty Fun?

Winter Preschool Unit
$12.49This Winter Preschool Unit includes all of the lesson plans, activities, and ideas that you need to teach preschool and Pre-K students about the season. Everything is written out and planned for you to make your job easier!
- 10 circle time lessons
- 10 math, literacy, & fine motor centers
- Book Recommendations

Students enjoy the process and are excited by the surprise ending. This project is similar to the tape resist name art projects, which would be a great subsequent project for another day.
Process Art in the Preschool Classroom
For a preschool art project, it is important to focus on the process. The end product is not the goal. Thinking about what the students will be doing, not what the students are making, is key. Some ways to highlight the process in an art project are to have students:
- Cut strips of paper and glue them to a paper to create unique works of art. Pre-cut strips may also be provided if students need more practice in the process of gluing the strips to the page.
- Rip small pieces of tissue paper and glue them to a cut-out to create a mosiac-style suncatcher. Students practice manipulating the paper into smaller pieces and make decisions as to how their final project will look.
- Squeeze colored water onto paper towels to create a tie-dye masterpiece. Using a plastic dropper, students strengthen the small muscles in their hands by selecting where to place each color.
- Blow paint using a straw to create a wind & rain art piece. By placing watered-down paint onto a canvas, students can explore the cause and effect wind has on objects by gently blowing the paint around the surface with a straw.
No matter the type of project or the final product, remember to keep the focus on what the students are doing. It is the active process that allows students to learn and grow.
FREE Winter Bundle!
Enjoy Free Winter resources perfect for the season!
After you subscribe, you will be redirected to the FREE Winter bundle. We respect your privacy. Unsubscribe at any time.