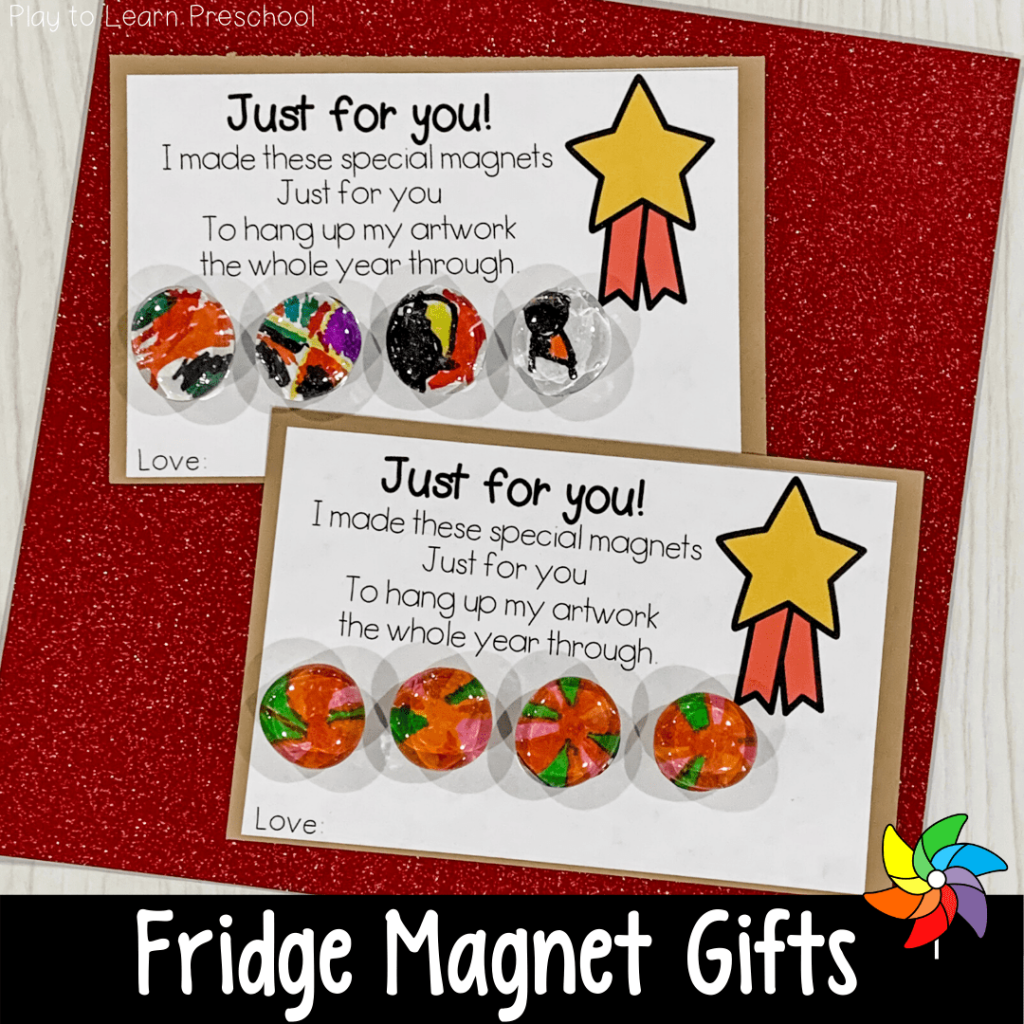
Preschool teachers are always looking for the perfect kid-made gifts. It happens every year… we feel the stress and pressure to come up with the perfect keepsake present at holiday time, for Valentine’s Day, for Mother’s Day and Father’s Day. This perfect gift has to be cute, meaningful, and easy enough for a classroom of young children to make. These kid-made glass magnets are the perfect option for any time of year!
Preschool “rules” for gifts from kids:
- The kids have to work on them longer and harder than the teacher!
- It must involve process art.
- While it is a keepsake gift, it must look like a preschooler made it.
- Aim for less than $1/project.
How to make Glass Magnets
The inspiration for this project is from Friends Art Lab and Preschool! If you’re looking for amazing art ideas, their Instagram page is a goldmine. They also have printable tutorial and lesson plans for teachers.
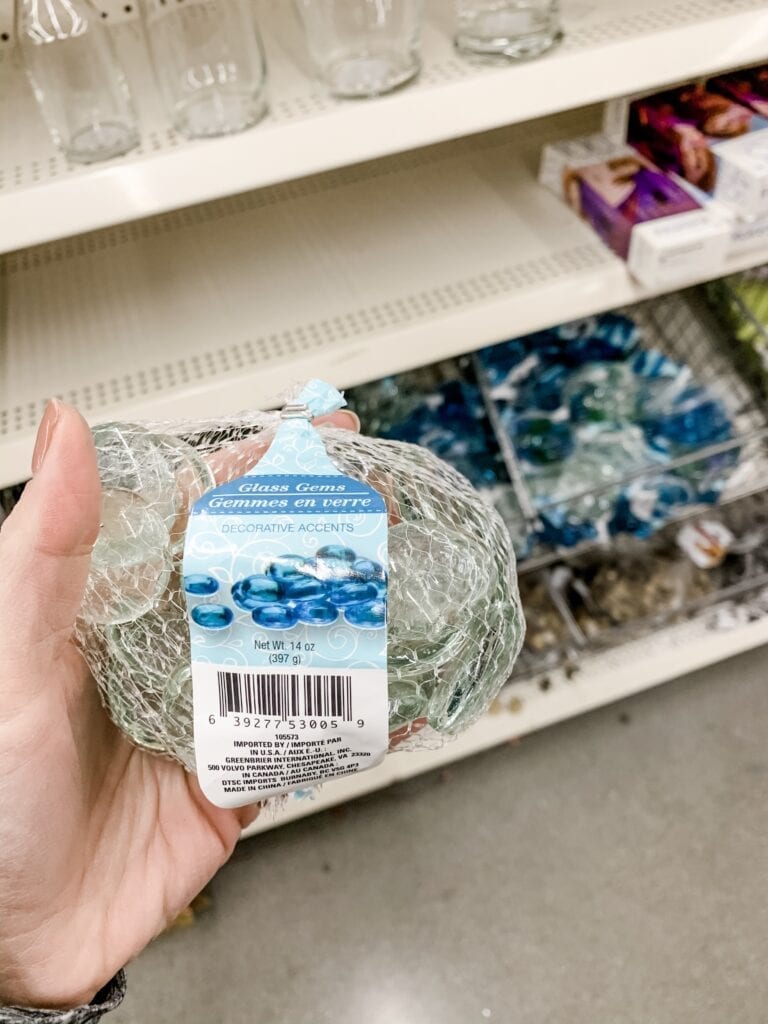
- Purchase glass gems from the dollar store.
These gems are clear glass, about 1.25 inches in diameter, and are flat on the bottom. They are readily available in the floral aisle and come in a little bag with about 20 glass gems.
- Give each child a paper with 4 circles.
You can print a simple template with 4 circles HERE. It truly doesn’t matter what type of paper you use. Plain printer paper will adhere better to the glass gems. Heavier cardstock will prevent the marker from bleeding through.
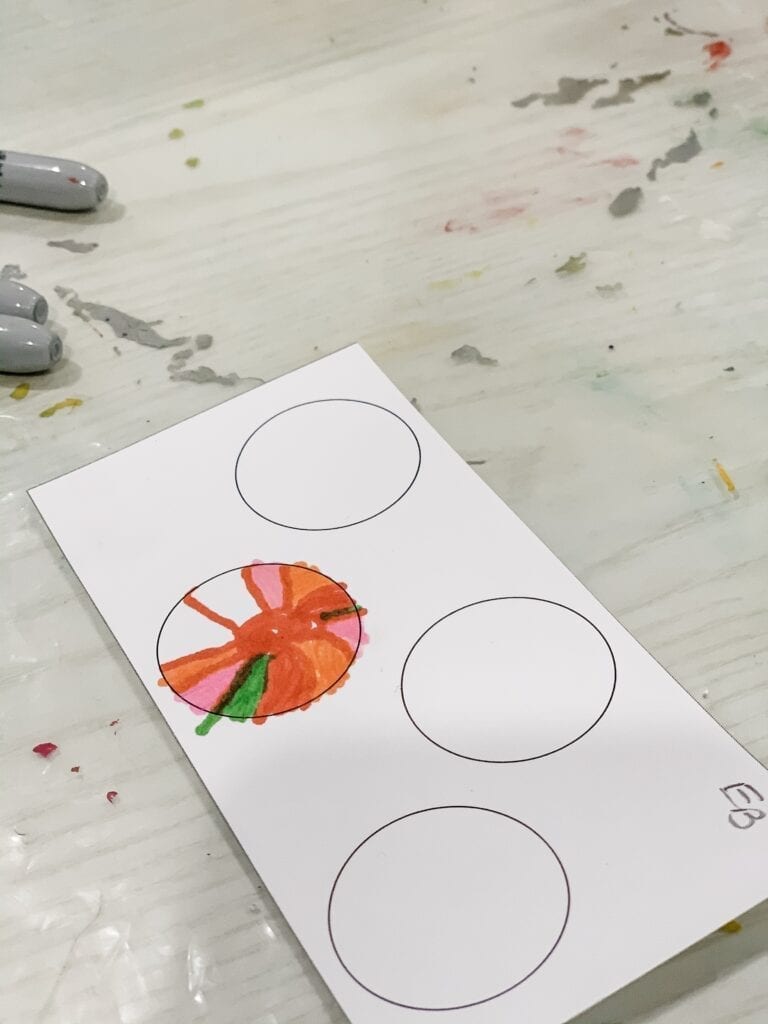
- Have the children draw a design in each of the 4 circles.
They need to use a Sharpie marker for this, so that the ink doesn’t bleed when it is glued to the gem. Take a deep breath! Preschoolers can absolutely use Sharpies with adult supervision. It might get on their hands. Take another deep breath. It’s okay. Children are washable. 🙂
- Cut out the 4 circles.
The teacher might want to do this part, depending on the age and scissors skills of the students. Remember to put each child’s name or initials on the back of the circles.
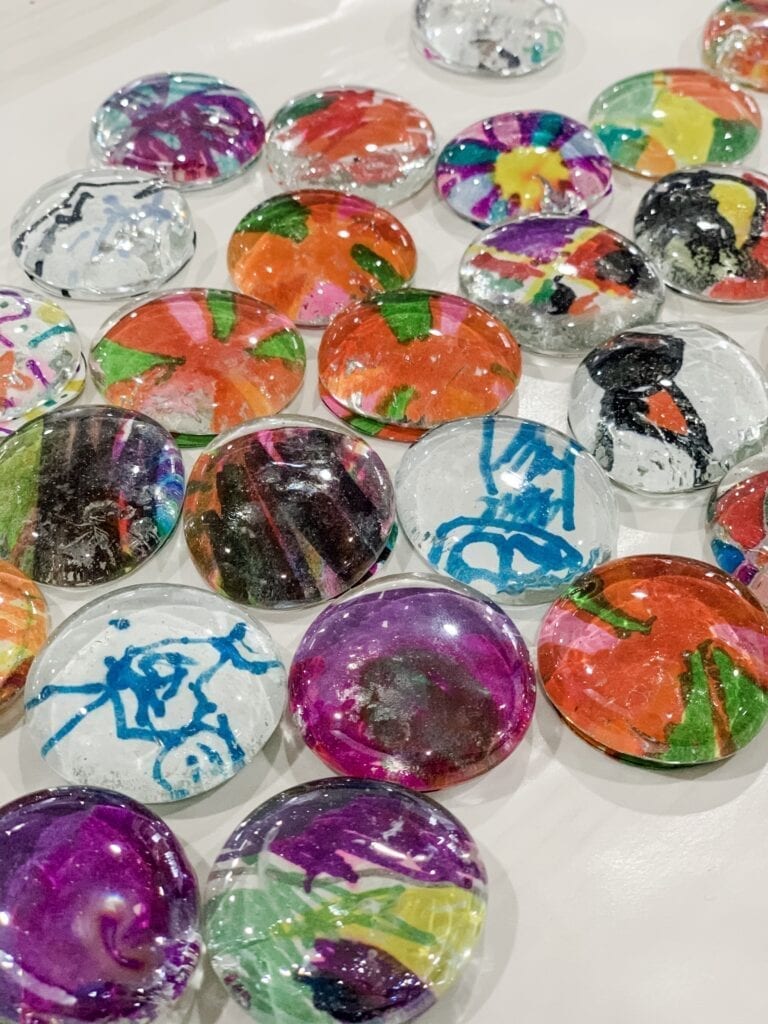
- Put a large drop of glue on top of each circular picture.
You can use white or clear Elmer’s glue. Both of these will dry clear and will adhere the glass gem to the paper well. Have the students place a glass gem (flat side down) on top of each picture. Allow the glue to dry, at least a couple of hours.
When the pictures are dry and glued to the glass gems, flip them all over. (Did you double-check to make sure each child’s name or initials are written on the back?)

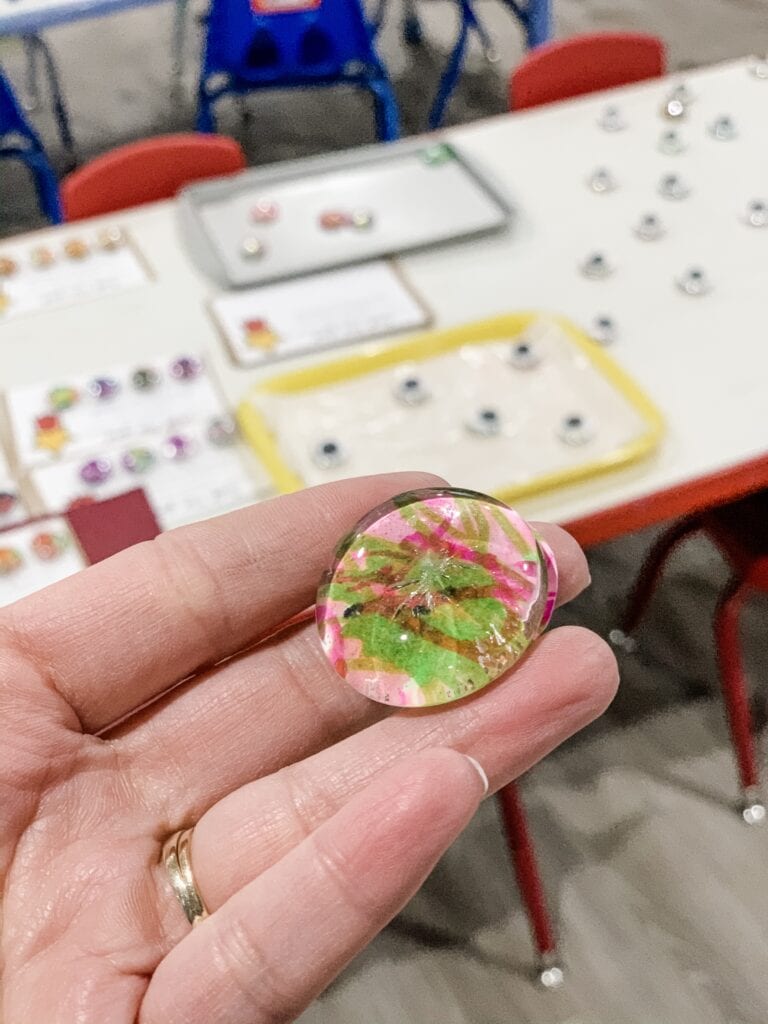
- Attach a round magnet.
(These small magnets are a choking hazard. Exercise close supervision and use your best judgment regarding the age and maturity of your students.)
There are a number of ways to do this:
- Purchase adhesive magnets (like these from Discount School Supply)
- Hot glue a round magnet (this will dry quickly, but must be done by the teacher)
- Adhere with something stronger, like super glue or gorilla glue. (These must also be used with caution by an adult only.)
The finished magnet will look like this– beautiful!! The gift recipients can use them on their fridge to hang the preschooler’s other artwork all year long.
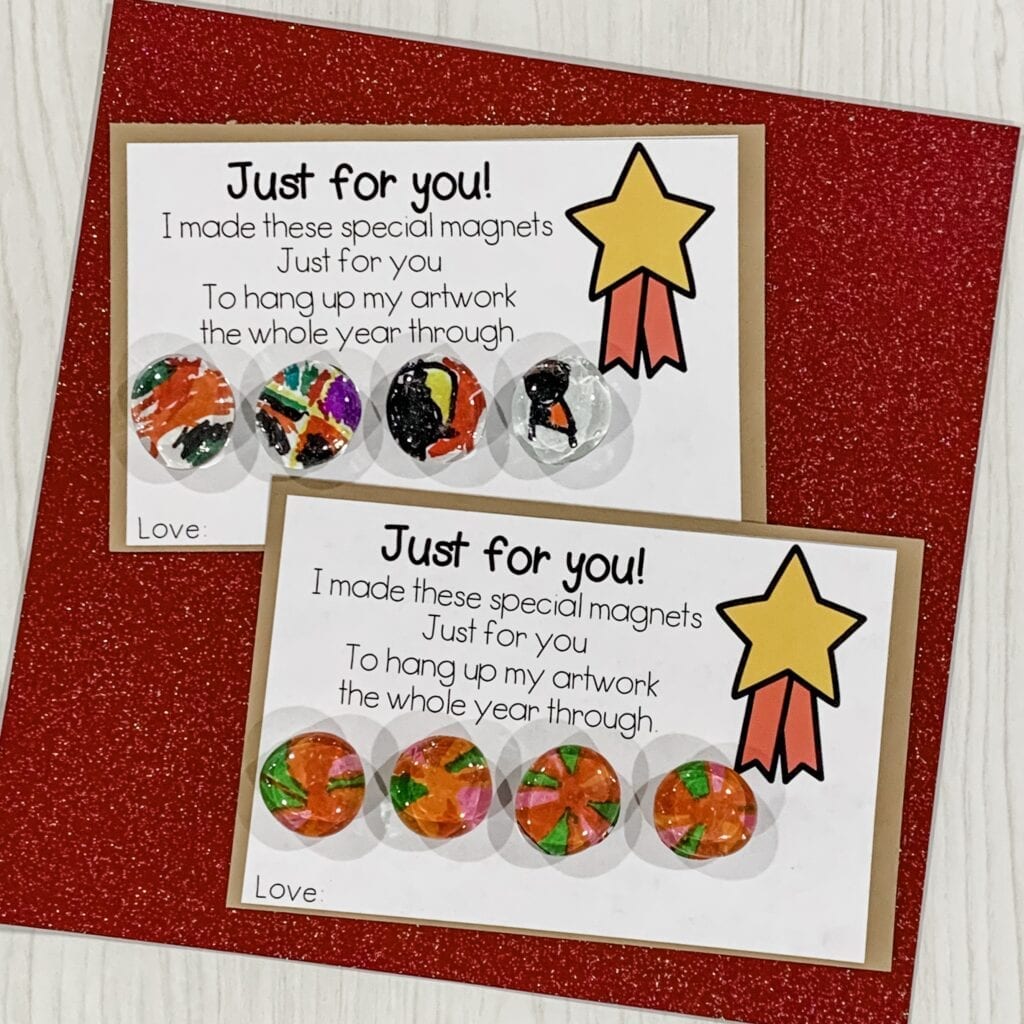
To finish these kid-made glass magnets, print off a cute little poem and have the children sign their names. Back it to cardstock for extra durability. Use a small bit of scotch tape, masking tape, or a glue dot to attach the set of magnets to the card.
Ta-da! Gorgeous, practical, kid-made glass magnets that are perfect for any season.

FREE Bag Tags and Send Homes!
Enjoy Free Bag Tags and Send Homes perfect for your students!
After you subscribe, you will be redirected to the FREE Bag Tags & Send Homes. We respect your privacy. Unsubscribe at any time.
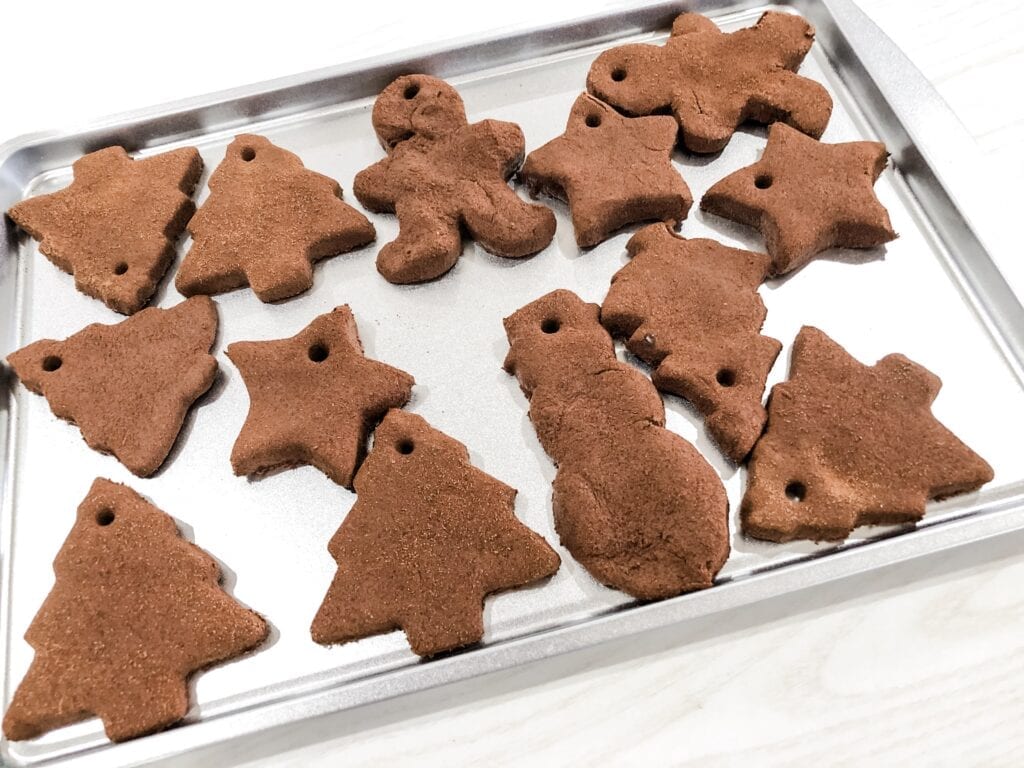
More Preschool Christmas Gifts for Parents
Cinnamon Ornaments
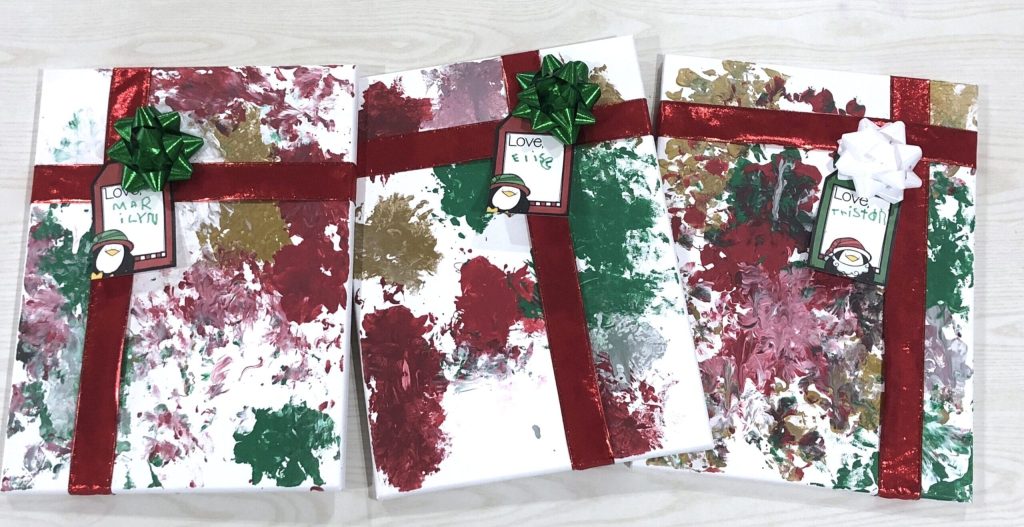
Gift Bow Painted Canvas